Handmade Wardrobe // spring blooms for two

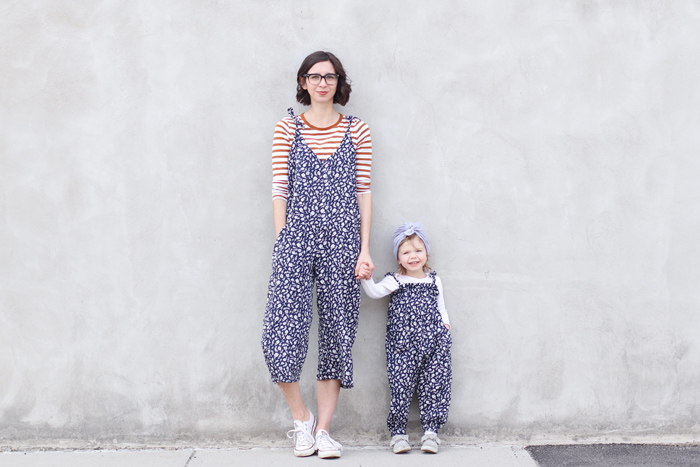
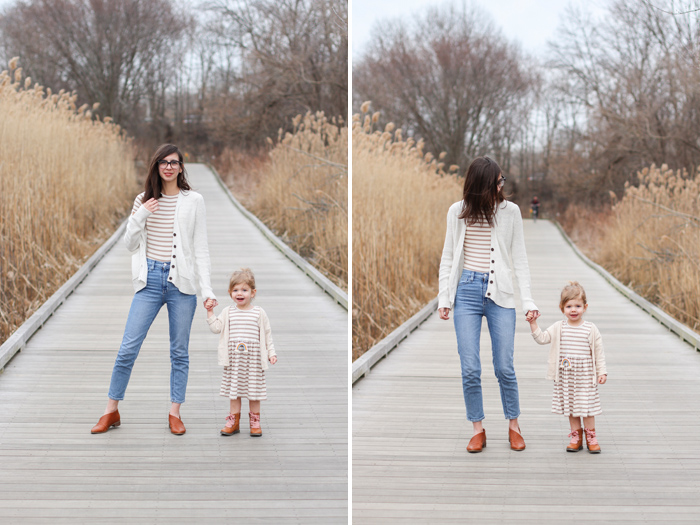
 my dress: Closet Case Patterns Kalle shirtdress

Penny’s dress: Hello Dear Kids pleated top dress

fabric for both: floral twill c/o Measure Fabric

Penny’s jacket: H&M 

————————————————————————

When the ladies at Measure Fabric gave me a peek at this fabric, they suggested the Kalle shirt dress as a good pattern fit, and I loved the idea so much, so I rolled with it! I had never made the pattern before, but it has been on my list. It came together surprisingly fast, for being a collared, full placket shirt with clean finishes on the inside. Also, It is a little shorter than I normally like my dresses, but that’s my fault for not making a muslin or testing out the length before cutting into my main fabric {face palm}. But nothing some little shorts underneath, or leggings on cooler days, can’t fix! 

And the Measure ladies were right - this fabric was perfect for the project! It’s a twill that has enough weight to be pants or shorts or a skirt, but still a beautiful drape to work as shirt dress or pretty skirt. It’s got a slightly slubby texture, yet a silky soft touch, and it sewed up like a dream. Probably why I was able to zoom through it so fast! 

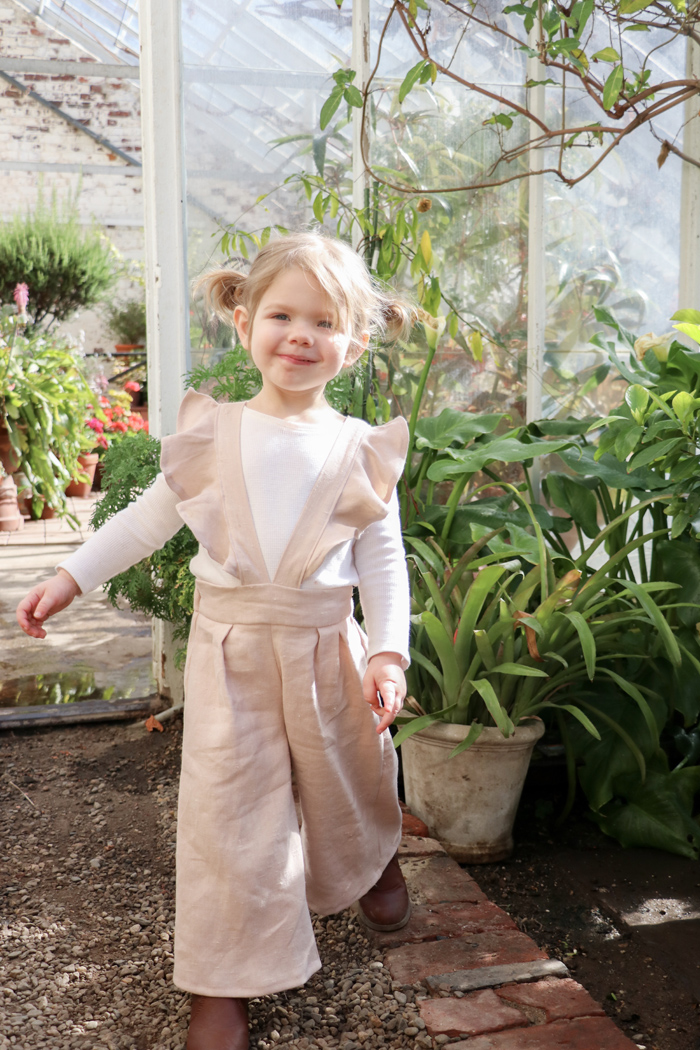
And of course, with a little maneuvering and puzzle piecing, I was able to squeeze out a matching look for P. I ran out of fabric for the pleated front piece, so I used some scraps of this cotton/linen dotted fabric that was left over from a random project. I actually like the contrast even better than if I would’ve used all the floral fabric!

DIY no-sew Mickey Mouse ears

We’re heading back to Disney World in a few days, and I whipped up this quick DIY for Penny for the occasion! She has her classic Mickey ears hat with her name embroidered on it that we got last year, and she will be wearing it to Magic Kingdom again. But I wanted to have something different and special for her to wear specifically to Animal Kingdom on this trip, and I didn’t want to pay a ridiculous amount of $$ for a specialty headband she’ll only wear to one park. So I made my own! And for less than $8.

This is a super quick and easy Mickey ears headband. Nothing fancy. Won’t look as expensive and nice as the store bought ones. But it gets the job done. No sewing required. Just a little hot glue.

You can make them animal print like I did, basic black, or any color or pattern you want. Good for if you want ears for the park but your on a budget, or you could make a bunch as favors for a Mickey themed party!

S U P P L I E S :

  • stiff craft felt or thicker craft foam (you can use floppy felt or thinner material, but you’ll need another layer in between to keep the ears upright, like cardboard or stuffing. I used the stiffer craft felt because it was sturdy enough to stay standing up without anything else. I got this giraffe print one at Hobby Lobby . you could also use fabric, but again would need a filler and would require sewing. A different tutorial all together).

  • basic, thin headband

  • hot glue gun

  • scissors

  • optional: small fake flowers (could also use a fabric bow for Minnie ears, or anything else decorative you could think of)

Decide how big you want your ears. If you find a round household object thats the perfect size, you can use it to trace the perfect circle on a piece of paper.

But don’t draw a complete circle! Leave an opening about 2” wide at the bottom, and draw tiny 1/4” straight lines at the edges of the opening

Fold your felt in half, and trace your open circle pattern on the fold, twice.

Cut each one out.

Since you cut on the fold, you will now have two peanut shapes.

Find your perfect placement for your first ear, and lightly mark it on the headband (I used chalk).

Add a line of hot glue right in the middle of the peanut shape.

Stick the line of glue along the bottom of the headband, making sure you are lined up with your placement markings from before. Press and hold until glue cooled/dried and sticking.

Now glue around the entire circular edge of one ear/peanut half.

Fold the ear in half, being careful to line up the edges. Press and hold until glue is dried and they are stuck together.

Ta-da! one ear done! Carefully trim around the edge if there are any spots that didn’t line up perfectly, or if there is any glue strings hanging out.

Repeat for the second ear.

Now its time to decorate! If you are adding florals like I did - pull some of the fake flowers off of their stems.

Trim off the green stub from the back, so that the flower is as flat as possible in the back. Add a bit of hot glue right in the middle.

Stick your flowers to your headband however you desire!

I hid the visible glue spots in the back of the headband by pulling some of the flower petals down over them. Easy-peasy! If you are using flowers that can’t do that, or if you are putting a bow or something else on, You could glue a thin ribbon on top to cover up the hot glue and imperfections.

handmade wardrobe // 32 and a handmade re-wear

top: Simplicity 8381

culottes: Megan Nielsen Tania culottes

hair clips: Fenna and Fei

shoes: Swedish Hasbeens

————————————————————————

32.

It was my birthday the other day! I didn’t have time to make a new birthday outfit (so many other projects going on right now!), so I pulled some of my favorite old makes from my closet. You’ve seen this top posted here, and the culottes posted here. Going to keeps this short, since this is a handmade repeat, but I love how these two pieces look together. Especially for pulling them out and pairing them together at last minute!

handmade wardrobe // Floreat, and a mini, and a tote bag too

top : Megan Nielsen Floreat top in Cloud 9 double gauze from Fabric.com

penny’s top: Butterick 3642 in same fabric

jeans: Urban Outfitters

tote: handmade using this Megan Nielsen tutorial

slides: Target (last year)

Penny’s shoes: Old Navy

—————————————————————————-

I recently worked on updating some old tutorials for Megan Nielsen Design Diary, including this DIY canvas tote! It’s nothing fancy, just a basic oversized tote bag. But a perfect carry-all when you need to take a small collection of toddler toys and snacks with you everywhere, haha. I actually didn’t use a traditional canvas, but instead a nice weight cotton/linen blend in a subtle stripe. I added a small macrame feather I made one night while crafting (search Pinterest for “macrame feather” to find a few different DIYS).

I actually made this brown Floreat top back in the fall, but it was already too cold to wear it without layering. So I’m happy to finally have some warmer weather to wear it alone and let it shine! And of course, I made sure I had just enough left to make a matching top for P. I love this double gauze - I actually bought it in two colors and used the blue one to make the jumpsuits a few posts back!

Snapshots // a Happy Place adventure

When I saw that a Happy Place pop-up was coming to Boston, I jumped online and bought tickets ASAP. I knew P would love it, and lets face it - me too. I mean… just look at all this Instagram-perfect content haha. There were so many rooms, including a yellow ball pit ‘pot of gold’ at the end of a rainbow, an upside down room, mirrored walls, ducky bathroom, confetti dome, and so much more. We had soooo much fun and P is still talking about the ball pit. She jumped in all by herself, and it was a big jump for a little girl! (theres a blurry photo below of her jumping)

If you’re in Boston and want to go yourself, the pop-up is around until June 2. My advice: Try to get the earliest time slot of the day and get there early, too. It gets craaaaazy crowded and overwhelming with so many people trying to get pictures. We were the very first ones in line for our group/the first time slot of the day, so we were able to stay a bit ahead of the crowd and even had a couple rooms to ourselves at some points. But that never would’ve happened if we weren’t the first ones in.

handmade wardrobe // not mellow yellow

my top: Megan Nielsen Patterns Floreat top (knotted) in a yellow rib knit from Fabric.com (no longer available)

Penny’s top (in same fabric) and dress: Simplicity 8706

my jeans: Megan Nielsen Dawn jeans in cream denim from Style Maker Fabrics

My shoes: Swedish Hasbeens

Penny’s shoes: Old Navy

——————————————————————

Not as many photos to choose from for this outfit set, because someone was a bit cranky and not in the mood for photos. So we cut it short after a few snaps. She still cute tho.

This isn’t a new handmade outfit. You’ve seen both of these garments before. I wore the Floreat top before here, and in this outfit I just knotted the angled hem for a different look.  Read about these Dawn jeans here. And I also posted about just Penny’s outfit when I first made it (here), if you want to see it closer up and see her happier to be wearing it HA.

handmade wardrobe // jumpsuit twins

jumpsuit fabric: Cloud 9 double gauze from Fabric.com

my jumpsuit: free pattern with purchase of Mimi G Sew Sew Def magazine

Penny’s jumpsuit: Hello Dear Kids harem jumpsuit

Penny’s turban: Nelly Lou

my tee : Madewell

————————————————————————————

A part of me thinks I may be getting a little out of control, a little crazy, with these mommy and me matching outfits. But also…… I’ll never stop, HA. Usually when I make matching outfits for us, I use the same fabric but different types of garments. With this one I went all-in and made matching jumpsuits. Maybe thats why I think its a little crazier.

This is my third time making a version of this jumpsuit (see the last one here), so I obviously love it. It’s not the easiest to get your hands on - you have to buy Issue 2 of Mimi G’s PDF magazine. It doesn’t list the jumpsuit as one the free patterns, but it is included, and worth it. The only thing I change is that I cut the straps into 4 pieces instead of two, so I can tie them and make it adjustable. Its definitely a layering piece for me because of the low cut, I would never wear it without something underneath. But thats how I like to wear most of my jumpsuits anyway. It makes it more comfortable when going to the bathroom in a jumpsuit - you don’t end up completely naked just to pee, ha.

But my favorite part of all of this is P’s jumpsuit. Its a harem pant that goes all the way up to under her arms. And the ruffle at the top and ankles are just the sweetest. Her favorite part, of course, are the little pockets. The PDF pattern is another one from the Etsy shop Hello Dear Kids. And again, the instructions are not the best. But its pretty straight forward if you have any knowledge of sewing and using patterns already.

handmade wardrobe // double stripes

my top: Megan Nielsen Rowan Bodysuit

Penny’s dress: self drafted

striped fabric: modal jersey knit from Cali Fabrics

Penny’s necklace: me-made DIY

both of our boots: Target , my jeans: Urban Outfitters, my sweater: thrifted

————————————————————

You’ve seen this bodysuit around here before - I made it back in September. But I realized I had some leftover fabric, so I made up a quick dress for P to match! And duh, we obviously needed a whole photoshoot for it, ha.

not much to say here for this set, just a lot of pretty pictures :). As I say all the time, Rowan has become a wardrobe staple for me. And for reference - I have a long torso and add an inch in length to the bodysuit!

handmade wardrobe // #sewbibs

my overalls: Megan Nielsen Patterns Flint pants with bib add-on (tutorial here) in tencel twill from Blackbird Fabrics

my top: Megan Nielsen Patterns Rowan bodysuit

Penny’s top: Butterick 6342

Penny’s pants: Gymboree

——————————————————————

My second pair of Flint bibs, and I’m obsessed (see first pair here). And also my contribution to the #sewbibs challenge put together by Heidi, Teri, Meg, and Jessamy!

Unlike my first version, which was made out of a more traditional twill, for this one I chose a really lovely tencel twill from Blackbird Fabrics. It’s so drapey and soft and perfect. And while I love the look of my other stiffer-hand pair as well, this fabric with this pattern is just soooo dreamy. Now if only I remembered to apply interfacing to the waistband, because all I can see in these photos is the seam allowance crease through the center. Doh! But I think I’ll survive, and the overalls will survive, and I’ll wear them over and over and over. And if you want to make a pair yourself, don’t forget that I wrote the tutorial for bib over at Design Diary!

I had a little bit of fabric left over, so I was able to squeeze out this little ruffle top for P, as well. Because, duh, I will always take an opportunity for her to match me, Ha!

Handmade Wardrobe // Mommy and Me, Forever and Ever

my top: Simplicity 8636

my jeans: Megan Nielsen Patterns ash jeans

Penny’s pants:  Hello Dear Kids frill suspender pants

Our fabric: blush slub linen blend from Measure Fabric

———————————

I know I say this a lot, but this is one of my favorite makes eeeeeever. Its just… It’s just exactly what I pictured. And the setting for the photos is exactly what I pictured, too.

So it all started with this blush linen from Measure Fabric. I’ve had an idea for this Simplicity top in a blush color for awhile, just hadn’t picked up the right fabric yet. Well this one is actually a twill suiting. So I asked the ladies at Measure if they thought it would work for this kind of top, and not only did they tell me theyre opinion, but they even sent me a video of them holding the fabric and letting it drape so I could see for myself. Above and beyond! SO yes, it is a twill suiting, but the weight and drape is so beautiful, it actually works really well for this voluminous blouse. And you can’t really see in these photos, but the slub texture is so lovely, too! And it has a bit of stretch, so could work for so many different garments, too.

So. this top. Love. Well, mostly. If I were to make it again, I think I would just lengthen the top yoke sections a bit. I fell like where the yoke seam hits right at my shoulder edge, it kind of flares out a bit and gives me really wide shoulders. Perhaps if the yoke section was a bit longer, it would drape a little nicer.  But still, not too bad, and still so pretty.

Once I had my top planned out, I obviously had to make something for P as well. I became stuck on the idea of these suspender pants from Hello Dear Kids. They are an Etsy shop that sells so many cute PDF kids patterns. And cheap, too. I don’t necessarily love the instructions. But it didn’t really matter for me (I really just did the construction my way, anyway). It was a tight squeeze, fitting it in on the rest of the linen yardage. But I juuuuuuust made it fit. Except for the waistband lining - I used some of my Grandma’s old fabric scraps, which you can kind of get a little peek at in one of the photos below. The end result was so, so good. Fit her perfect, and now I’m convinced I need a pair in my size.

Anywho, check out some of the detail shots below!