Black and White and Snowflakes

bwsnow5

We got our first snowfall this past weekend. And again yesterday.

It doesn’t look this pretty anymore. Now it’s all gross, as it always happens. It’s dirty and lumpy and icy and slippery and everywhere (EVERYWHERE) and in the way. But for a bit - within that hour after it first started - it was magical. 

image

bwsnow2

bwsnow3

bwsnow4

bwsnow1

coat: Sheinside

glasses: Warby Parker

hat: Urban Outfitters

snood: ASOS

pants: H&M

pumps: Nine West

Holly In Your Hair - a DIY

holly1

Does that title sound like I’m about to show you a bunch of photoshopped pictures of miniature versions of myself hanging out in other people’s hair? Because now that’s all I can picture. 

Anywho… I wasn’t born around Christmas, but I’m a sucker for playing up the whole holly thing this time of year. I often use the phrases “holly jolly Christmas” and “happy Holly-days”, and I gravitate towards any decorations that include the leaves and berries. So when I saw all of the christmas stuff at the floral section in Michaels (and at 70% off!), I got an idea. This Christmas, I’ma be Holly… wearing holly. 

Genius, I know. 

Here’s how I did it….

holly2

You’ll need: fake holly leaves (you can get it for a few dollars at a craft store) - adhesive - felt - alligator hair clips

holly3

1. Most likely, the leaves and berrys will just pop off of the main stem with a light tug. But if not, just simply cut them off. Cut the little stems off of the berries, too. 

2. Glue a couple of leaves together to your desired look. Once they are completely dry, glue the berries to the leaves where the come together near the bottom. Note - I started out with tacky glue, which worked  really well glueing leaf to leaf. But not so much for the berries. I ended up using super glue for those. 

3. Cut a small piece of felt that is just slightly bigger than your hair clip. 

4. First glue the piece of felt to the back of your holly leaves - right in the middle, but closer to the bottom. Once dry, glue your hair clip to the piece of felt. Adding the felt gives it a little bit more stability. 

5. Voila! Stick one in your hair, or wear a bunch together. Happy Holidays!

holly4
holly5
holly6

In My Life

insta98765

» Blog Better Boston has a new and improved website! And if you’re a Boston blogger - make sure to submit your links for their new {hub}LINKS newsletter. 

» Have you all seen the video going around of the Airline that surprised a flight of passengers with Christmas gifts? I’m not gonna lie… I cried. So beautiful (and such crazy amazing PR). 

» I know it won’t happen this year, but I wanna make these balloon ornaments next Christmas. So awesome.  

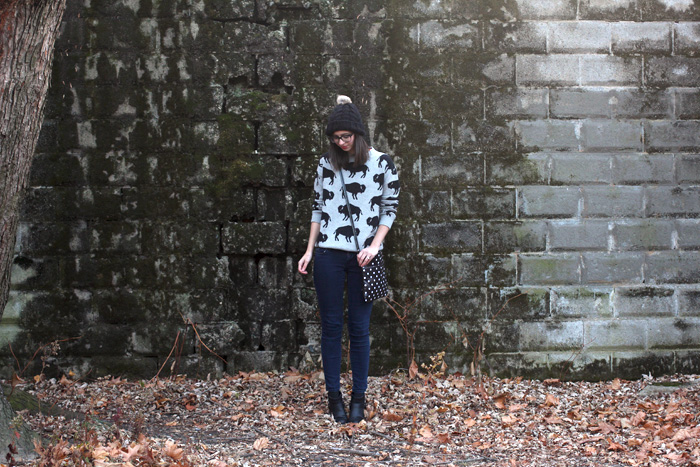
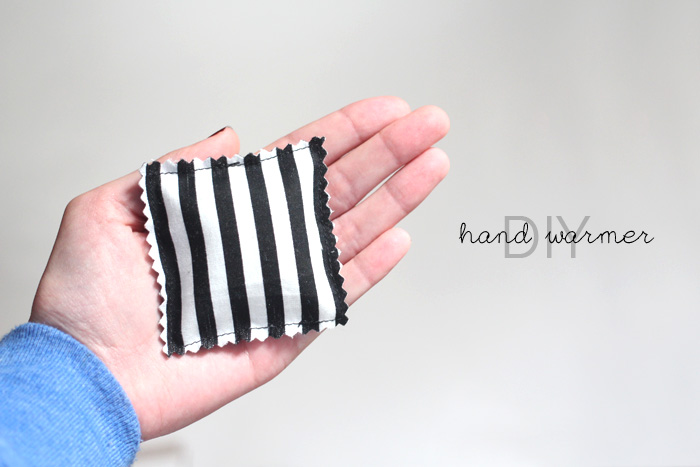
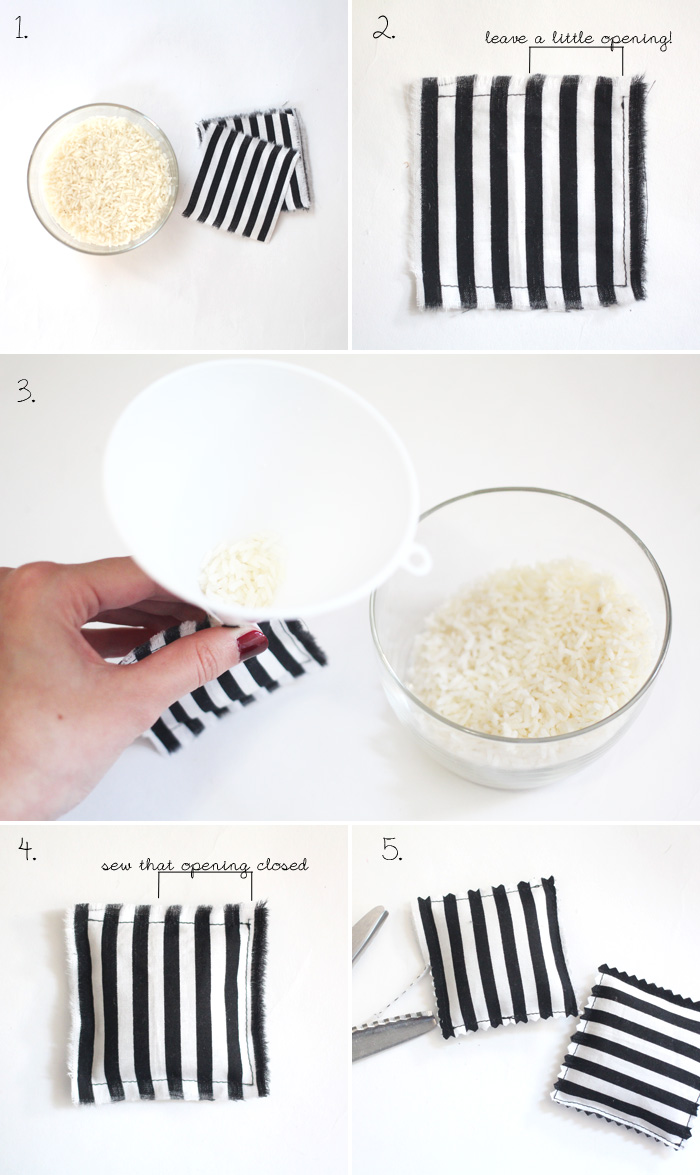
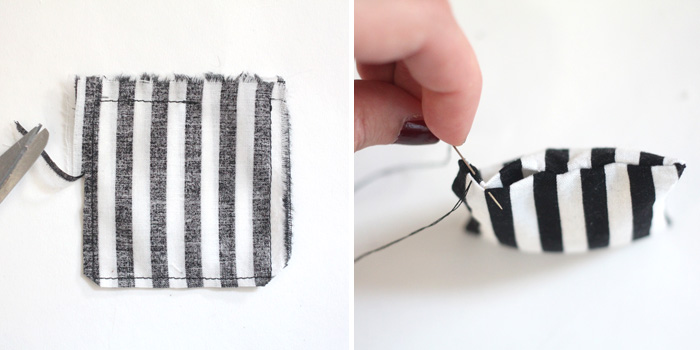
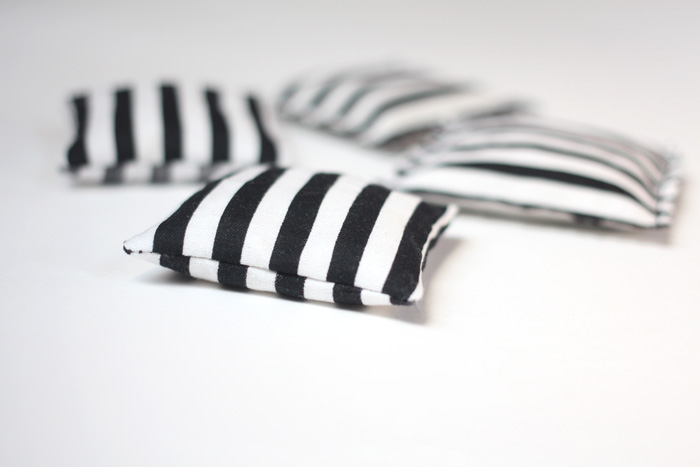
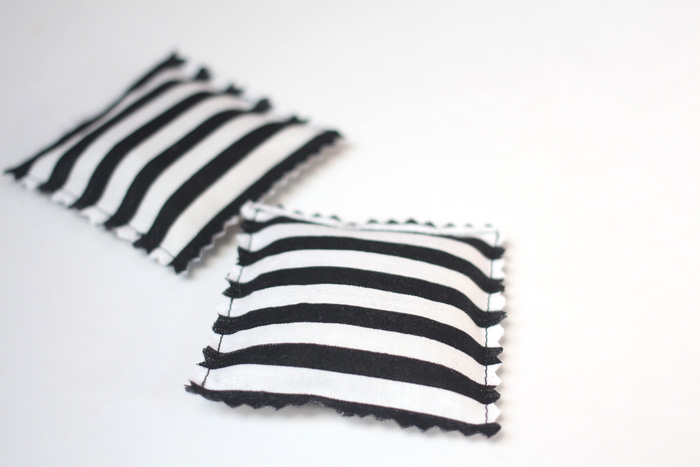
» Boo and I have a wintery couples shoot coming up soon. And of course I couldn’t decide on anything to wear….. so I decided to make something instead. I’m using this pattern and this fabric, and I’m really stoked about how it is coming out so far! (sneak peak above). 

» A few favorite Etsy treasuries featuring shopHollyDolly items - one, two, three.

» Speaking of shopHollyDolly, there is a few more days left to order any Christmas gifts! Don’t forget to use coupon code FREESHIP13 at checkout to receive free domestic shipping. 

» More wish list wants - this jumpsuit and this dress

» This just in : cats in sweaters are hilarious. 

» Are you on Instagram? Follow along! My username is : hollyjollydolly


Classic

classic1

I felt like one classy lady in this outfit. From the cape, to the red and grey and black color combo, to the simplicity, to the nude ballet flats. The whole thing felt timeless. I wouldn’t say that that is a word you would associate with most of my outfits, but it’s nice to break out the classics every once in a while :)

classic2

classic4

classic3

cape: American Apparel

sweater: Gap // thrifted

necklace: shopHollyDolly

jeans: Urban Outfitters

flats: H&M

In My Life

insta10366

» After posting the hand warmer DIY yesterday, I realized that it has been forever since I’ve done a DIY post. I think I need to remedy that :). Heres a few past favorites : necklace stand, mason jar pin cushionburlap envelopes, yarn lanterns, passport cover, faux fur snood

» I love me some The Seam Designs for cold weather accessories. But another new favorite - check out Salem Style. I met Lianna at Tuesday’s Boston Blogger event, and she is a sweetheart!

» The Black Friday / Cyber Monday craze may be over, but I’m still offering a deal for anyone that is looking for a special handmade holiday gift! Use the coupon code FREESHIP13 for free domestic shipping on your order from shopHollyDolly

» Are you on Instagram? Follow along! My username is : hollyjollydolly

DIY Hand Warmers

handwarmer1

I don’t know about you guys, but I’m a baby in the cold. Even having lived somewhere that has a cold, snowy winter my entire life, I still can’t handle it. And I’m actually dreeeeeading another Northeast winter. 

So I made up a few batches of these little teeny hand warmers to try and combat the chill. I keep them right next to my keys, so I remember to heat them up quick before I leave. That way I don’t have numb fingers on my walk to Starbucks the grocery store. Oh who am I kidding,  I’m going to Starbucks. 

Here’s how I did it…..

handwarmer2

1. For a set of hand warmers, cut 4 3x3” pieces of cotton fabric.

2. Place two of your squares wrong sides together, and sew 1/4” from the edge. Pivot at the corners, and leave about 1/2- 3/4” opening. Don’t forget to backstitch at the beginning and end. 

3. Fill your square pouch with rice about 3/4” of the way full. I used a funnel so that I didn’t make a mess :)

4. Sew and close up your small opening.

5. Trim along the edges with pinking shears so that they don’t unravel. That’s it!

………

But if you would prefer a cleaner look…..

handwarmer3

Start by placing your two square pieces right sides together, and sew just like before (1/4” from the edge, leave 1/2” opening). Clip your corners and trim the seam allowance, and then turn right side out through the opening.  Fill with your rice, and then close your opening with an invisible slipstitch.

Just slightly more work, but it does have a simpler, cleaner look!

handwarmer4

Right before you walk out of the house, just heat them up in the microwave for about 30 seconds and slip them in your coat pocket. Caution! They’ll be really hot! I But I like to get them just a tad too hot so that they stay warm longer.

Stay toasty, my friends :)

handwarmer5

Repeat Offender // Boston Bloggers

sparklerepeat1

This is quite possibly one of my favorite outfits ever, so it was a no brainer to repeat it. I’m sure I’ll wear it a couple more times this winter, too. And it just so happened it worked perfectly for last night’s Boston Blogger’s holiday event. You know, with the sparkles and all. Nothing says holiday party like sequins :)

Speaking of the blogger meet-up - it was such a fantastic night! It’s always fun to get together with everyone, and catch up with some girls that I haven’t seen in forever. And without fail, I always meet a bunch of new faces to add to my blog roll. Every time. This city is full of such talented people! Thanks to Allison and Kate for being so awesome and organizing these events for us :)

sparklerepeat2

sparklerepeat3

sparklerepeat4

sparklerepeat5

sparklerepeat6

sparklerepeat7

sweater: Naomi and Lavender

faux fur snood: Jack Wills // Buffalo Exchange

skirt: JCrew // Buffalo Exchange

clutch:  LilaLu Bags // Crompton Collective

booties: Steve Madden