HandmadeWardrobe // Late Summer Make

Well hey there! Long time, no see. It's been a crazy busy summer, and I realized the blog here has been neglected.... again. But I have a bunch of posts now backed up to share with you. Some outfits, some adventures. 

We'll start with this romper! I had this all cut out and sitting on my sewing table for 2 months, and I wish I would've gotten around to making it earlier on in the summer. It's lightweight and airy, and the perfect leafy print. I've used this pattern 3 times before (this jumpsuit, this romper, this dress), and it has officially been added to my top five most used patterns. I used the jumpsuit version, and just shortened the pants to shorts length. 


pattern: Vogue 9075

fabric: tropical floral rayon crepe from Style Maker Fabrics

Handmade Wardrobe // On The Fence

So. This jumpsuit. 

I don't love it. But I like it. It's M7756, and I do absolutely adore the silhouette. Overall, I like how it came out, I just have some issues with fit and fabric choice. 

I really should have raised the neckline an inch or so and removed some excess from the bust area. If you haven't noticed, I have no boobs. So theres just a little too much extra fabric hanging around that area. And combined with the daring low neckline, well, there may be a few people that got to see a bit too much of me that day. Nothing a little fashion tape can't fix in the future. But still. I don't love that idea. So small bust people - take note. 

That, and theres my fabric choice. I got a little too excited about the idea of using this mustard ponte knit for a jumpsuit, that I disregarded that the pattern called for lightweight fabrics. It works for the most part, but because of the lining and facing, it gets a little bulky in spots. It is pretty cozy, though. 

So yeah, just keeping it real. I know I usually rave about my makes and how much I love them. But it's not all sunshine and rainbows. Some don't turn out exactly how I picture. Although, this one isn't a total lose, and I'll still be making it anaddition to my wardrobe. Just with tape always on hand. And maybe one day I'll get around to making a second version with the necessary revisions.  

Snapshots // Crawford Notch, White Mountains, NH

We spent a long Father's Day weekend on our first camping trip of the summer! We changed it up from our usual spot in Acadia, ME and headed into the White Mountains in NH instead. We started out with a quick mini hike the first day, survived a long 5.4 mile hike the second day (which included a railroad bridge and a waterfall!), and spent a lot of time hanging out at the campsite. 

Penny definitely takes after her daddy, and loves camping. She slept and napped in the tent like a champ, and thought it was the coolest thing ever to sleep outside. And she could play in the dirt all day. We still have more camping to do this summer, and I eventually plan on doing a separate post on camping toddler activities, but heres a rundown on what she did this trip: painted rocks, shoveled and sifted dirt, played with glow sticks, rode her scooter, looked at things through binoculars, "threw" a frisbee, and played hide and seek behind trees. I have a few more ideas for her for next time, so I can't wait!

I didn't include any pictures here, but we also crawled out of the woods one day to go to Story Land - an amusement park for young kids. It's such a cute park, and Penny LOVED that she could actually ride so many rides. Aaaaand She met Daniel Tiger (and gave him hugs!). If you are ever in the White Mountains of NH and have toddlers or small kids, you should definitely check it out!

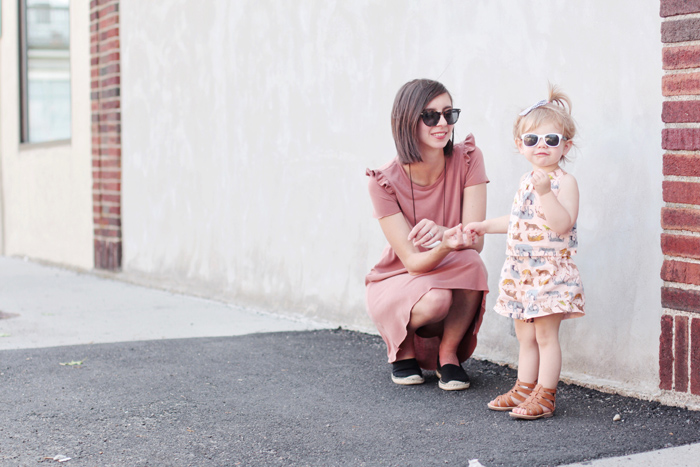
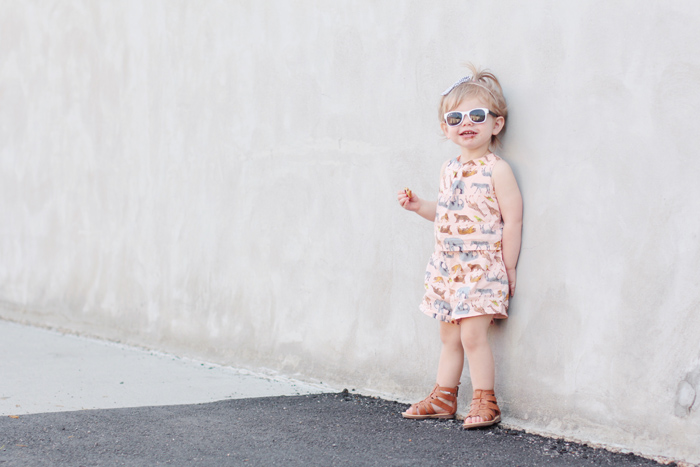
Handmade Wardrobe // Mommy and Me in Pink

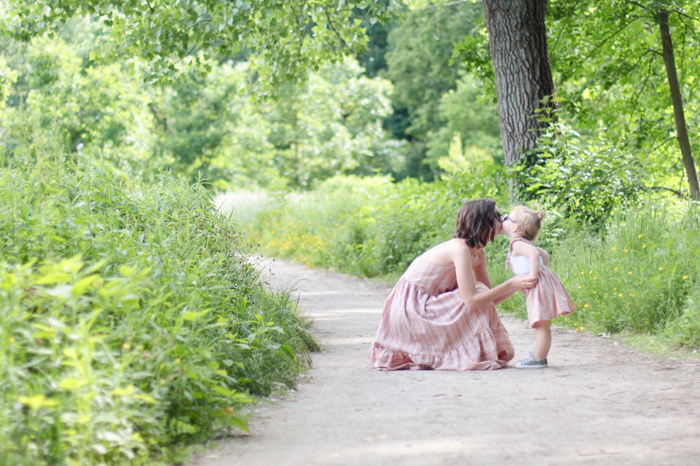
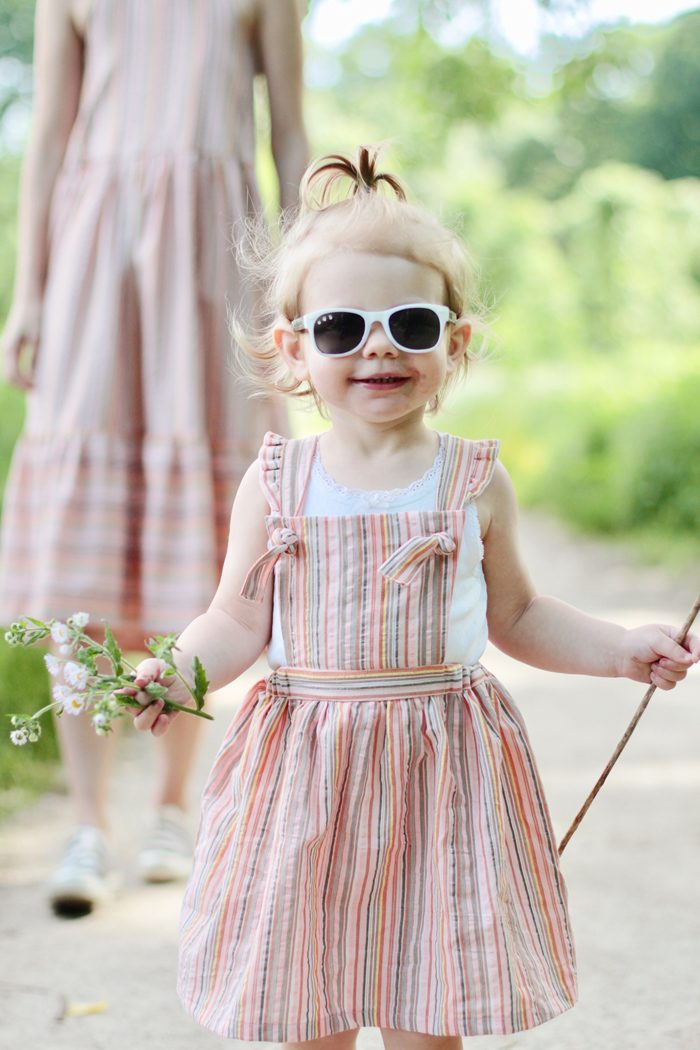
I'm so soon in love with how these came out! I know I say that with almost everything that comes off my sewing table, but I really mean it with these ones. They make me so happy. And fit so well. I originally bought this fabric with this dress in mind, but when I had just enough yardage left to squeeze something out of it for P, I couldn't resist. I think from now on I'll purposely be buying extra yardage so I always have enough to make her something too. 

My dress is a modified McCall 7595 (view D)

Penny's dress is the Macy Pinafore by Jilly Atlanta

fabric is from Cali Fabrics (I don't see it available anymore)

DIY Shaving Cream Marbling

It's been so long since I've shared a DIY with you guys! I really love this one, and I've done it in the past (although I'm still perfecting it, as you'll see!) I'm going to show you how to paint a marbling effect with shaving cream. I'll show you how to use fabric paint and fabric so you can create all sorts of cute little sewing projects. But note that you don't necessarily need to do this on fabric. If you use regular craft acrylic paint, this could work on a sturdy paper or canvas, or any other surface you want to try. I would think its the same process, though!

Supplies:

  • shaving cream
  • baking pan/cookie sheet
  • white fabric ( try to stick with a natural fiber like cotton) 
  • fabric paint (if you can't find fabric paint in colors you like, you can mix acrylic paint and a fabric paint medium to make it more flexible for fabric)
  • a straight edge, like a ruler
  • large plastic or garbage bag underneath everything to contain the mess

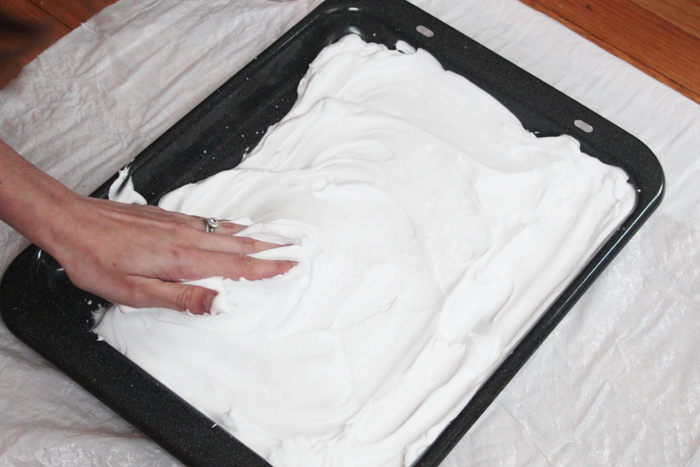
Squirt a bunch of shaving cream onto your cookie sheet and smooth it out. You can use a toll or something to smooth out the cream, but i just use my hand. It's fun to get messy, and it smells so good!

Squirt on you on your fabric paint whichever way you want. Streaks, squiggles, small blobs. Just avoid large blobs of paint. Layer on your colors and have fun with it. 

(So I actually did this next step two ways because I wasn't happy with the first go round. But I'm going to show you it anyway and the result, in case you DO like how it looks.)

It's time to swirl . For this first one, I used a skewer stick (a toothpick or something else small would work too) to create small swirls. Swirl lightly just on top of the shaving cream, you don't need to dig into the cream.  

After this, I added a few more squirts of red and orange and swirled a little more. I'm going to jump ahead a couple of steps to show you the finial result from doing it this way:

This is what it looked like from using a stick to create small swirls. Not really what I was going for, so I tried a different swirling method you'll see below. But by all means, if you like this look, go for small swirls!

Ok, so I started over with my shaving cream. I squirted on my paint, and then swirled with my fingers and hand. VERY gently, and just on the surface of the shaving cream. If you mix too much, you'll just end up with a muddled mess. 

Carefully lay your fabric down on top of the shaving cream. Gently pat and rub the fabric to transfer the paint. Don't push too hard or rub too hard. Or, again, you'll get a muddled mess. 

Gently pull back the fabric off of the shaving cream. 

Lay the fabric down flat with painted side up. It's going to look messy because there is a lot of excess shaving cream sticking to it. 

This step is probably the most difficult part. I've done this painting process a few times in the past, and this is the part that I tend to mess up on and cause me to start over. So just note that you may have to try the whole thing a few times to get it right. Have plenty of supplies on hand to do a few versions. 

You need to use your straight edge to veeery gently and softly scrape off the excess shaving cream. I do this in small sections, because the cream will build up on the straight edge. So I do small sections, and wipe it off in between. Be VERY gentle with a soft hand. If you press too hard, you'll smear the paint and end up with straight edge paint lines.

** As you can see, this DIY is all about being very gentle and soft handed. **

You don't have to get every last bit of shaving cream though. You'll be washing it later, so the rest of it will come off. Just try to get the majority of it. 

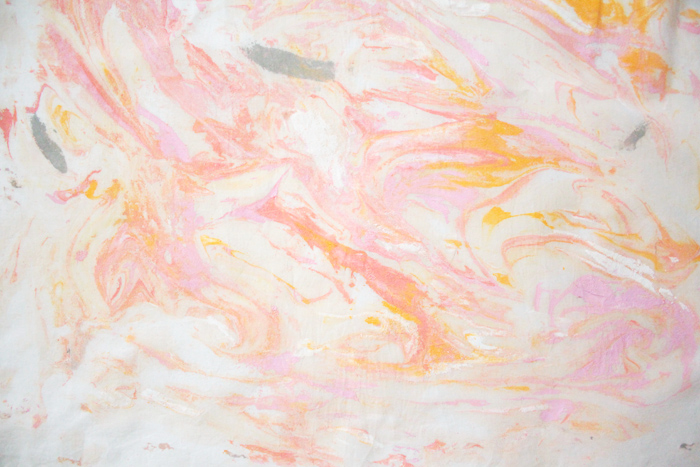
I had a larger piece of fabric, so I repeated everything a second time to cover the rest of it. And this was my result! Not exactly perfect, but I'm pretty happy with the way it came out. 

Let the paint completely dry on your fabric. And go ahead and clean everything else up!

Once the paint is completely dry, hand wash it really well. 

Ring out, let dry, and press if needed. If you do press it, iron it from the wrong (non painted) side, or use a pressing cloth. Don't press right on top of the paint. 

That's it! Now you can do whatever you'd like with your fabric. I turned in the edges and stitched to create a cute little hand towel for Penny's play kitchen. In the past, I cut out pieces for eye masks, and even did it on cotton canvas to create zipper pouches. Sky's the limit! If you have the patience, you could repeat all over a large yardage of fabric to make larger items. 

Handmade Wardrobe // Ruffle River

This is my favorite and most worn version of all the River tops and dresses I made! It's made out of a slightly heavier, light blue chambray.  I added a little ruffle detail to the raglan sleeve seam on this one, and made sure to include a how-to post as part of the sewalong on Design Diary. You can find that here

P.S - neck scarf is from Target, jeans are from Urban Outfitters. 

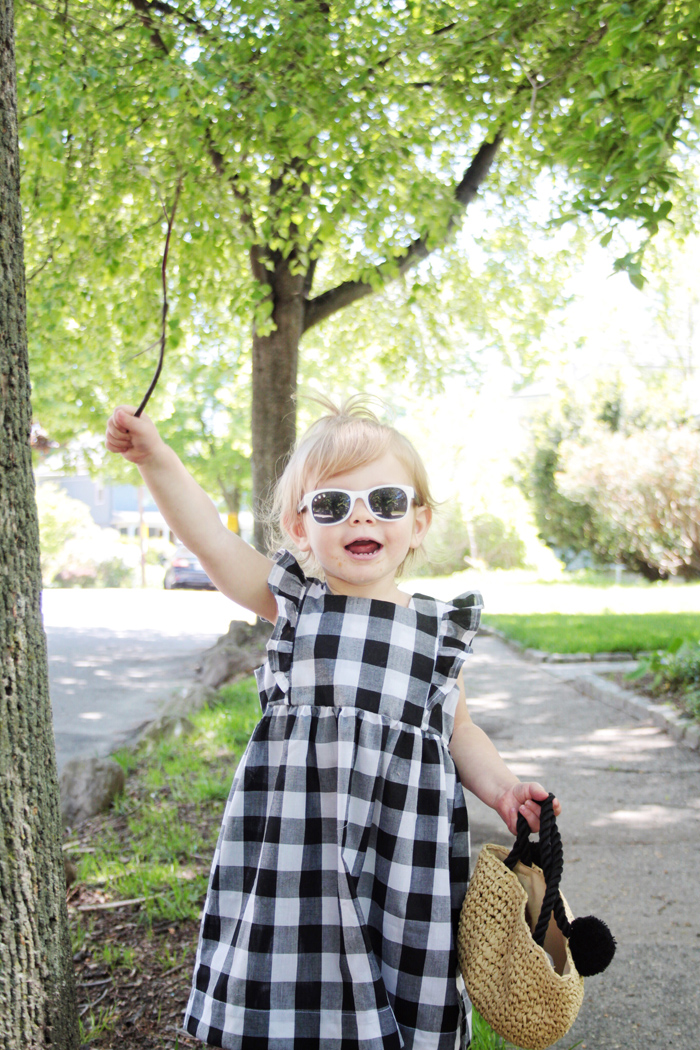
Penny's Handmade Wardrobe // Checkmate

I've been sewing a lot for Penny late too, and thought this one deserved its own post. I mean, just look at that little model!

It's Simplicity 1470 (I can't find it on the website), but I left off the waistband and back bow because of lack of fabric. But still oh so cute. This might be my favorite thing I've made her. I might as well stop making things now, because she's just going to live in this all summer. My work here is done. 

Her sunglasses are from Roshambo Baby, purse and shoes are Old Navy (find them under 'Penny's Closet' at the top of the page!)

Handmade Wardrobe // Another Tee Dress

I told you I make a lot of these tee dresses! This one felt like it needed another fun detail, so I took a page out of my own book and added ruffles to the shoulder seams just like my Rowan bodysuit

Also - yes, I'm wearing my favorite Mama & Little teething necklace. No - Penny is no longer a teething baby. But yes- I still wear it all the time. 

Also also - Penny's jumpsuit and sandals are thrifted babyGap, so not currently available!

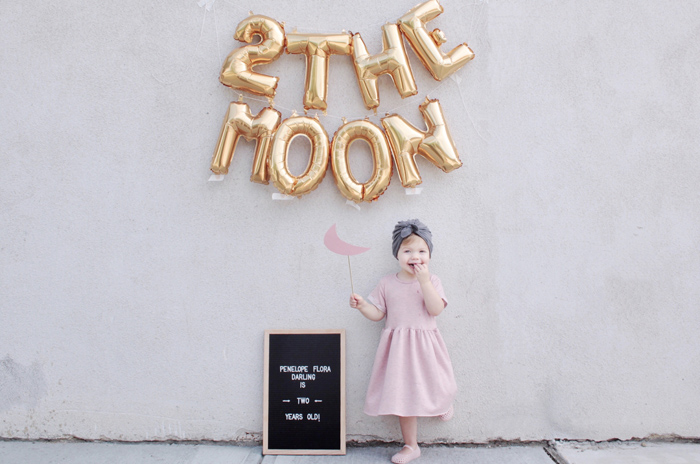
Owl Love You 2 The Moon : Penny Turns Two!

If you follow me on Instagram, then you've probably seen all of these photos from last weekend. But I wanted to document them here too, because my baby is TWO! We had a small birthday party with friends over MDW, Daddy made her a galaxy cake, Mama went overboard decorating with balloons, and Penny got a scooter, binoculars, sit-n-spin, and so many toys. 

We love our big girl, and I'm still in denial that she's already two. Wasn't she born, like, yesterday?

P.S .....

Penny's dress : hadmade

Penny's turban: Nelly Lou

2 the moon balloons: Studio Pep

leterboard: Oak & Made

pink tray (under the cake): Target