
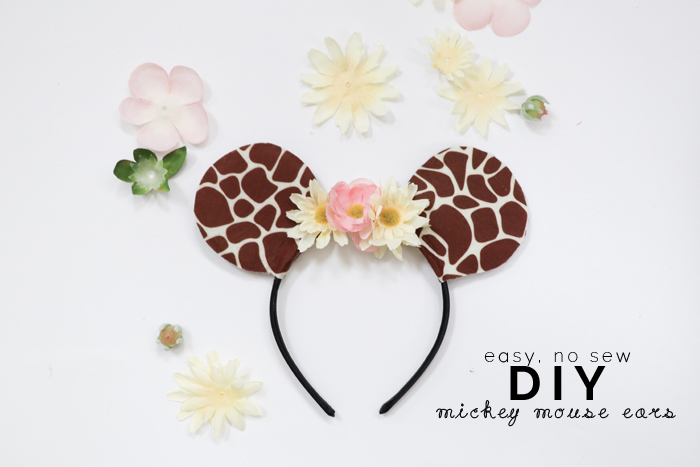
We’re heading back to Disney World in a few days, and I whipped up this quick DIY for Penny for the occasion! She has her classic Mickey ears hat with her name embroidered on it that we got last year, and she will be wearing it to Magic Kingdom again. But I wanted to have something different and special for her to wear specifically to Animal Kingdom on this trip, and I didn’t want to pay a ridiculous amount of $$ for a specialty headband she’ll only wear to one park. So I made my own! And for less than $8.
This is a super quick and easy Mickey ears headband. Nothing fancy. Won’t look as expensive and nice as the store bought ones. But it gets the job done. No sewing required. Just a little hot glue.
You can make them animal print like I did, basic black, or any color or pattern you want. Good for if you want ears for the park but your on a budget, or you could make a bunch as favors for a Mickey themed party!
S U P P L I E S :
stiff craft felt or thicker craft foam (you can use floppy felt or thinner material, but you’ll need another layer in between to keep the ears upright, like cardboard or stuffing. I used the stiffer craft felt because it was sturdy enough to stay standing up without anything else. I got this giraffe print one at Hobby Lobby . you could also use fabric, but again would need a filler and would require sewing. A different tutorial all together).
hot glue gun
scissors
optional: small fake flowers (could also use a fabric bow for Minnie ears, or anything else decorative you could think of)

Decide how big you want your ears. If you find a round household object thats the perfect size, you can use it to trace the perfect circle on a piece of paper.
But don’t draw a complete circle! Leave an opening about 2” wide at the bottom, and draw tiny 1/4” straight lines at the edges of the opening
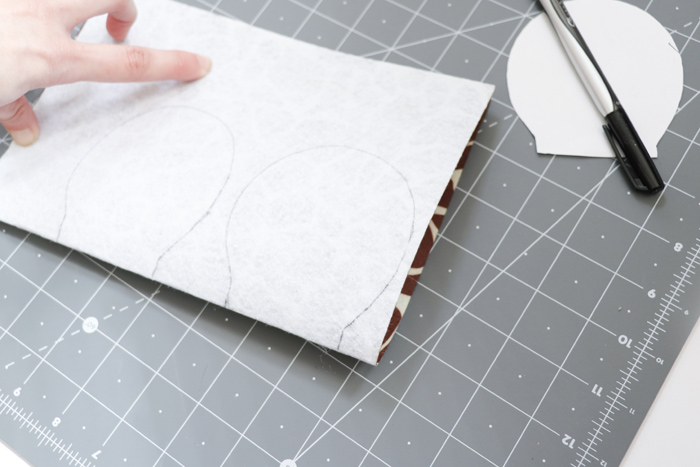
Fold your felt in half, and trace your open circle pattern on the fold, twice.
Cut each one out.

Since you cut on the fold, you will now have two peanut shapes.

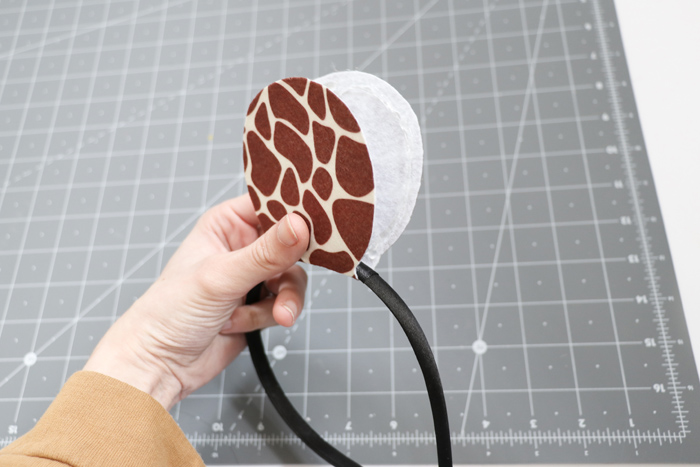
Find your perfect placement for your first ear, and lightly mark it on the headband (I used chalk).
Add a line of hot glue right in the middle of the peanut shape.

Stick the line of glue along the bottom of the headband, making sure you are lined up with your placement markings from before. Press and hold until glue cooled/dried and sticking.

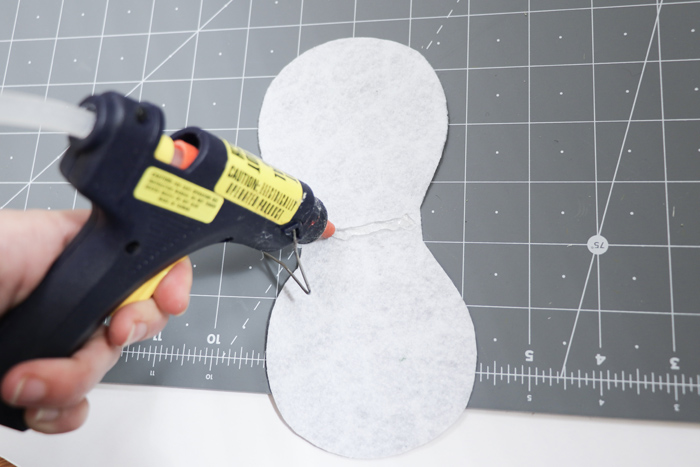
Now glue around the entire circular edge of one ear/peanut half.
Fold the ear in half, being careful to line up the edges. Press and hold until glue is dried and they are stuck together.

Ta-da! one ear done! Carefully trim around the edge if there are any spots that didn’t line up perfectly, or if there is any glue strings hanging out.

Repeat for the second ear.

Now its time to decorate! If you are adding florals like I did - pull some of the fake flowers off of their stems.
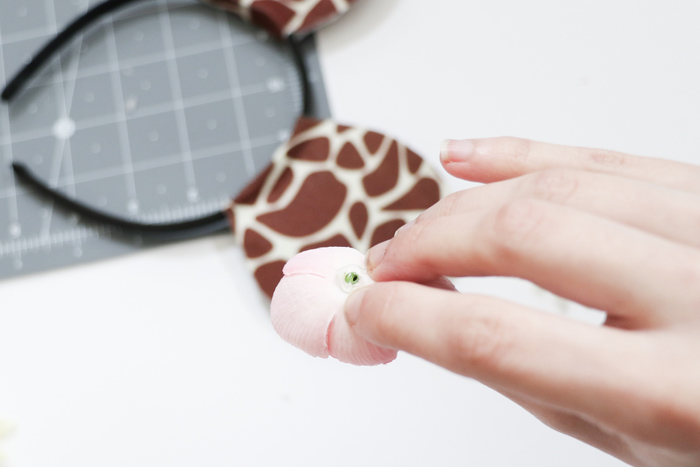
Trim off the green stub from the back, so that the flower is as flat as possible in the back. Add a bit of hot glue right in the middle.

Stick your flowers to your headband however you desire!

I hid the visible glue spots in the back of the headband by pulling some of the flower petals down over them. Easy-peasy! If you are using flowers that can’t do that, or if you are putting a bow or something else on, You could glue a thin ribbon on top to cover up the hot glue and imperfections.