Handmade Wardrobe // flower child

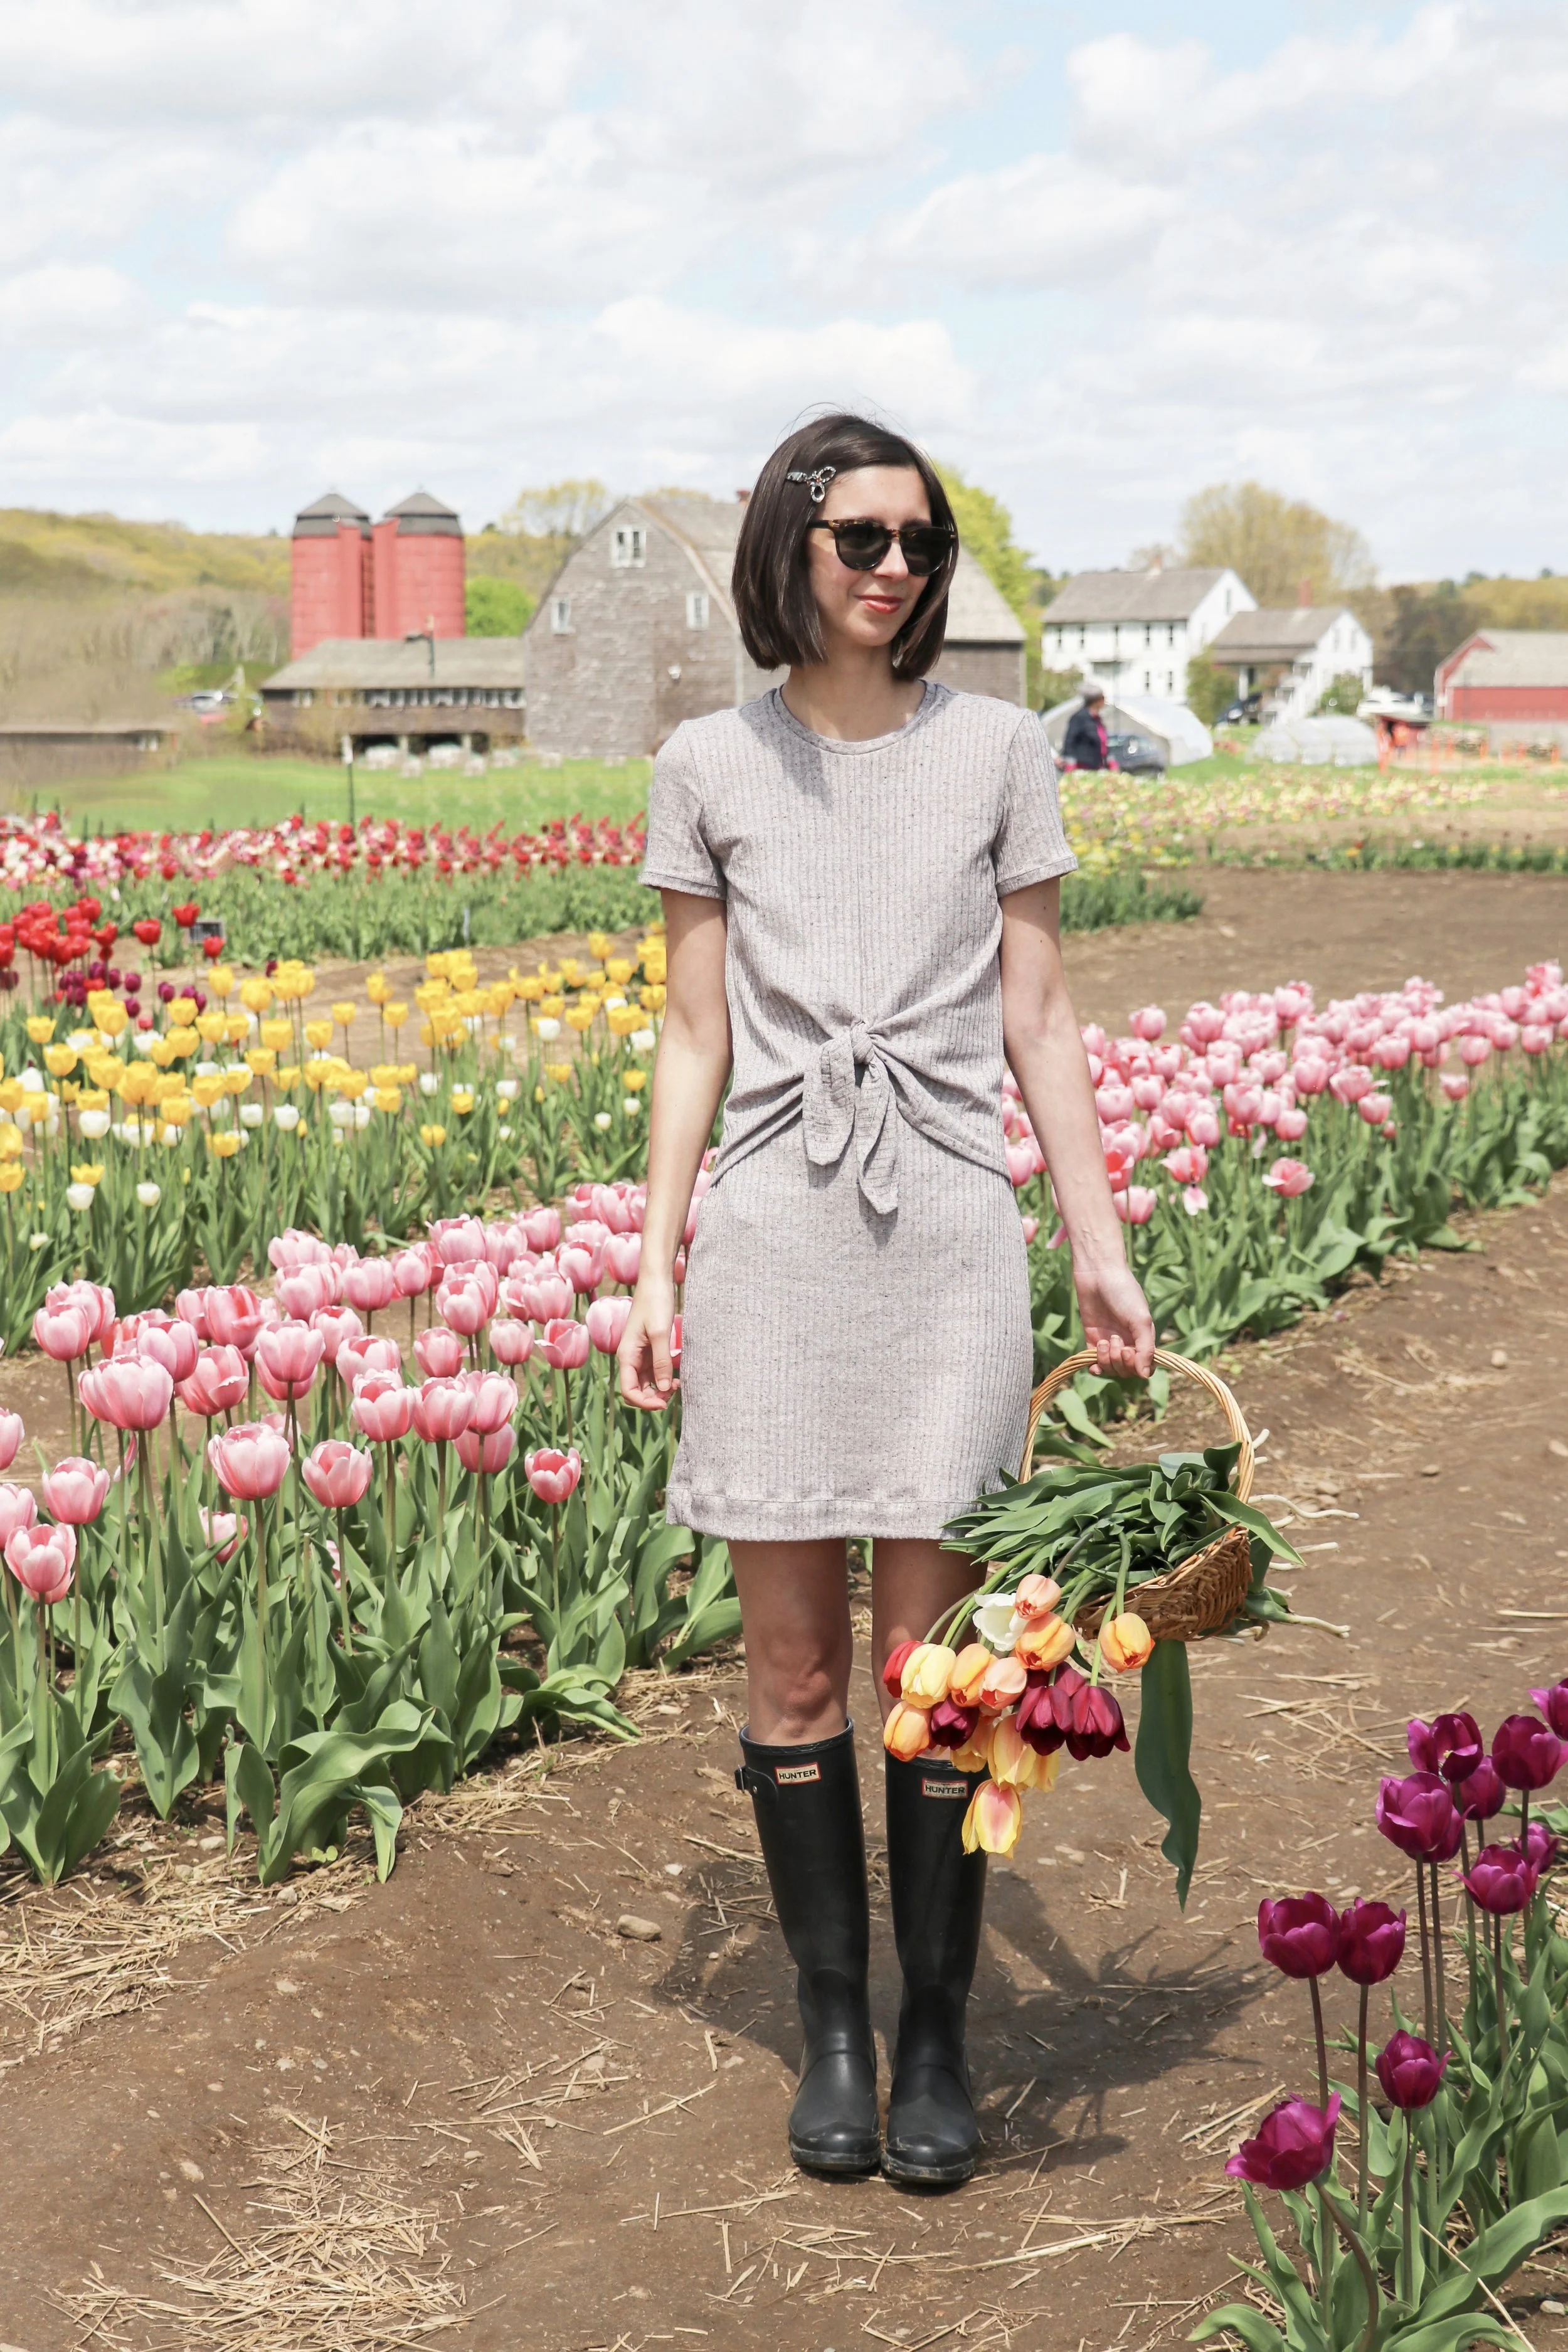
dress: Megan Nielsen Patterns Floreat dress

penny’s cropped tee: self drafted  

fabric: double brushed jersey knit from Girl Charlee

my belt bag: Target

my shoes: sooooo old

penny’s pants: Target

penny’s sunnies: Amazon

————————————————————

I originally had this post scheduled for later in the week, but I was so excited about this set that I rearranged posts and moved this up to Monday haha.

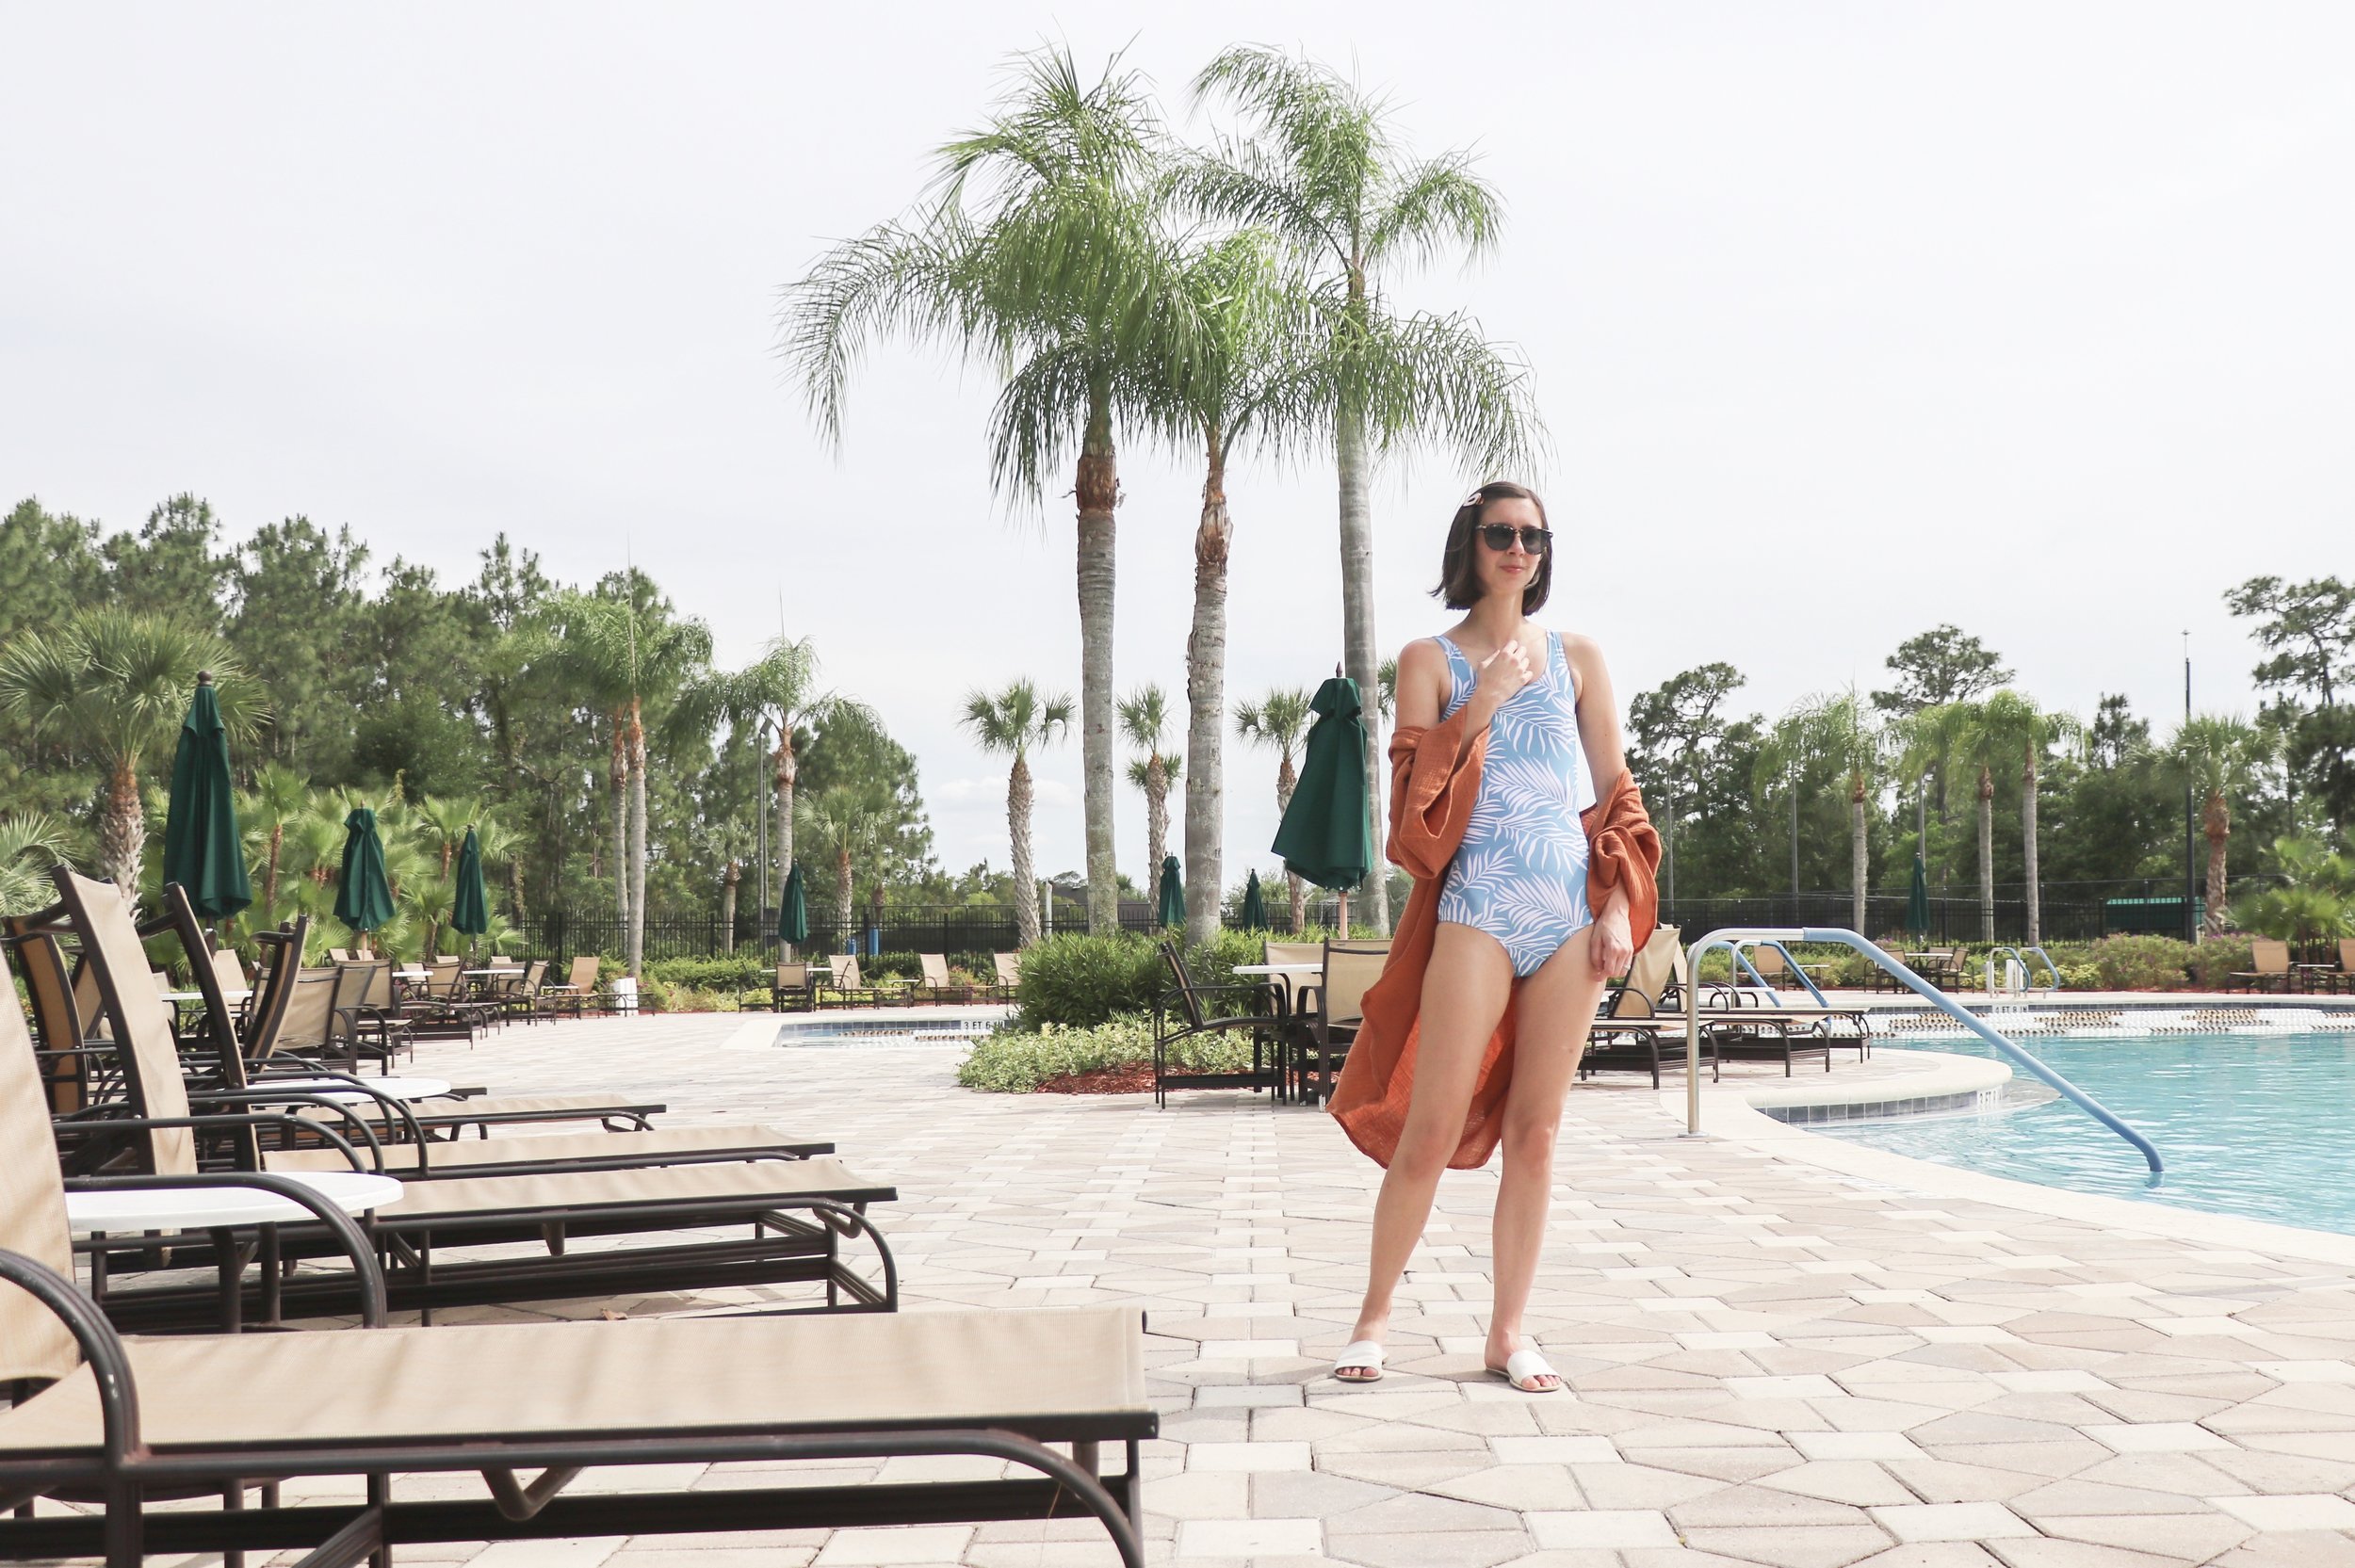
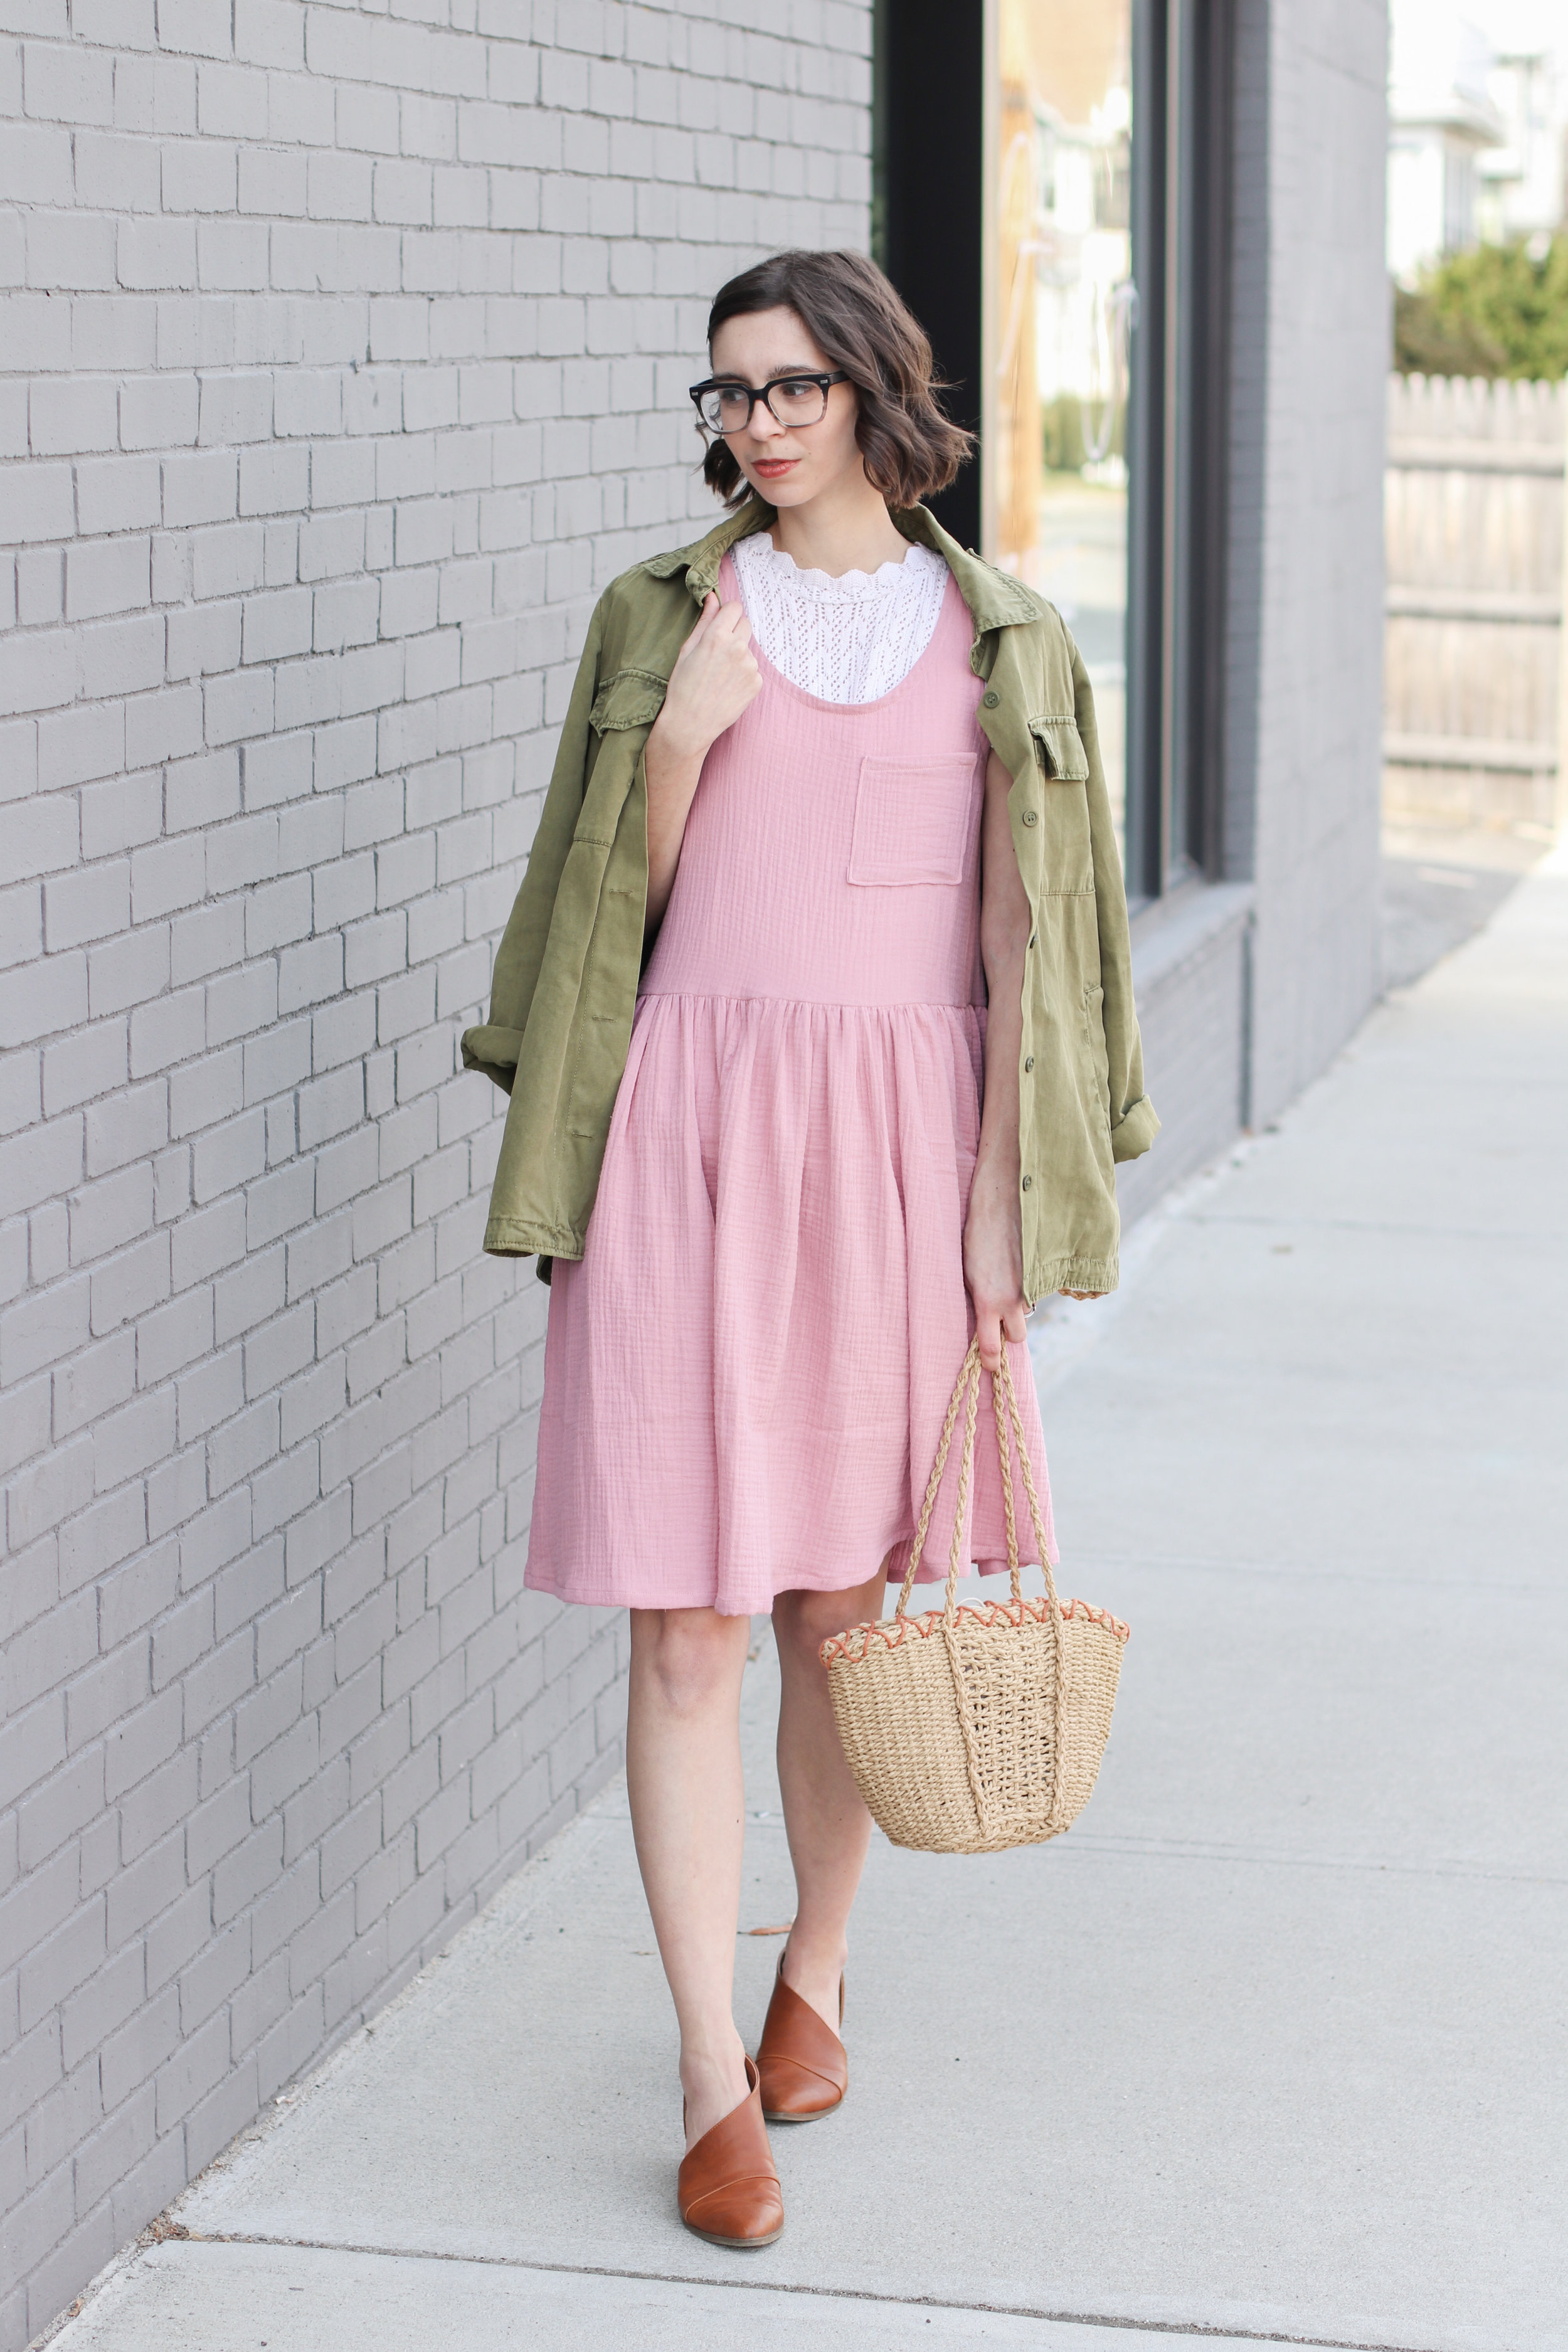
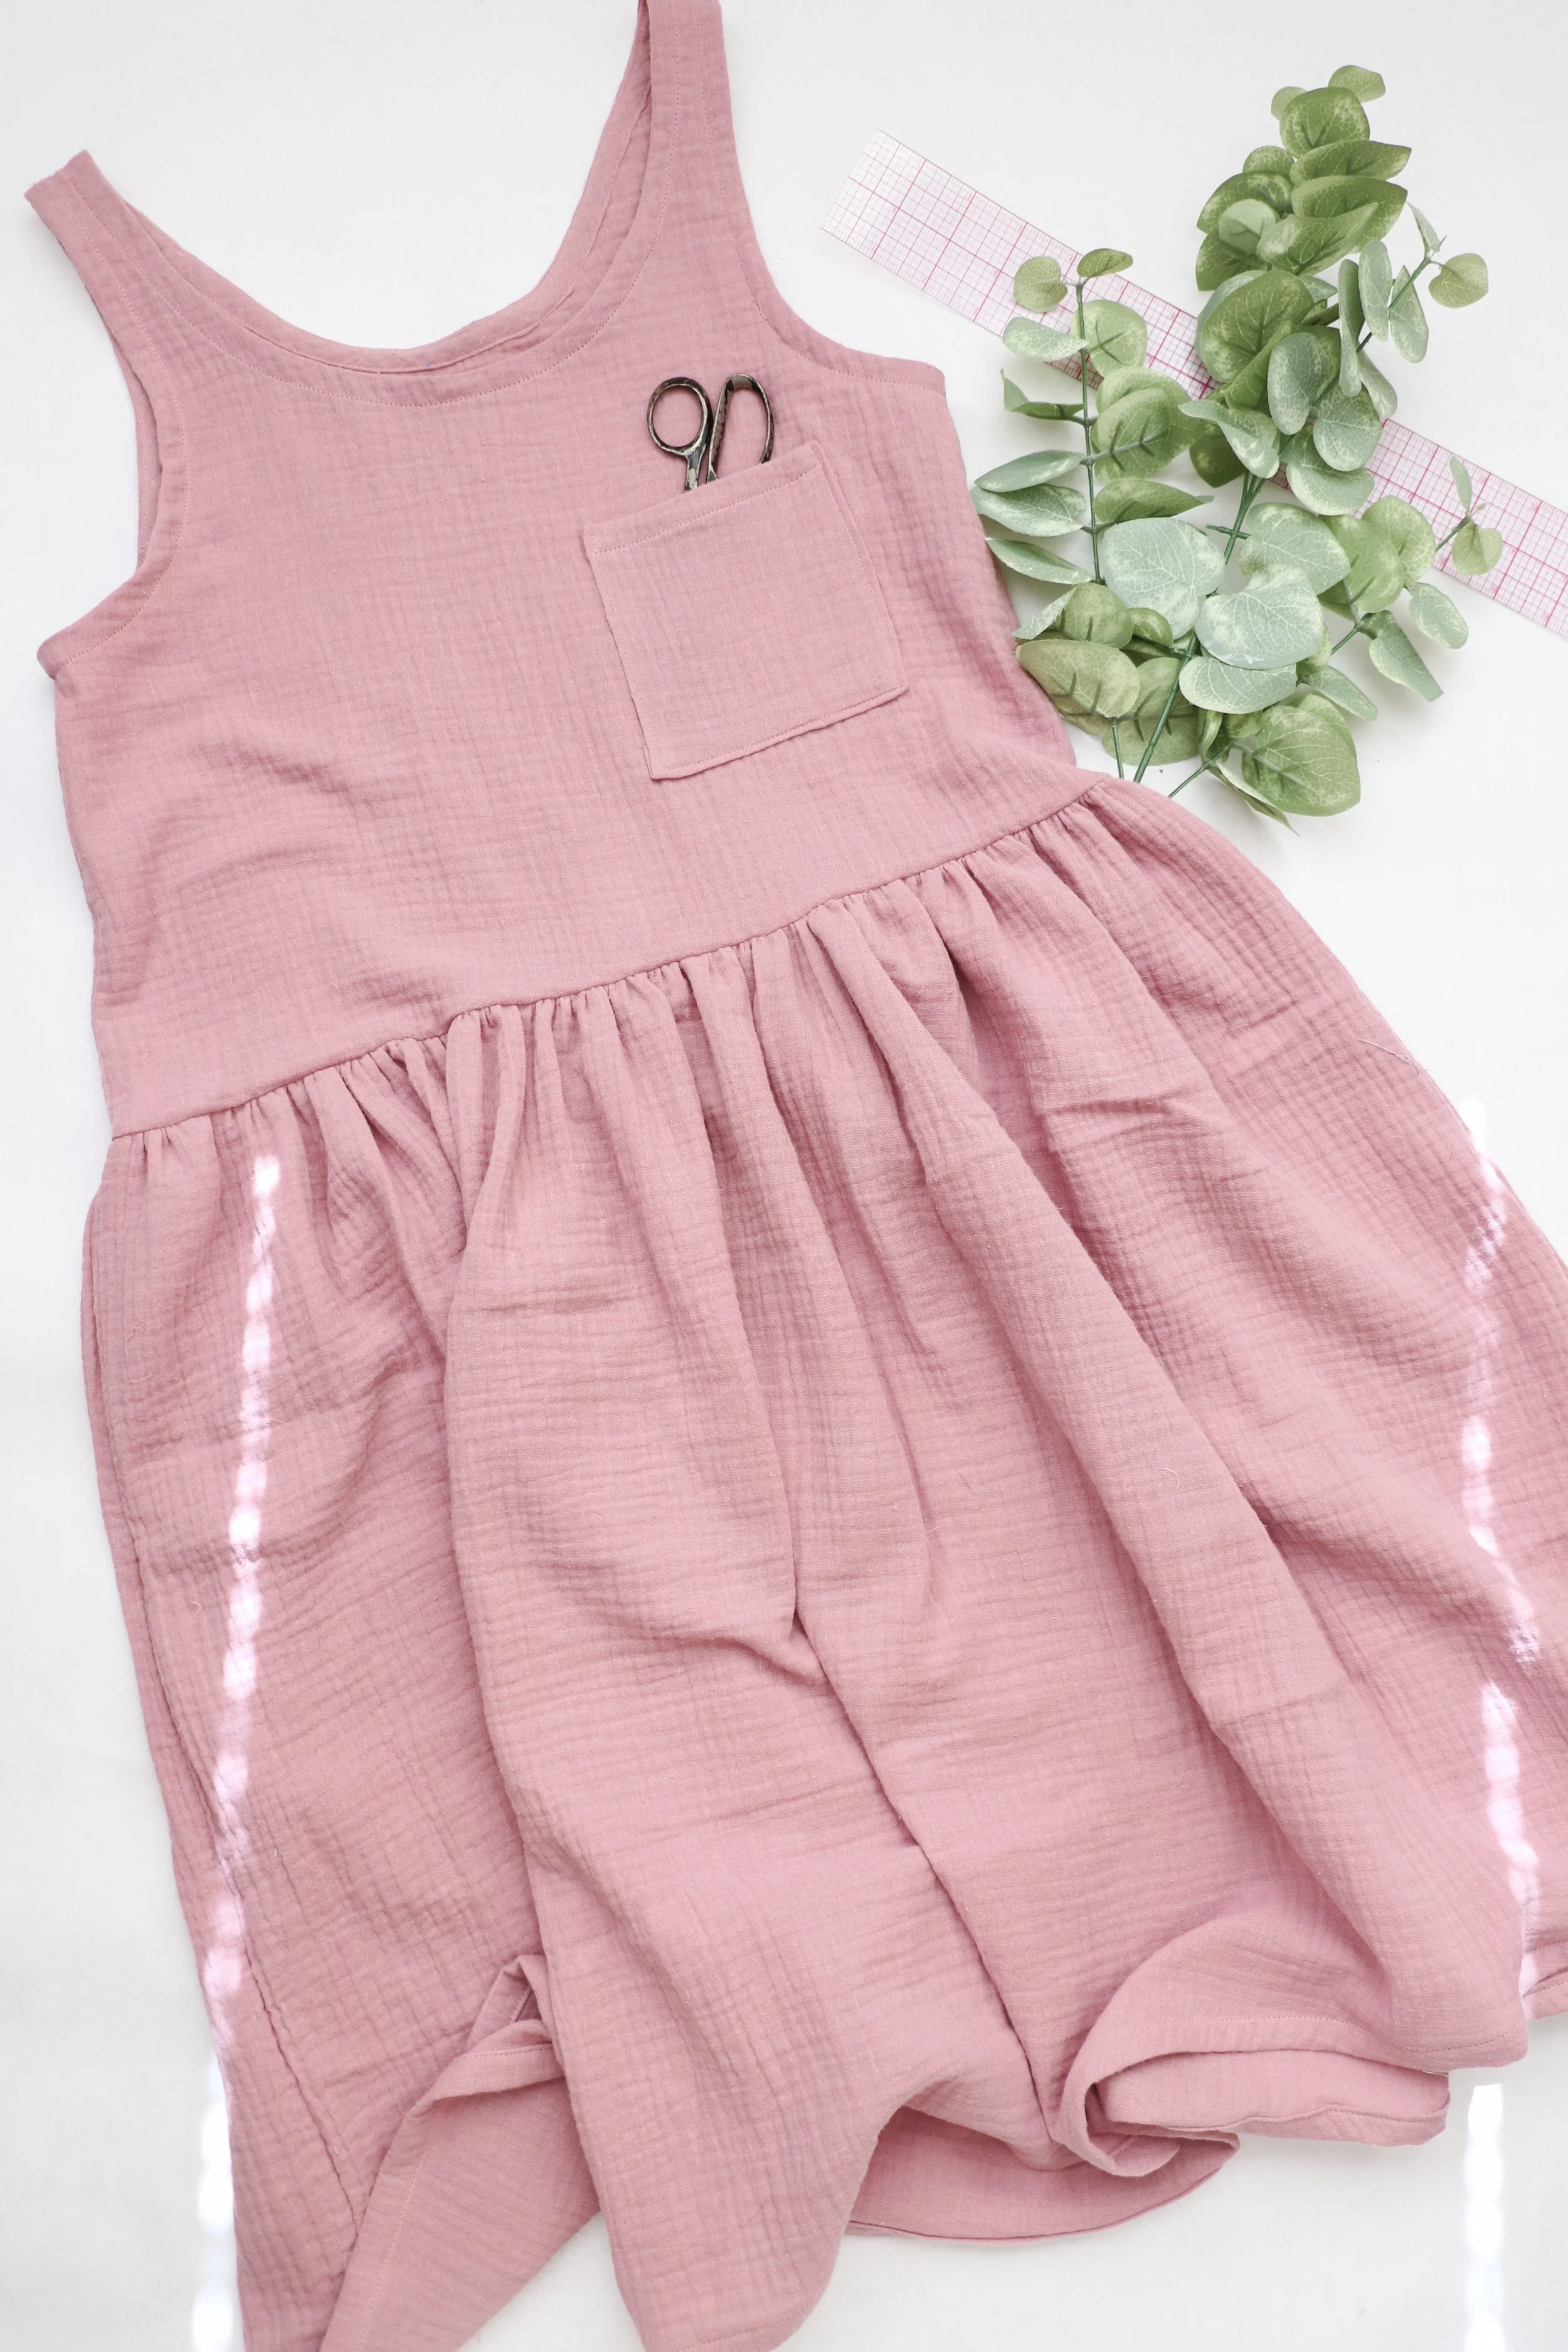
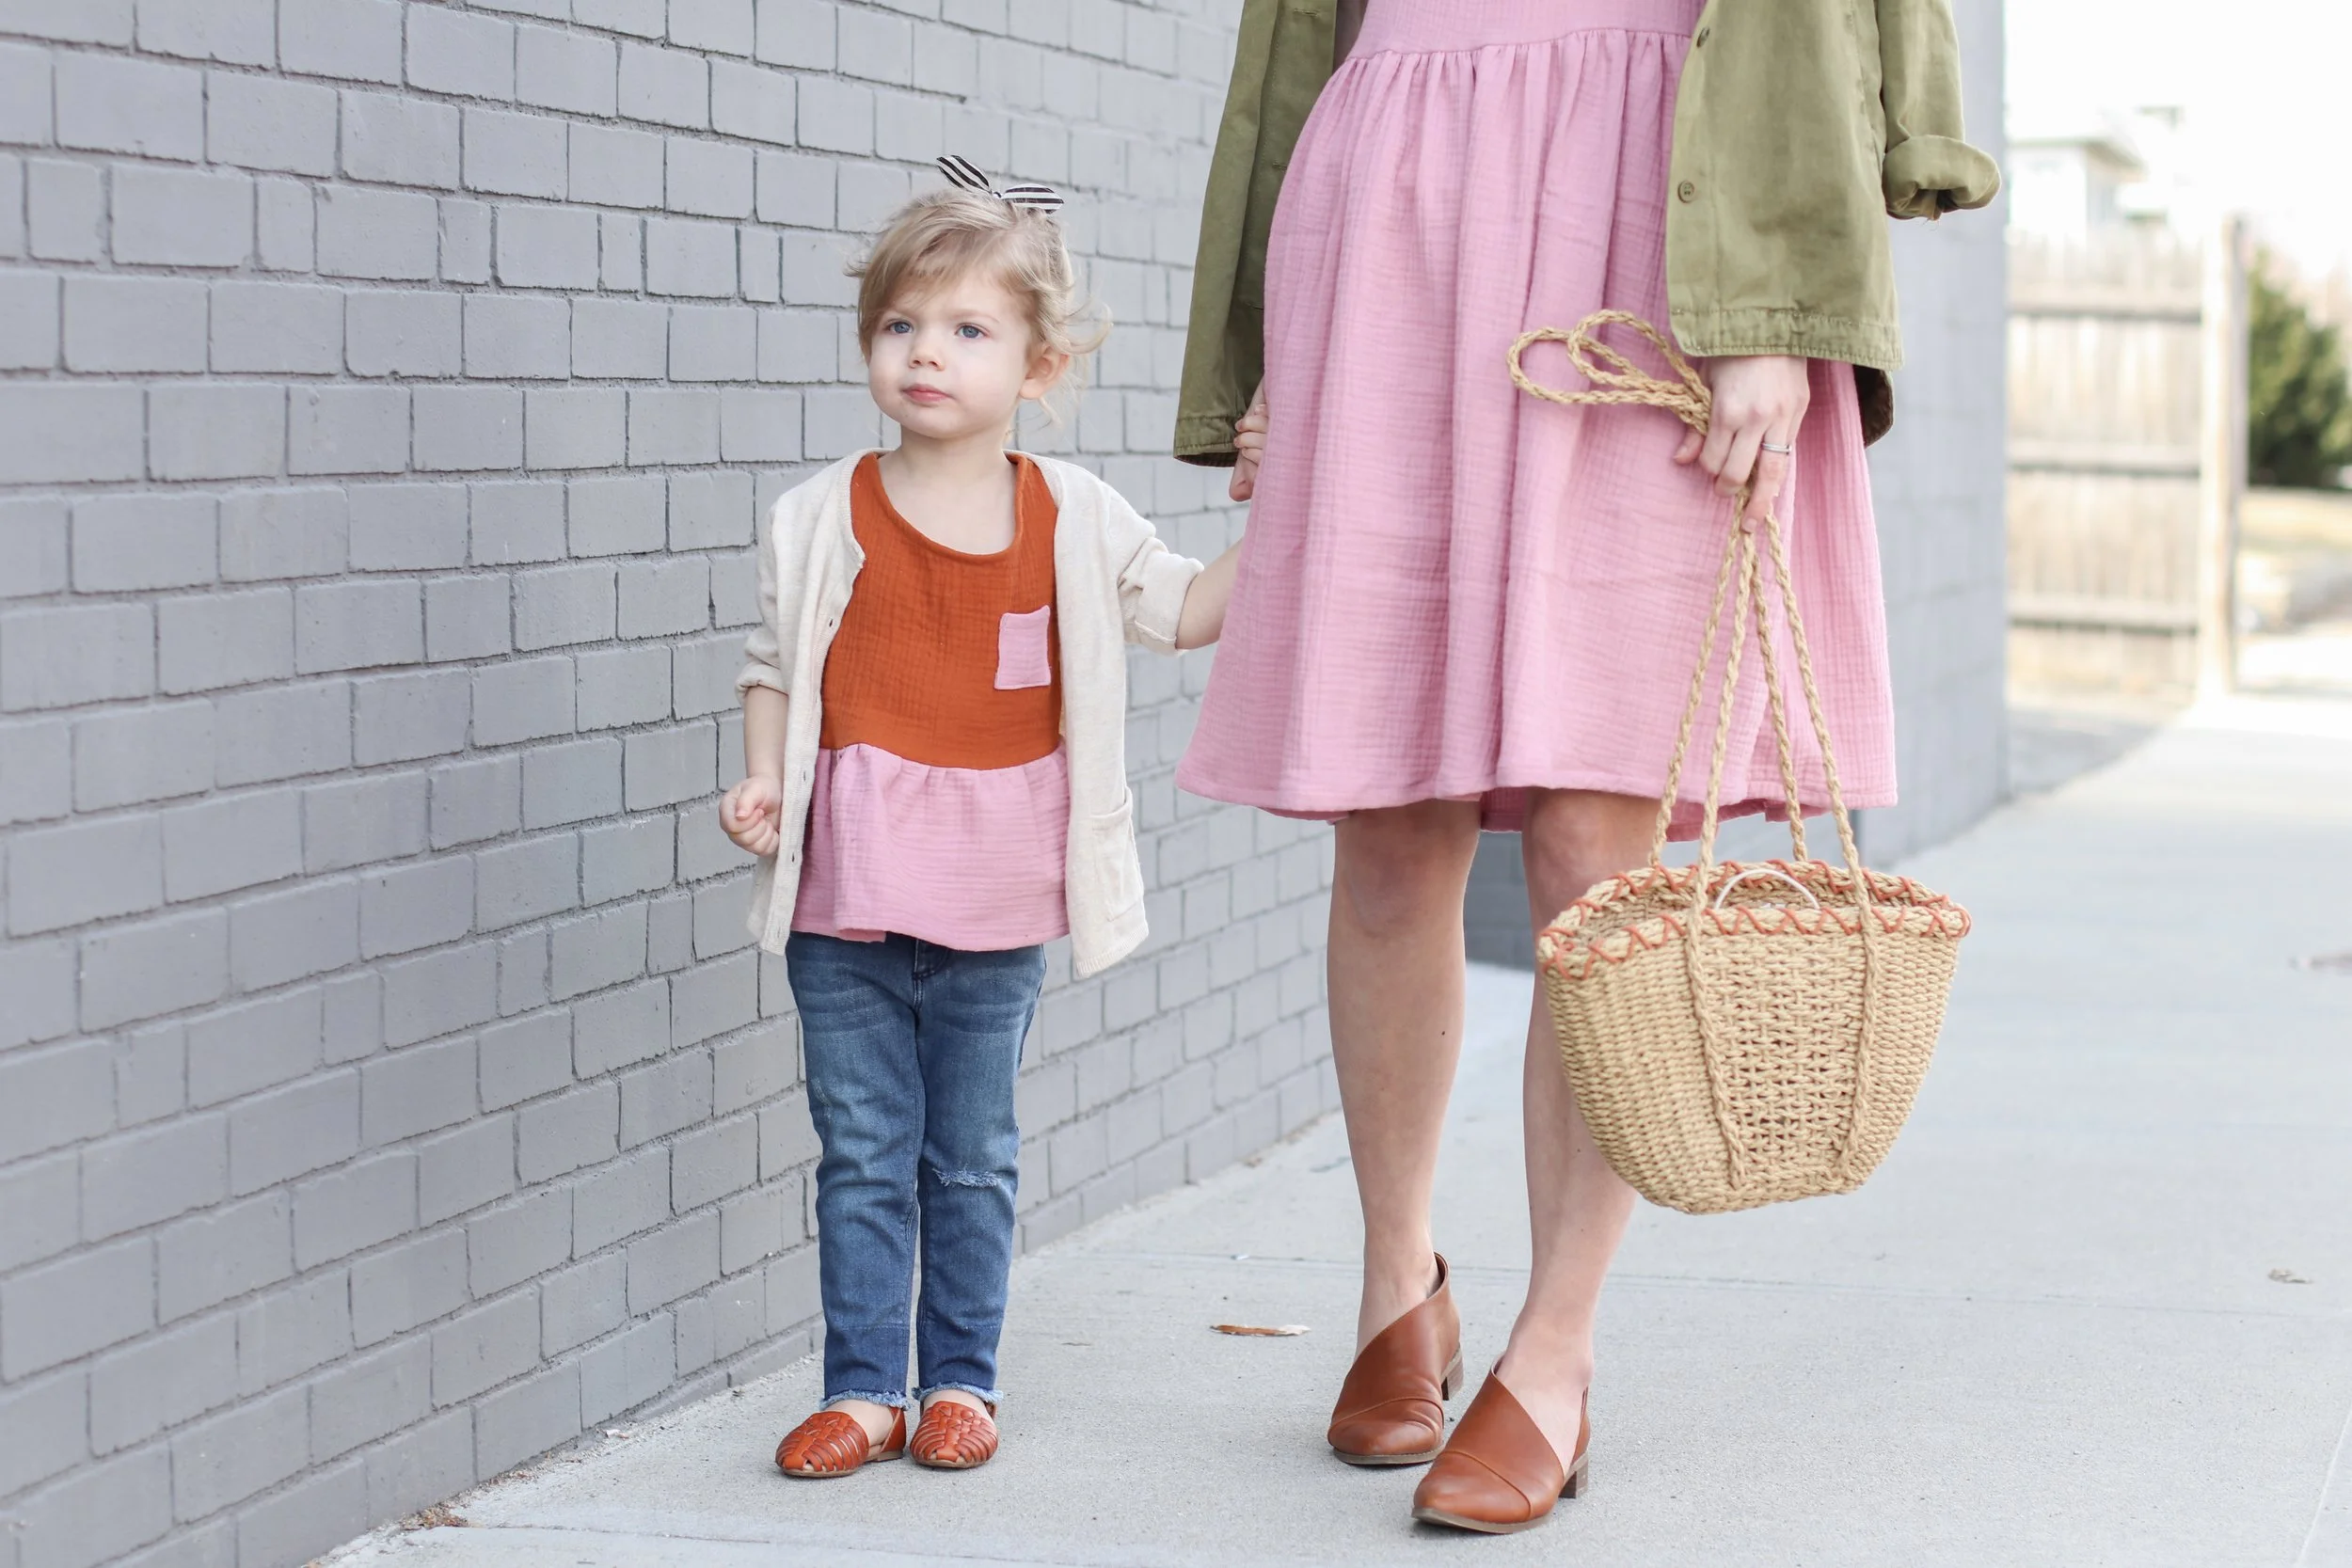
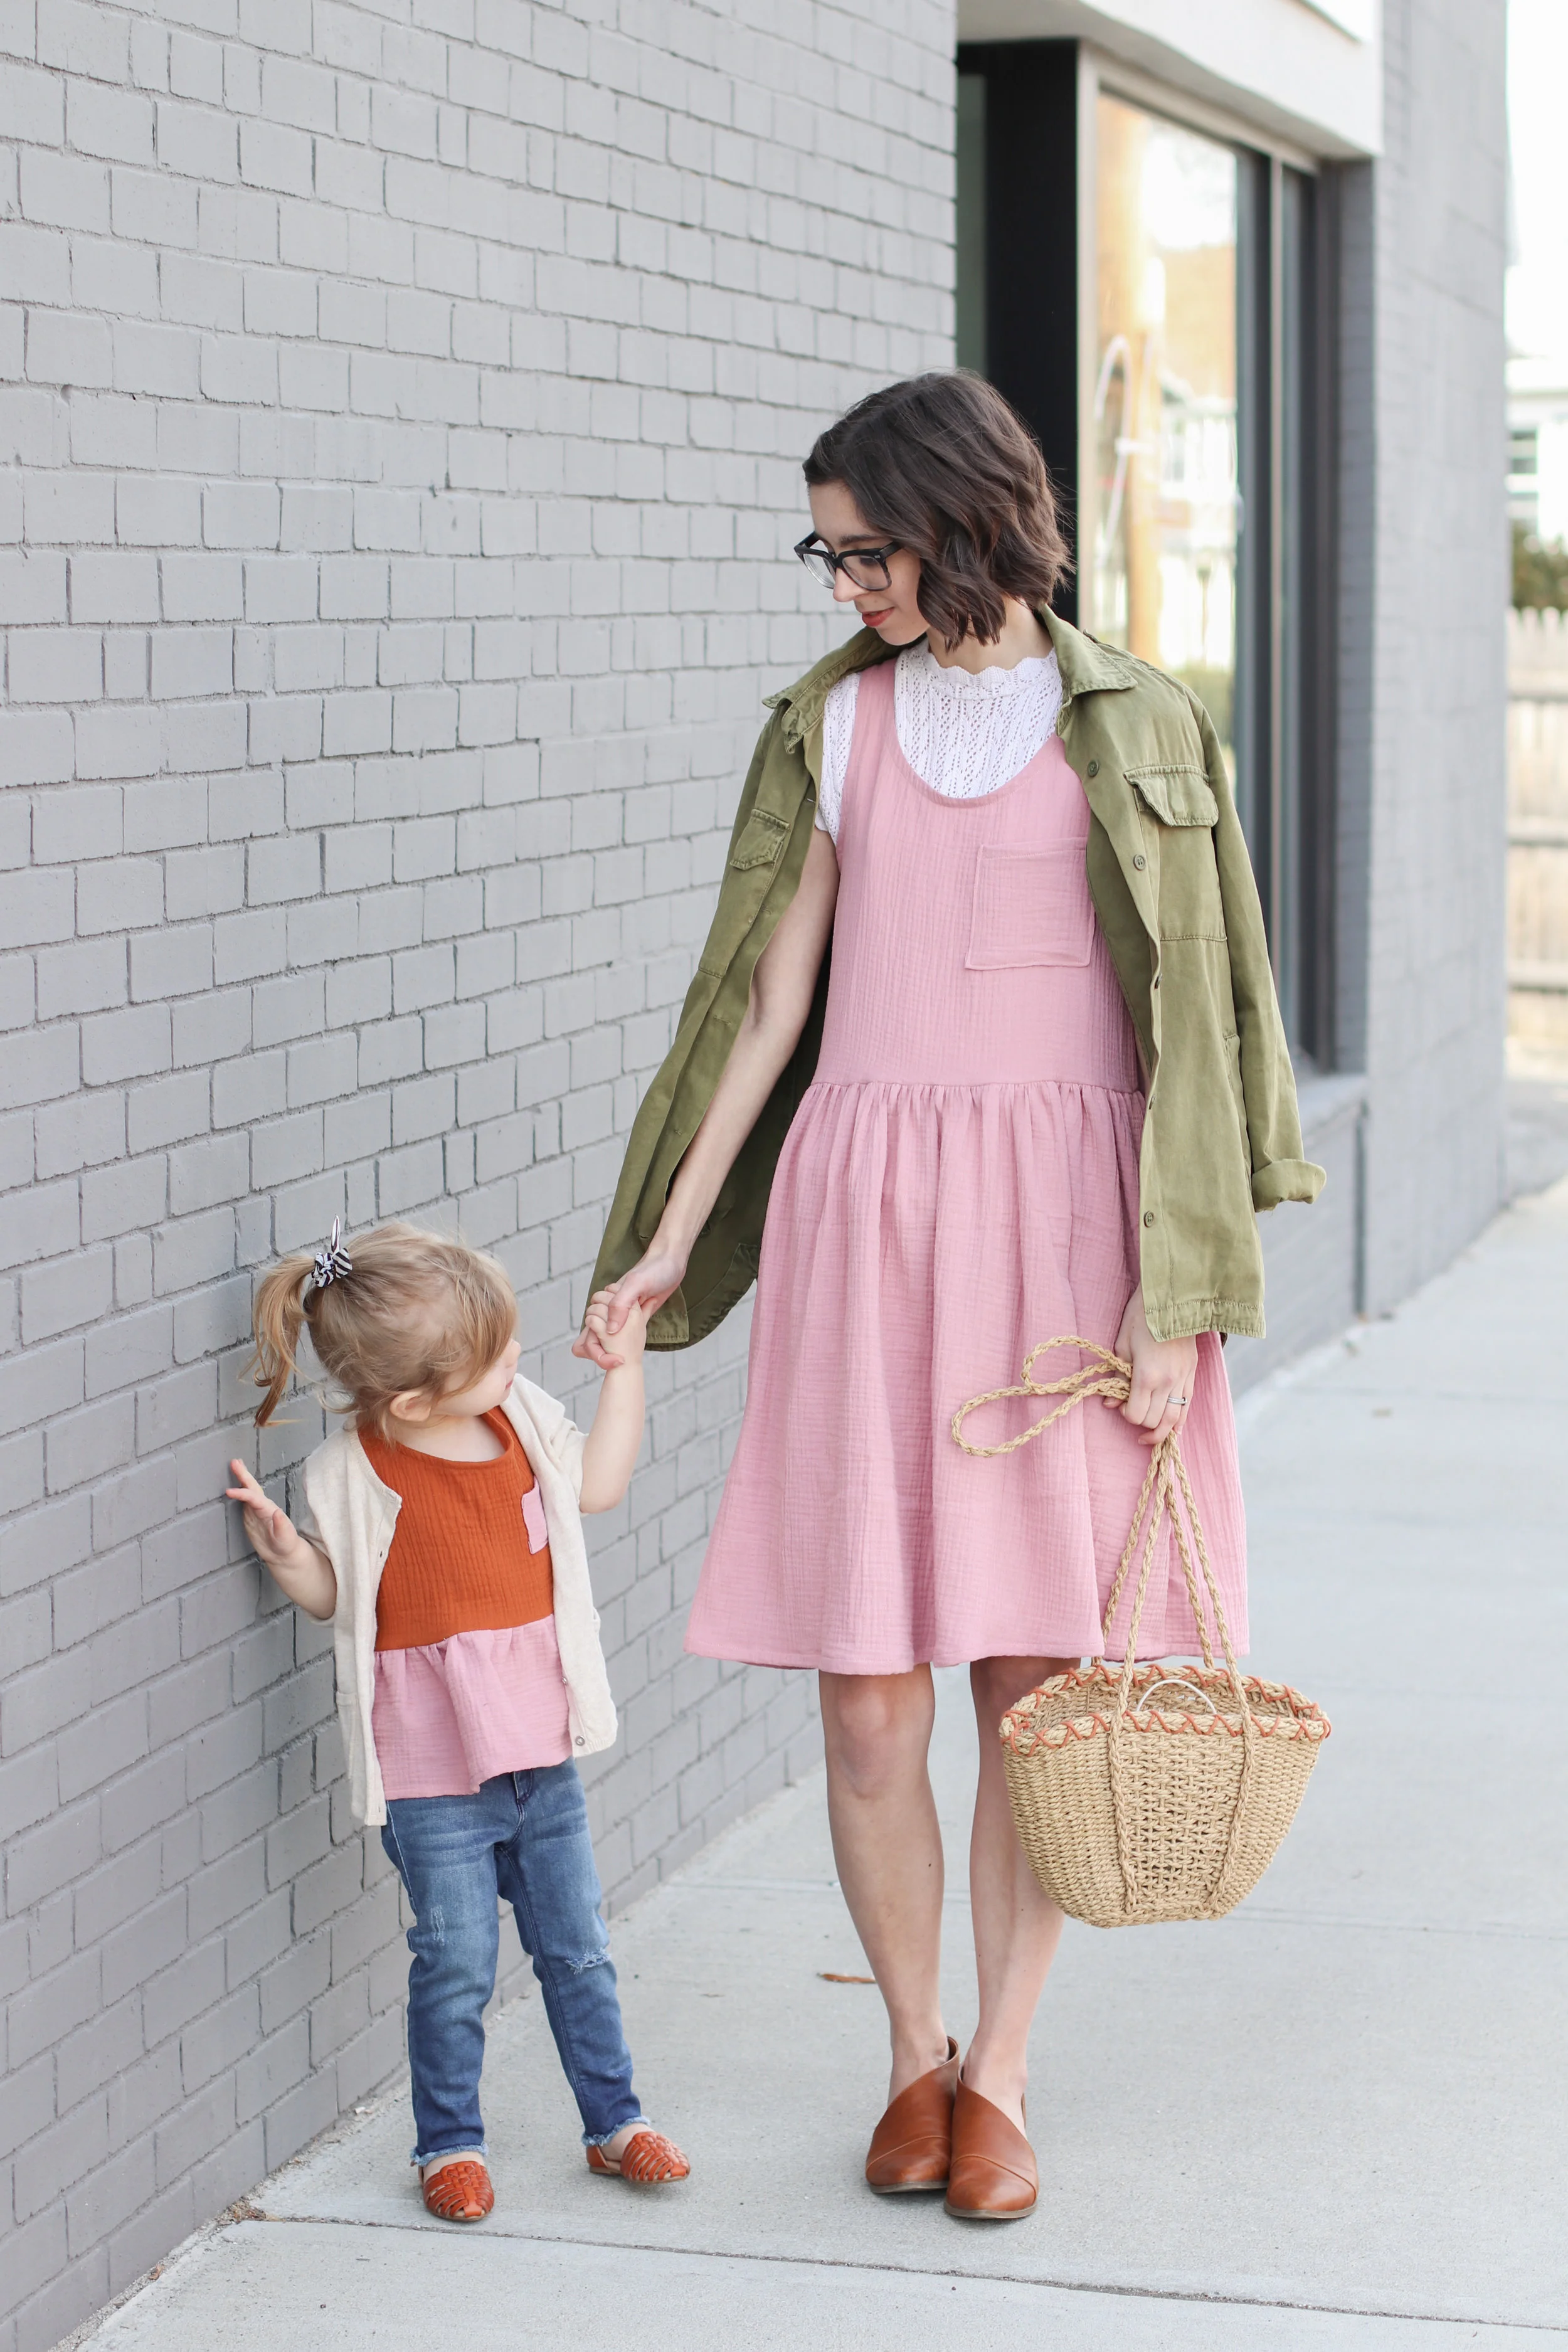
I’ve been holding onto this fabric for awhile (it’s no longer available, unfortunately), but I honestly knew I wanted to make a knit Floreat dress with it from the second it arrived in the mail. This is the 5th Floreat version I’ve made, and as usual, I’ve had to make zero mods to the pattern. The loose fitting shape is forgiving, and it makes it quite an easy sew. Yes, even with the angled hem! Once you get the hang of it (I mean I have made 5 now haha), it’s a breeze. I did also make the matching tie belt for it, but last minute decided to wear my new belt bag with it instead (which I’m obsessed with!). 

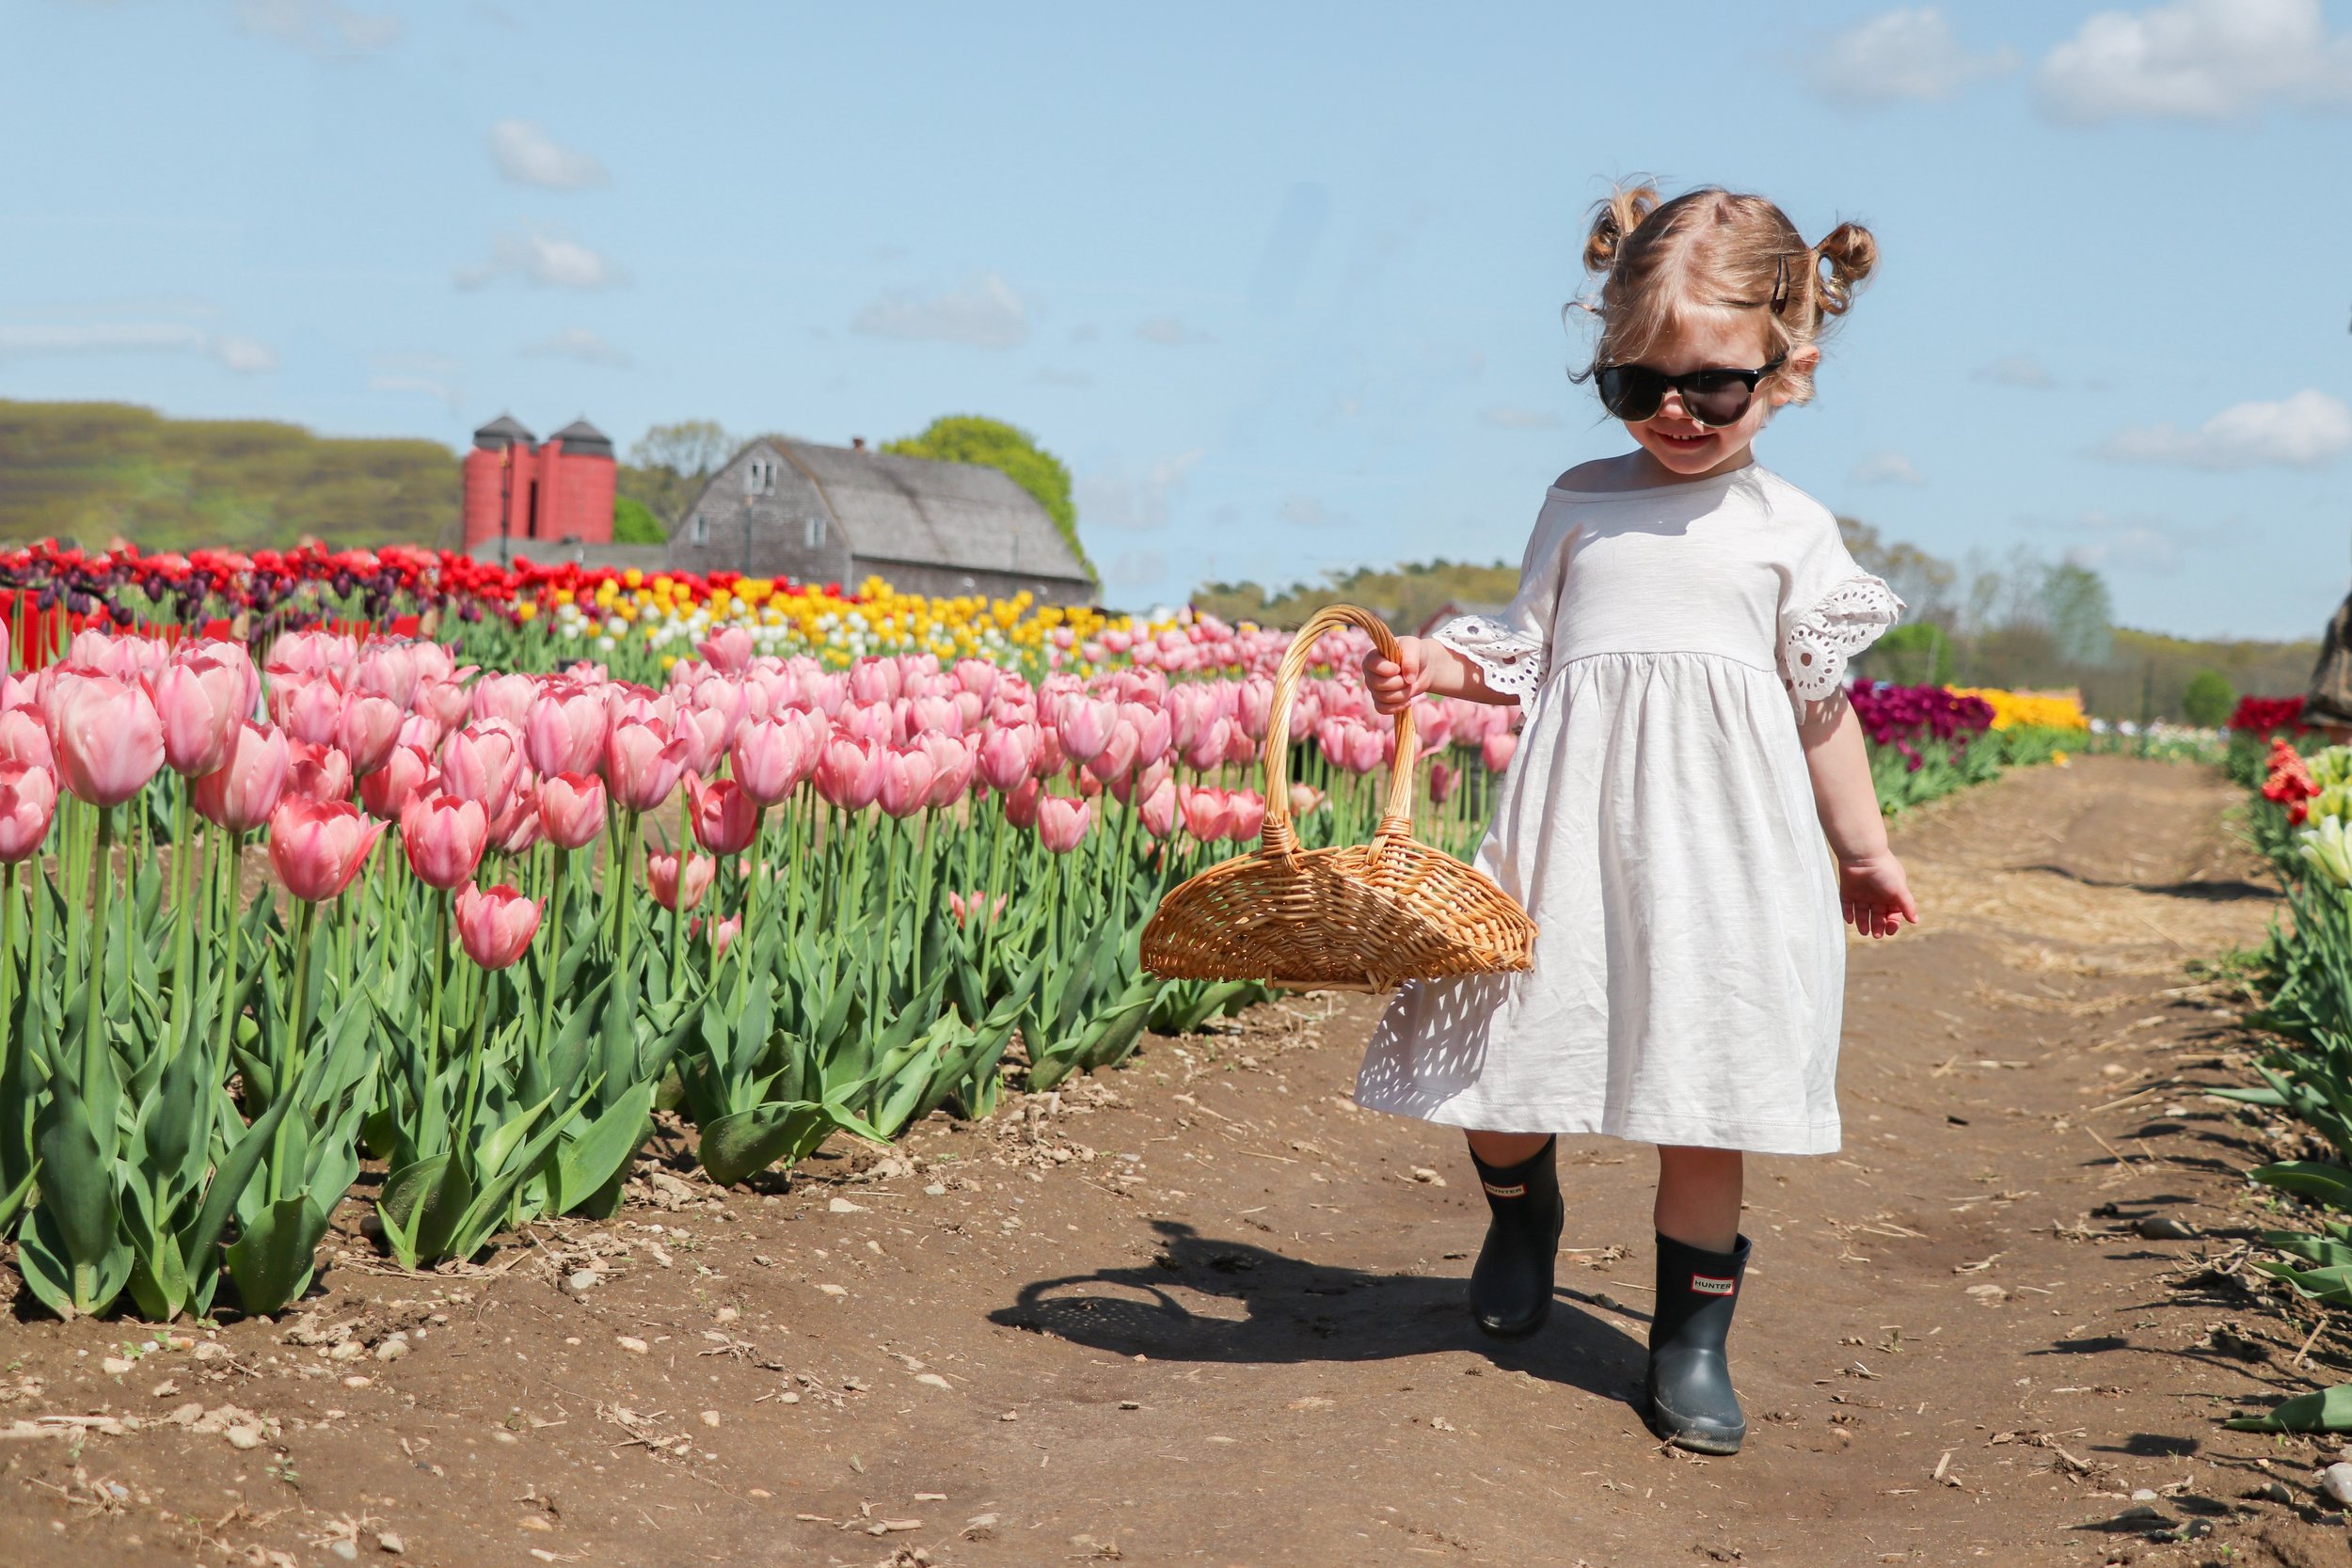
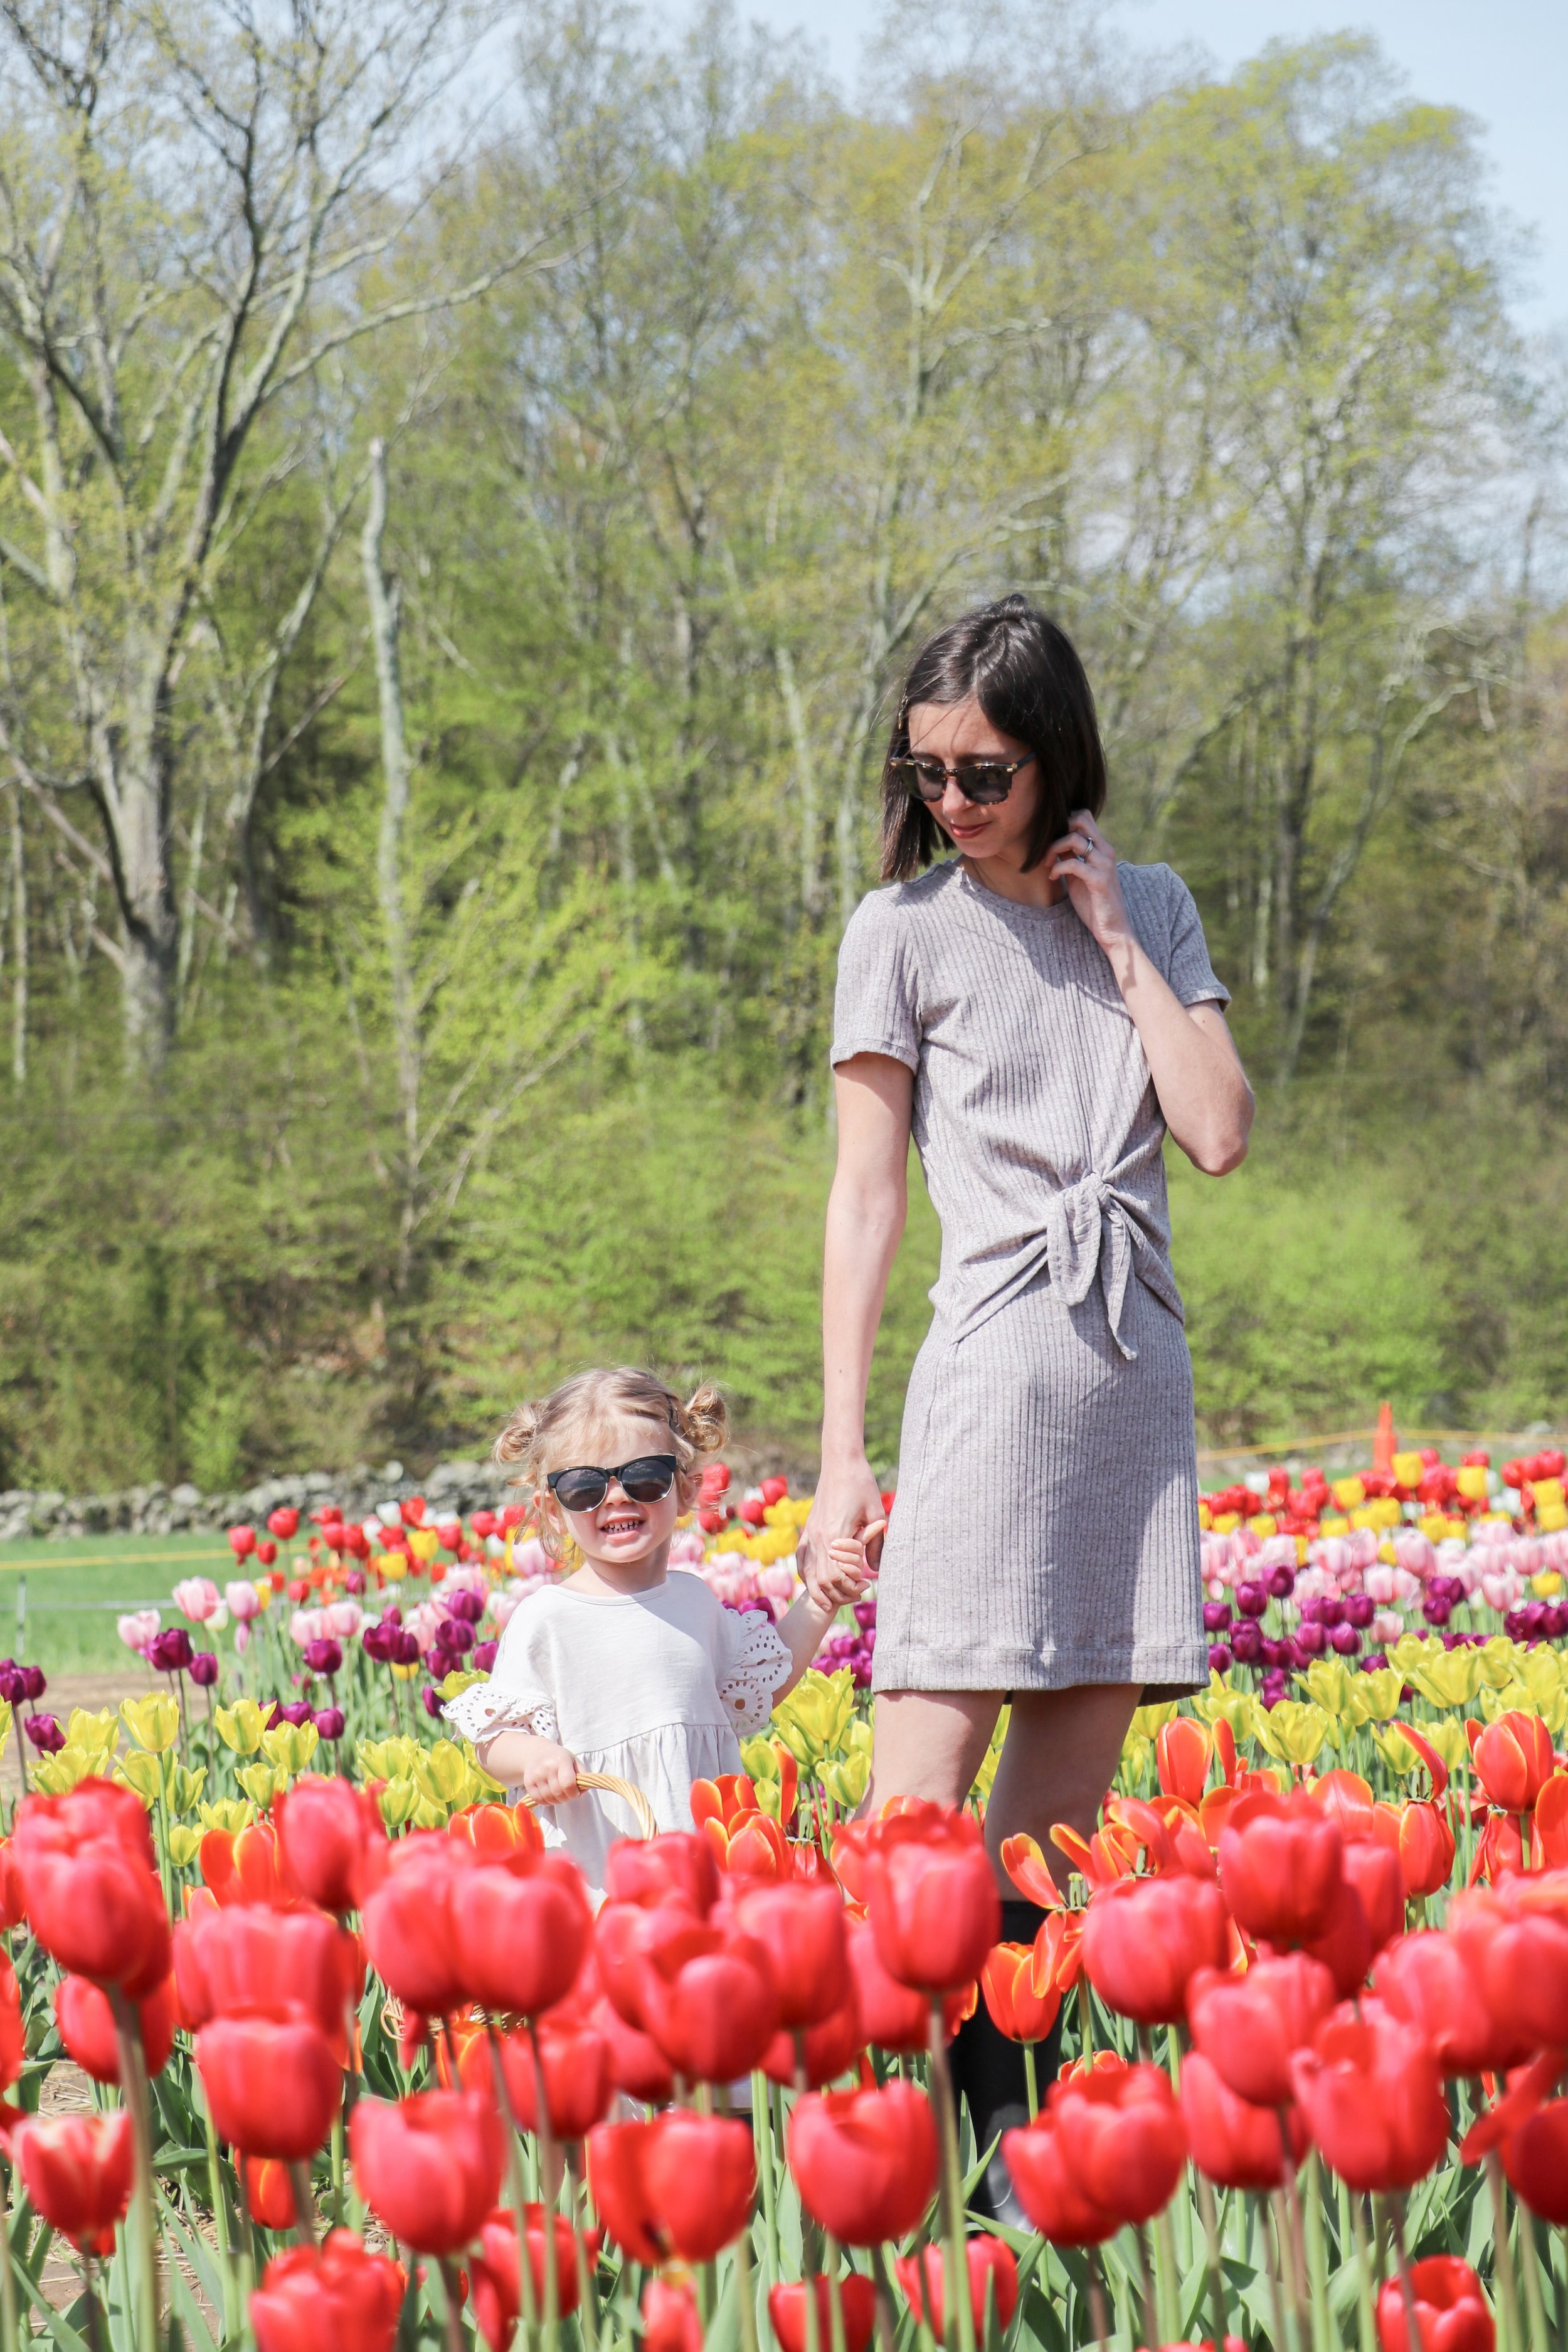
My original vision was to make a cute gathered dress for P, too. Or at least a peplum tee. But I had so little fabric left, the most I could squeeze out was this little cropped tee. That little belly sticking out a bit kiiiiills me. 

Review // Madam Sew ultimate presser foot kit

Recently, Madam Sew sent me one of their Ultimate Presser foot sets to try out. I was pretty excited because I only have and use two feet - my regular foot and my zipper foot. So this was pretty cool for me!

The presser foot set comes with 32 presser feet, a snap on adapter, an instruction manual, and a DVD with instructional videos. there is also an app you can download to see all the video tutorials and instructions, as well.  Both the written instructions and video tutorials were very helpful, especially with some of the feet/techniques I’ve never used before!

Most of the feet are snap-on, but work with both snap-on and screw-on sewing machines, because it comes with the bonus snap-on adapter for screw-on machines! *One thing to note, though - if you work on a Bernina, you will need an additional adapter (sold separately) because Bernina uses their own presser foot system. But its worth it, and totally simple, because once its on, you can use both screw-on feet and then also uses the snap-on adaper, too!

There are some feet that I’m personally excited to play around with. Including an adjustable bias binding foot, rolled hem/narrow hem foot, invisible zipper foot (no longer need to use my regular zipper foot!), piping foot, and a lot more! I’ve also been using the zig zag foot a lot recently. It has a big, clear open area in the center so you can see where you are stitching better! And if you work with sticky fabrics like leather, suede, plastic, etc - there are also a few different feet (roller foot and non-stick foot) to make sewing those fabrics easier.

In today’s post, I’m going to show a small sampling of 4 of the presser feet I played around with. And you can also head to my Instagram (@hollydollydarling), where I’m sharing videos of all of these samples in my stories! The story videos will be up for 24 hours, but I will save them in my highlights in my profile afterwards.

GATHERING FOOT

This foot is fun! I create gathers a lot for peplums, dresses, ruffles, etc. So this is the first one i jumped to try. Using this foot, it automatically creates gathers as you sew, no need to pull on threads and finger-gather. They are fixed-gathers though, so you can not adjust them after the fact. So you should play around on scraps before a project to find the settings for your perfect gather. By adjusting the stitch length and tension on your machine, you can create loose/farther spaced gathers, really full gather,s or anything in between. The dvd included with the presser foot kit (or the instructions in the app) is very helpful in explaining how to get the gathers you need.

The foot also has a little slot on it which allows you to gather one fabric AND attach it to another fabric at the same time!

see below for my results.

EDGE JOINING/STITCH IN THE DITCH FOOT

The main purpose of this foot is for joining the edges of two pieces of fabric together. I didn’t test that out. I was more excited about using this for stitching in the ditch - something I do a lot! The foot has a thin guide bar right in the center, which is lined up perfectly with the needle. As you sew, the bar glides right along in the ditch/seam, with the needle following behind - keeping your stitch-in-the-ditch stitching perfectly straight with barely any effort.

See below for my results.

STITCH GUIDE FOOT

This is a pretty simple foot, but a very useful one that I know I’ll find myself using quite often. Especially on jeans and pants that have a lot of topstitching! Topstitching is my nemesis. I’m not the most patient person, and my topstitching often ends up uneven and wavy. This foot has a small perpendicular bar that extends out, with markings ever 2mm. You can use these guides to sew parallel topstitching lines and keep them even and straight. And because there are so many lines, you can do it at any width you need, up to an inch.

Look how straight my 4 lines of topstitching lines are below.

OVERCAST FOOT

This foot requires a machine that has an overcast stitch setting (there are different kinds of overcast stitching, so your machine may have a few options). An overcast stitchh is done along the edge of fabric, to finish the raw edge , in a manner that looks similar to a serger/overlock finish. And this foot helps aid your machine when using that stitch! It has a guide bar to help keep the edge of your fabric lined up, as well as a center piece that helps create overlock stitching without rolling.

I’ve actually never used this stitch before, since I have a serger. But I thought it would e fun to show for those of you that don’t!

That’s all I am showing you for now! Don’t forget to check out videos of these samples in action on my Instagram stories and highlights (@hollydollydalring), and check out the full kit at Madam Sew here.

Handmade Wardrobe // palm leaf Cottesloe

swimsuit: Megan Nielsen Cottesloe swimsuit in an (old) swim fabric from Blackbird Fabrics

cover-up: hand drafted kimono in a rust gauze also from Blackbird Fabrics

Penny’s suit: Kortni Jeane

————————————————————-

Here is Cottesloe number 2! This is view B, which is your basic, no frills, one piece. Perfect coverage from top to bottom. Back has a bit of a scoop back, but not anywhere near as low as view A. Sorry I don’t have any photos of the back - I got sunburn reeeeeal bad a couple days before and my back was bright red with some not so cute tanlines, doh. This suit is fully lined with bust pads. which is nice, but as I mentioned in my other Cottelsoe post, I think I personally prefer a shelf bra. And also just like my other suit, I added 3/4” to the length for my long torso. That’s it! No other mods. Nothing fancy. The perfect basic suits for swimming laps, running after a toddler, or just for someone who likes some coverage.

And P.S - the sewalong is currently in progress over on Design Diary. So if you’re making any version of the Cottesloe suit and need some help with construction, head on over there!

Snapshots // magic kingdom and animal kingdom, 2019

Magic Kingdom outfits:

my top: thrifted Madewell

my pants: handmade Named Clothing Ninni Culottes in a light chambray

my ears: Target party section

Penny’s overalls: Pepper Kids

Penny’s tee and sneakers: June and January

Penny’s fanny pack: Target (girls, not toddler. I had to alter the waist strap. And I cut off the glittery bunny ears)

—————————————————————————

Long, photo heavy post alert!

Disney, year 2! It was so fun this year, with Penny being a year older. While there were still plenty of rides she couldn’t ride, she was more aware of what we wee doing and how much fun it was. She kept yelling “that was so much fun!” or “I like that!” after the rides. Especially the Barnstormer rollercoaster and teacups. It appears we a little thrill seeker on our hands. And dare I say, I may have finally started a liking in her for a Disney Princess! She lists the Little Mermaid ride as one of her other favorites, and she even got a Little Mermaid toy as a prize. You have no idea how happy this makes me! I love that she loves Cars and Mickey, but I was such a Little Mermaid fan when I was little.

At Magic Kingdom, we literally spent all day there. Got there right at rope drop at 9am, and stayed for the fireworks spectacular at 9pm. And surprisingly, we still didn’t hit all the rides that we could’ve, ha. Granted, we did ride some of Penny’s favorites multiple times, and we also stopped and sat down for her to take a 45 minute nap. But we spent most of our time in Fantasyland, hitting up every ride we could there. Also got a good spot for the parade, spent a bit of time on Main street picking out some prizes, managed to squeeze in a few rides in Tomorrowland, and then very quickly ran through Adventureland at the end. We love Magic Kingdom so much! If we only ever went to one theme park ever again, we would have no problem picking this one. Now if only it wasn’t so freakin expensive so we could do it all the time haha.

Scroll down for Animal Kingdom!

——————————————————————————————————————

Animal Kingdom outfits -

Mickey tees: Target

my skirt: handmade Megan Nielsen Wattle skirt (see original post)

Penny’s shorts: handmade by shortening a Hello Dear Kids pants pattern

Penny’s ears: DIY here

———————————————————————

This was Penny’s first time at Animal Kingdom, since we didn’t do it last year. Even though it doesn’t have nearly as many rides for her to ride, I still think she had fun! We discovered she reaaaaaally loves flamingos (had no idea!). She stood there and stared at them forever, and this girl never stands still. But she she just watched them and watched them, and cried every time we tried to leave them.

She also saw lots of animals on the safari (including a giraffe that walked right next to the jeep!), danced like crazy at the lion king show, helped played the drums with the street performers, met Mickey and Minnie (!!!), and had a blast in the dino dig yard. We did also spend a little bit of time in Pandora, which was pretty cool! I realize now I never took any pictures in that area.

Handmade Wardrobe // Snapshots // Ruska dress at Wicked Tulips

dress: Named Clothing Breaking the Pattern Ruska knot dress a rib knit from Harts Fabric

scissors hair clip: Turtle Story

Penny’s dress: Gymboree

both our boots: Hunter boots

——————————————————————

We may be kind of crazy, but the day after returning from vacation, we jumped right back in the car and drove over an hour down to Wicked Tulips farm in Rhode Island. I’ve been wanting to visit the last couple years, but they are only open for a short couple of week period each year, and I didn’t want to miss the opportunity again!

It was the perfect opportunity to wear my new Ruska dress that I finished right before leaving for Florida. It’s my first make form the Breaking The Pattern book, which I’ve been holding onto since November. I knew the Ruska knot dress would be my first make because it is sooooo my style. Probably the main reason I wanted the book, ha. For having such an interesting detail, it was actually a surprisingly quick sew. I was able to finish it ,from start to finish, in one Penny nap time, which doesn’t happen often. And I also didn’t have to make any modifications! Perfect for me, straight form the pattern. My only regret is not having enough fabric left to make a matching outfit for Penny, of course haha.

Now back to Wicked Tulips. For those of you in the New England area that want to visit next year (I don’t think they are open past this weekend), here are my two tips:

  1. Wear rain boots, or hiking boots, or any boots or shoes you don’t mind getting muddy. Definitely don’t wear fancy shoes. The parking lot, the flower fields - its all muddy. Even in rainboots, Penny slipped and fell right on her butt in the mud…in her cream colored dress.

  2. Expect A LOT of people. My photos are deceiving. The crowd is INTENSE. We went right at opening on a Wednesday morning, and it was still insane. I knew this going in, so I fully expected a lot of people, and a lot of people in the background of my photos. So it wasn’t upsetting. The reason you can’t tell in my photos is because I decided, after the fact, to try out some of my photoshop skills and try removing as many background people as I could! They’re not perfect, but I’m pretty proud of what I did. It was good editing practice.

Handmade Wardrobe // gingham Cottesloe

Swimsuit: Megan Nielsen Patterns Cottesloe swim in a gingham fabric from Raspberry Creek Fabrics

Penny: swim top from Kortni Jeane, sunnies from Amazon

—————————————— 

Gah, I’m so excited to finally be able to share some shots of my Cottesloe swimsuits! If you follow me on Instagram, you’ve seen some flat lay and mirror selfie shots, but I was finally able to wear them IRL for some actual swimming while we were on vacation in Florida. First up - my grey gingham View A one piece with back ties! This is my favorite of all three suits I made. It fits like a dream and feels so buttery soft. It’s got the perfect one piece coverage in the front and along the bum, but with a bit of some surprise skin with the low back. I also included a shelf bra with bust pads in this one. Bust pads are a must for me! Not to add size (it doesn’t help me anyway, ha), but for even-ness, and modesty. I did a full lining with bust pads in the other two suits (which you will see later), but I’ve decided that I like the shelf bra of this one better, and will probably continue with this method for future me-made swimsuits. The only pattern modification I made is adding about 3/4 - 1” to the torso length, just as I do for my Rowan bodysuits #longtorsoproblems.

The Cottelsoe sewalong starts real soon over on Design Diary, so keep a look out for that!

What do you think? Isn’t it a dream?!

Also - throwing in a few pics of my kid, because she cute.

Handmade Wardrobe // gathered Eucalypt

my dress: Megan Nielsen Patterns Eucalypt dress with a gathered waist hack (tutorial here)

Penny’s top: self drafted

fabric: double gauze from StoneMountain & Daughter Fabrics

my top: thrifted

purse: Free People

shoes: Target

——————————————— 

Hey everyone! I’m just popping in quickly from Florida to share my gathered waist Eucalypt dress! I wrote up the tutorial hack over on Design Diary, and it can be used to make a dress like this, a maternity dress, drop-waist dress, or peplum tank! So head on over there for the instructions.  

Handmade Wardrobe // spring blooms for two

 my dress: Closet Case Patterns Kalle shirtdress

Penny’s dress: Hello Dear Kids pleated top dress

fabric for both: floral twill c/o Measure Fabric

Penny’s jacket: H&M 

————————————————————————

When the ladies at Measure Fabric gave me a peek at this fabric, they suggested the Kalle shirt dress as a good pattern fit, and I loved the idea so much, so I rolled with it! I had never made the pattern before, but it has been on my list. It came together surprisingly fast, for being a collared, full placket shirt with clean finishes on the inside. Also, It is a little shorter than I normally like my dresses, but that’s my fault for not making a muslin or testing out the length before cutting into my main fabric {face palm}. But nothing some little shorts underneath, or leggings on cooler days, can’t fix! 

And the Measure ladies were right - this fabric was perfect for the project! It’s a twill that has enough weight to be pants or shorts or a skirt, but still a beautiful drape to work as shirt dress or pretty skirt. It’s got a slightly slubby texture, yet a silky soft touch, and it sewed up like a dream. Probably why I was able to zoom through it so fast! 

And of course, with a little maneuvering and puzzle piecing, I was able to squeeze out a matching look for P. I ran out of fabric for the pleated front piece, so I used some scraps of this cotton/linen dotted fabric that was left over from a random project. I actually like the contrast even better than if I would’ve used all the floral fabric!

DIY no-sew Mickey Mouse ears

We’re heading back to Disney World in a few days, and I whipped up this quick DIY for Penny for the occasion! She has her classic Mickey ears hat with her name embroidered on it that we got last year, and she will be wearing it to Magic Kingdom again. But I wanted to have something different and special for her to wear specifically to Animal Kingdom on this trip, and I didn’t want to pay a ridiculous amount of $$ for a specialty headband she’ll only wear to one park. So I made my own! And for less than $8.

This is a super quick and easy Mickey ears headband. Nothing fancy. Won’t look as expensive and nice as the store bought ones. But it gets the job done. No sewing required. Just a little hot glue.

You can make them animal print like I did, basic black, or any color or pattern you want. Good for if you want ears for the park but your on a budget, or you could make a bunch as favors for a Mickey themed party!

S U P P L I E S :

  • stiff craft felt or thicker craft foam (you can use floppy felt or thinner material, but you’ll need another layer in between to keep the ears upright, like cardboard or stuffing. I used the stiffer craft felt because it was sturdy enough to stay standing up without anything else. I got this giraffe print one at Hobby Lobby . you could also use fabric, but again would need a filler and would require sewing. A different tutorial all together).

  • basic, thin headband

  • hot glue gun

  • scissors

  • optional: small fake flowers (could also use a fabric bow for Minnie ears, or anything else decorative you could think of)

Decide how big you want your ears. If you find a round household object thats the perfect size, you can use it to trace the perfect circle on a piece of paper.

But don’t draw a complete circle! Leave an opening about 2” wide at the bottom, and draw tiny 1/4” straight lines at the edges of the opening

Fold your felt in half, and trace your open circle pattern on the fold, twice.

Cut each one out.

Since you cut on the fold, you will now have two peanut shapes.

Find your perfect placement for your first ear, and lightly mark it on the headband (I used chalk).

Add a line of hot glue right in the middle of the peanut shape.

Stick the line of glue along the bottom of the headband, making sure you are lined up with your placement markings from before. Press and hold until glue cooled/dried and sticking.

Now glue around the entire circular edge of one ear/peanut half.

Fold the ear in half, being careful to line up the edges. Press and hold until glue is dried and they are stuck together.

Ta-da! one ear done! Carefully trim around the edge if there are any spots that didn’t line up perfectly, or if there is any glue strings hanging out.

Repeat for the second ear.

Now its time to decorate! If you are adding florals like I did - pull some of the fake flowers off of their stems.

Trim off the green stub from the back, so that the flower is as flat as possible in the back. Add a bit of hot glue right in the middle.

Stick your flowers to your headband however you desire!

I hid the visible glue spots in the back of the headband by pulling some of the flower petals down over them. Easy-peasy! If you are using flowers that can’t do that, or if you are putting a bow or something else on, You could glue a thin ribbon on top to cover up the hot glue and imperfections.

handmade wardrobe // 32 and a handmade re-wear

top: Simplicity 8381

culottes: Megan Nielsen Tania culottes

hair clips: Fenna and Fei

shoes: Swedish Hasbeens

————————————————————————

32.

It was my birthday the other day! I didn’t have time to make a new birthday outfit (so many other projects going on right now!), so I pulled some of my favorite old makes from my closet. You’ve seen this top posted here, and the culottes posted here. Going to keeps this short, since this is a handmade repeat, but I love how these two pieces look together. Especially for pulling them out and pairing them together at last minute!