Recently, Madam Sew sent me one of their Ultimate Presser foot sets to try out. I was pretty excited because I only have and use two feet - my regular foot and my zipper foot. So this was pretty cool for me!
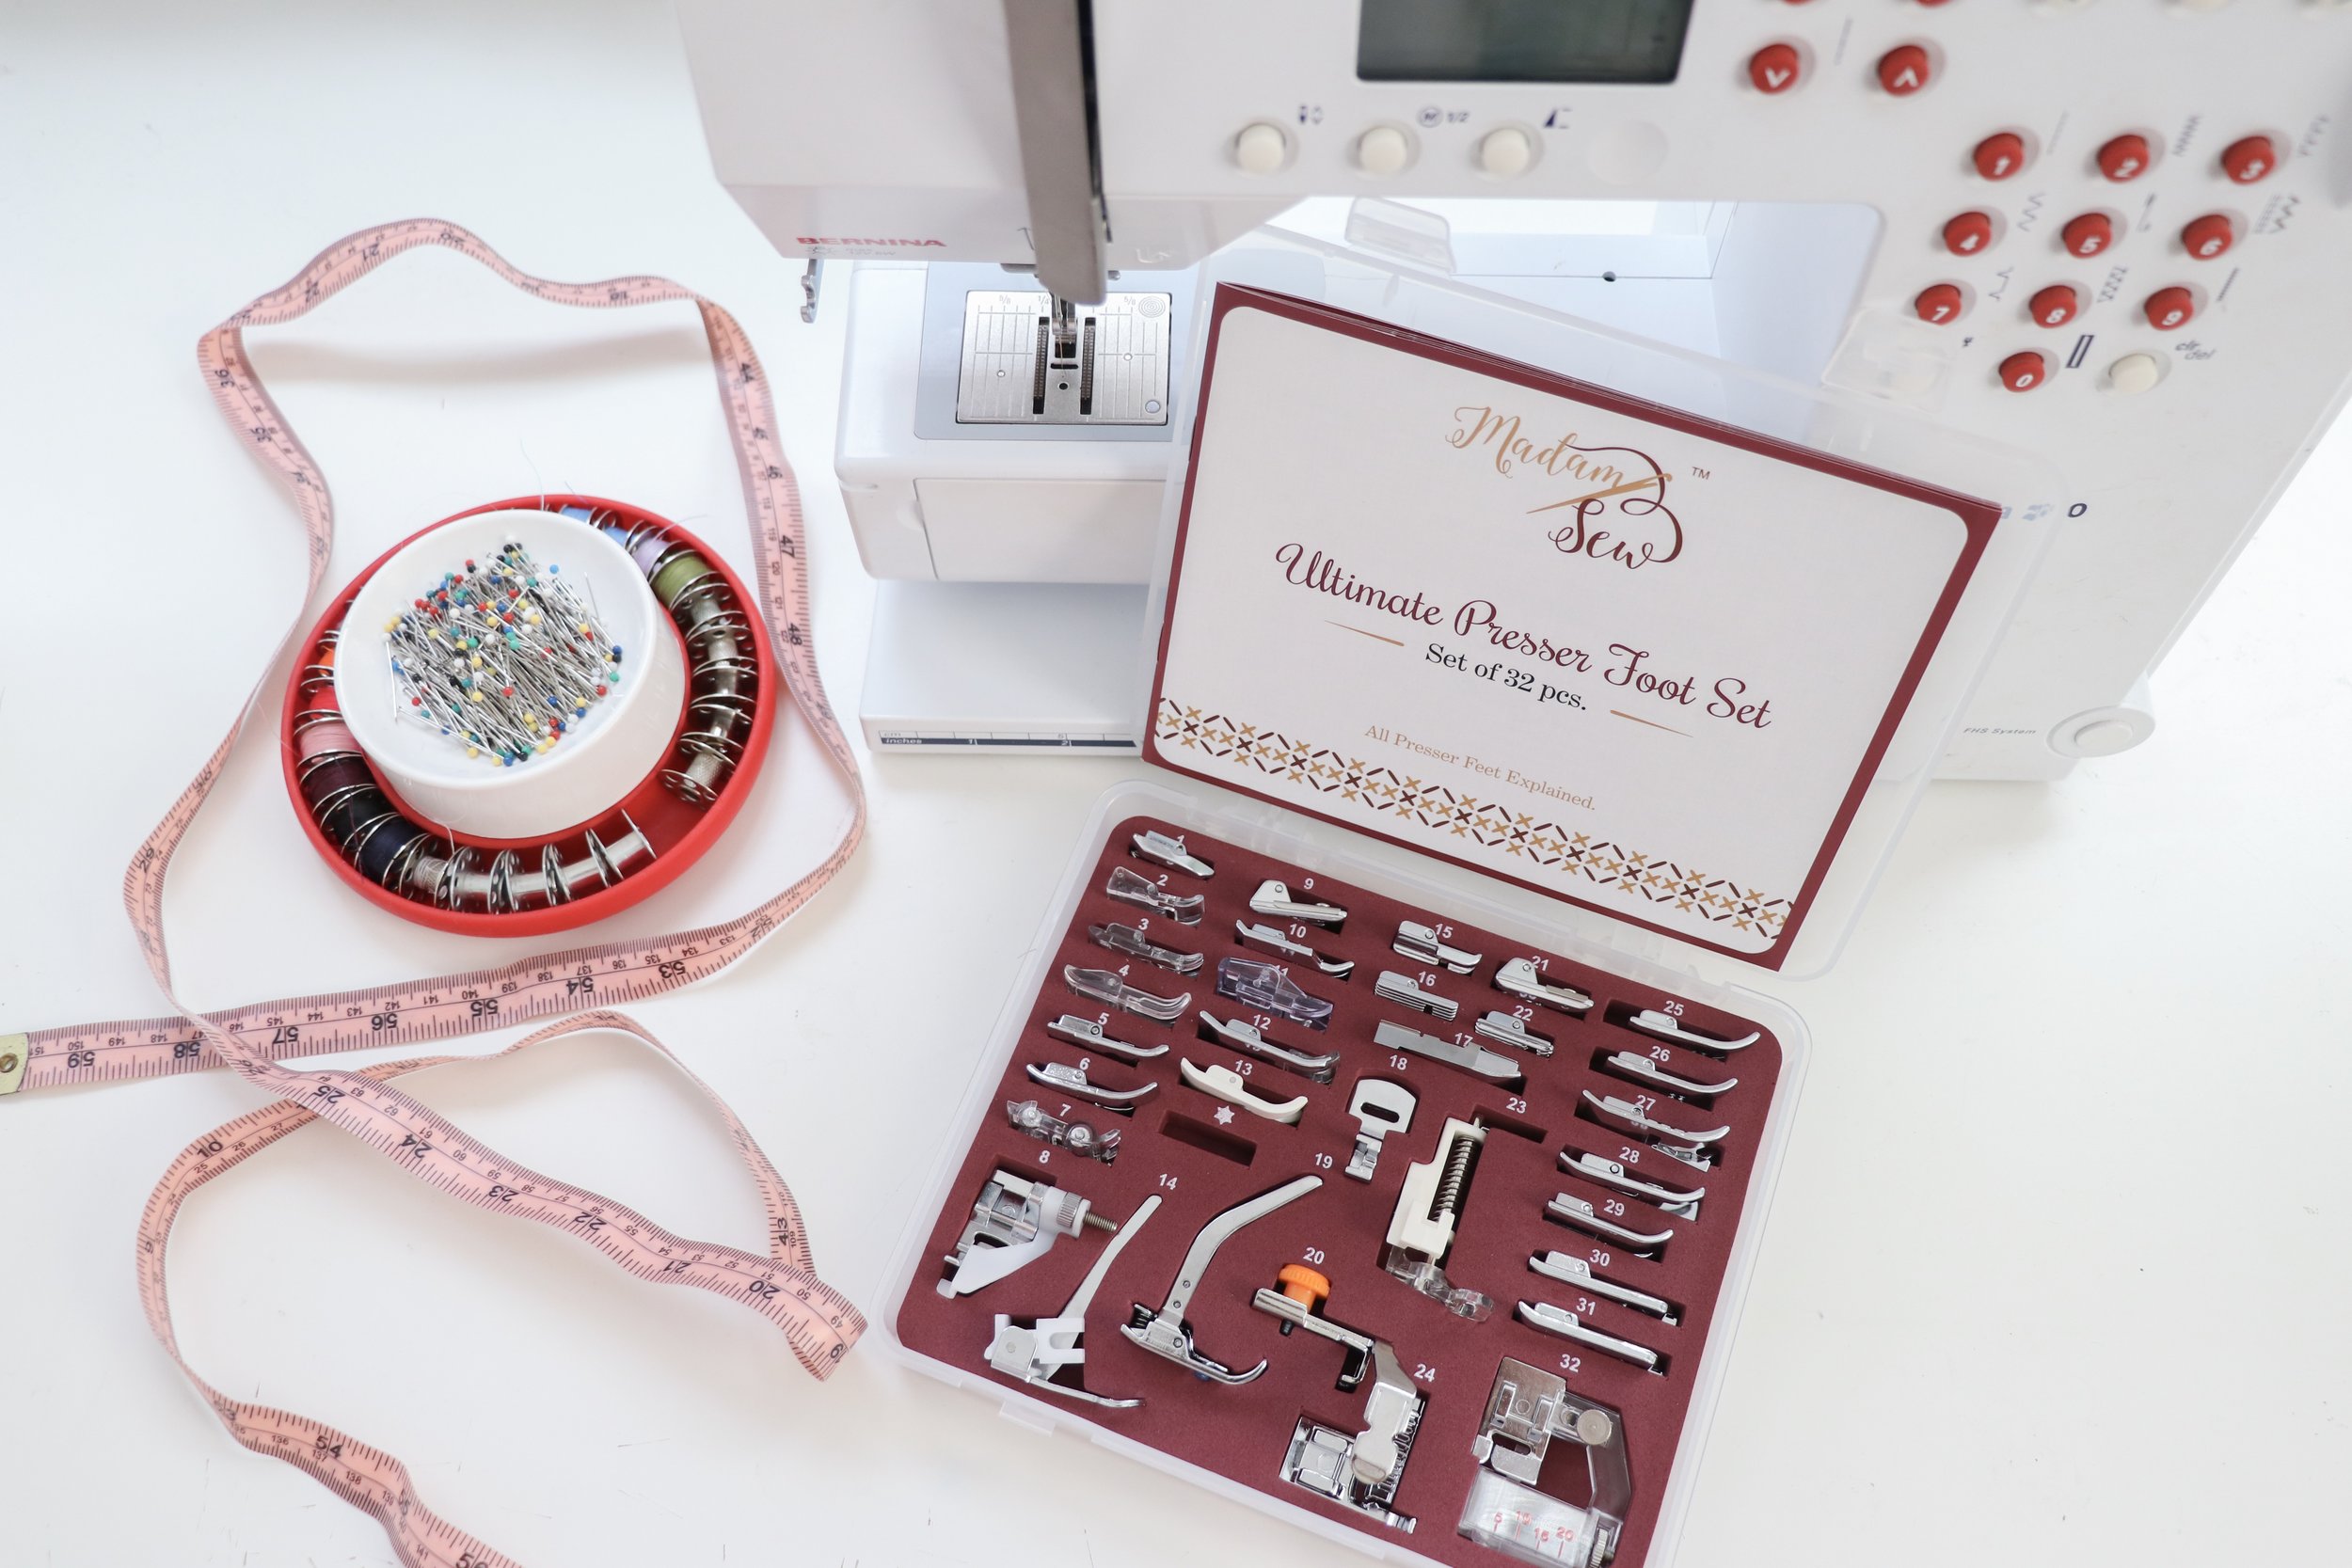
The presser foot set comes with 32 presser feet, a snap on adapter, an instruction manual, and a DVD with instructional videos. there is also an app you can download to see all the video tutorials and instructions, as well. Both the written instructions and video tutorials were very helpful, especially with some of the feet/techniques I’ve never used before!
Most of the feet are snap-on, but work with both snap-on and screw-on sewing machines, because it comes with the bonus snap-on adapter for screw-on machines! *One thing to note, though - if you work on a Bernina, you will need an additional adapter (sold separately) because Bernina uses their own presser foot system. But its worth it, and totally simple, because once its on, you can use both screw-on feet and then also uses the snap-on adaper, too!
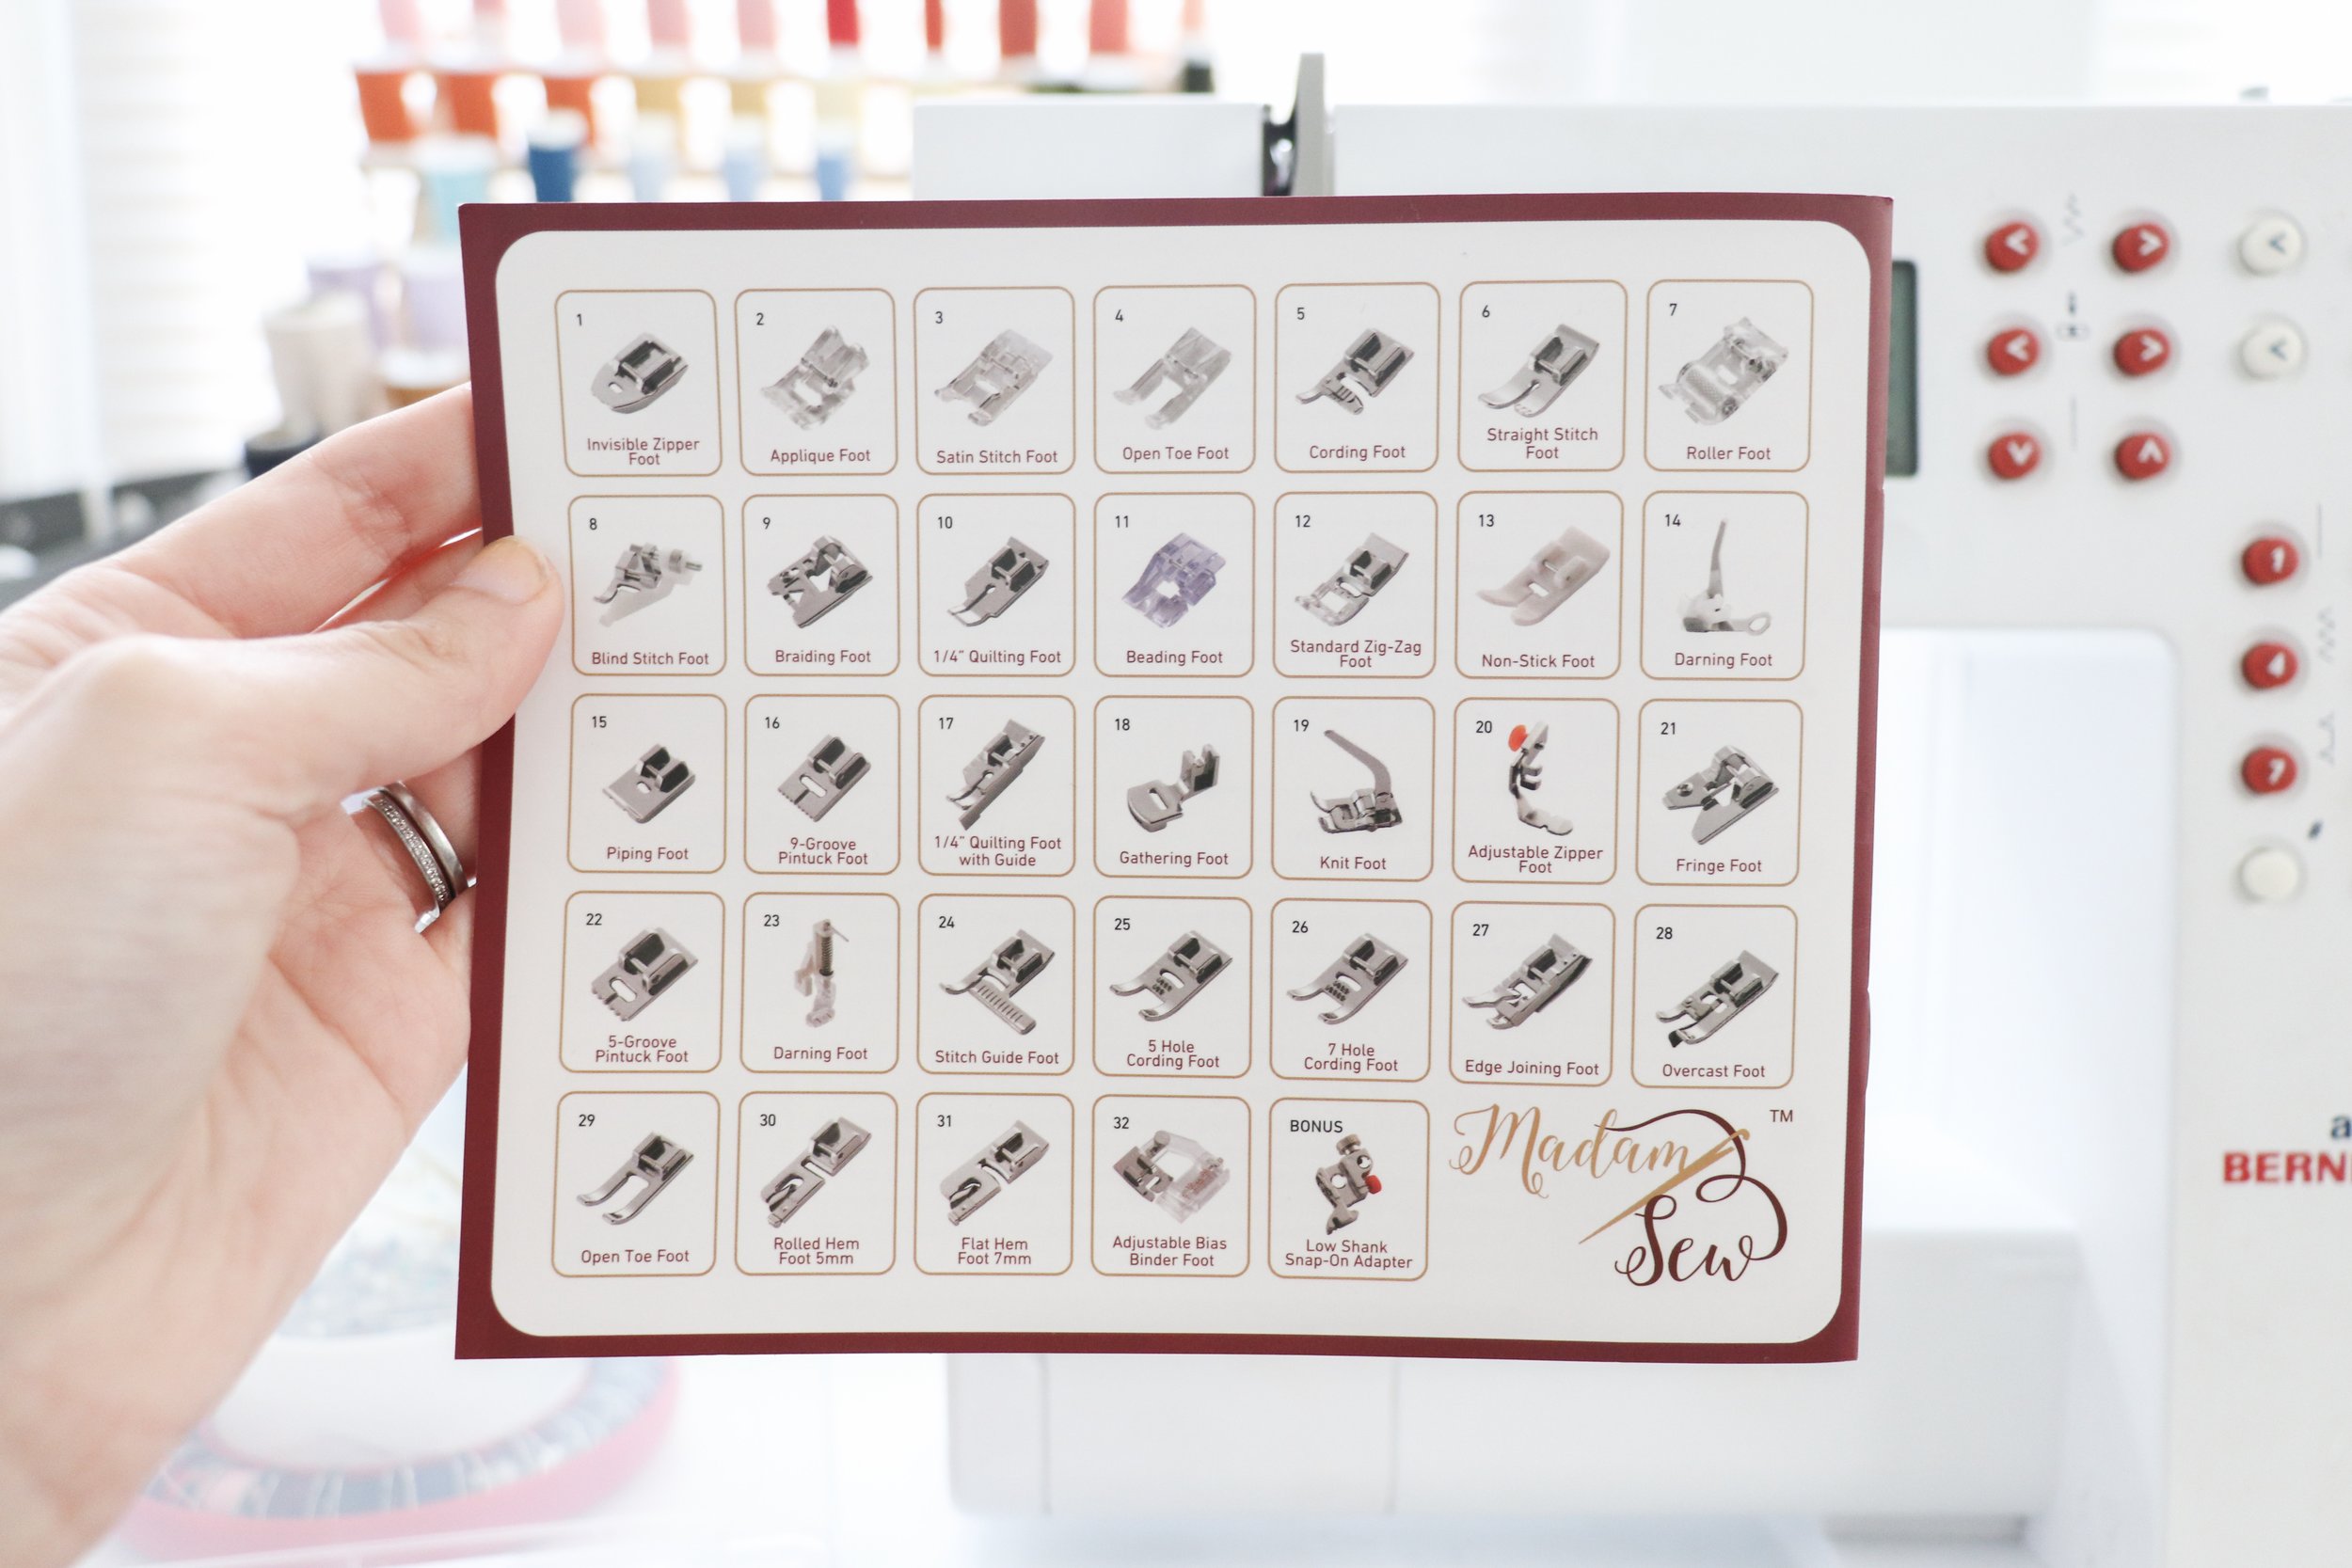
There are some feet that I’m personally excited to play around with. Including an adjustable bias binding foot, rolled hem/narrow hem foot, invisible zipper foot (no longer need to use my regular zipper foot!), piping foot, and a lot more! I’ve also been using the zig zag foot a lot recently. It has a big, clear open area in the center so you can see where you are stitching better! And if you work with sticky fabrics like leather, suede, plastic, etc - there are also a few different feet (roller foot and non-stick foot) to make sewing those fabrics easier.
In today’s post, I’m going to show a small sampling of 4 of the presser feet I played around with. And you can also head to my Instagram (@hollydollydarling), where I’m sharing videos of all of these samples in my stories! The story videos will be up for 24 hours, but I will save them in my highlights in my profile afterwards.
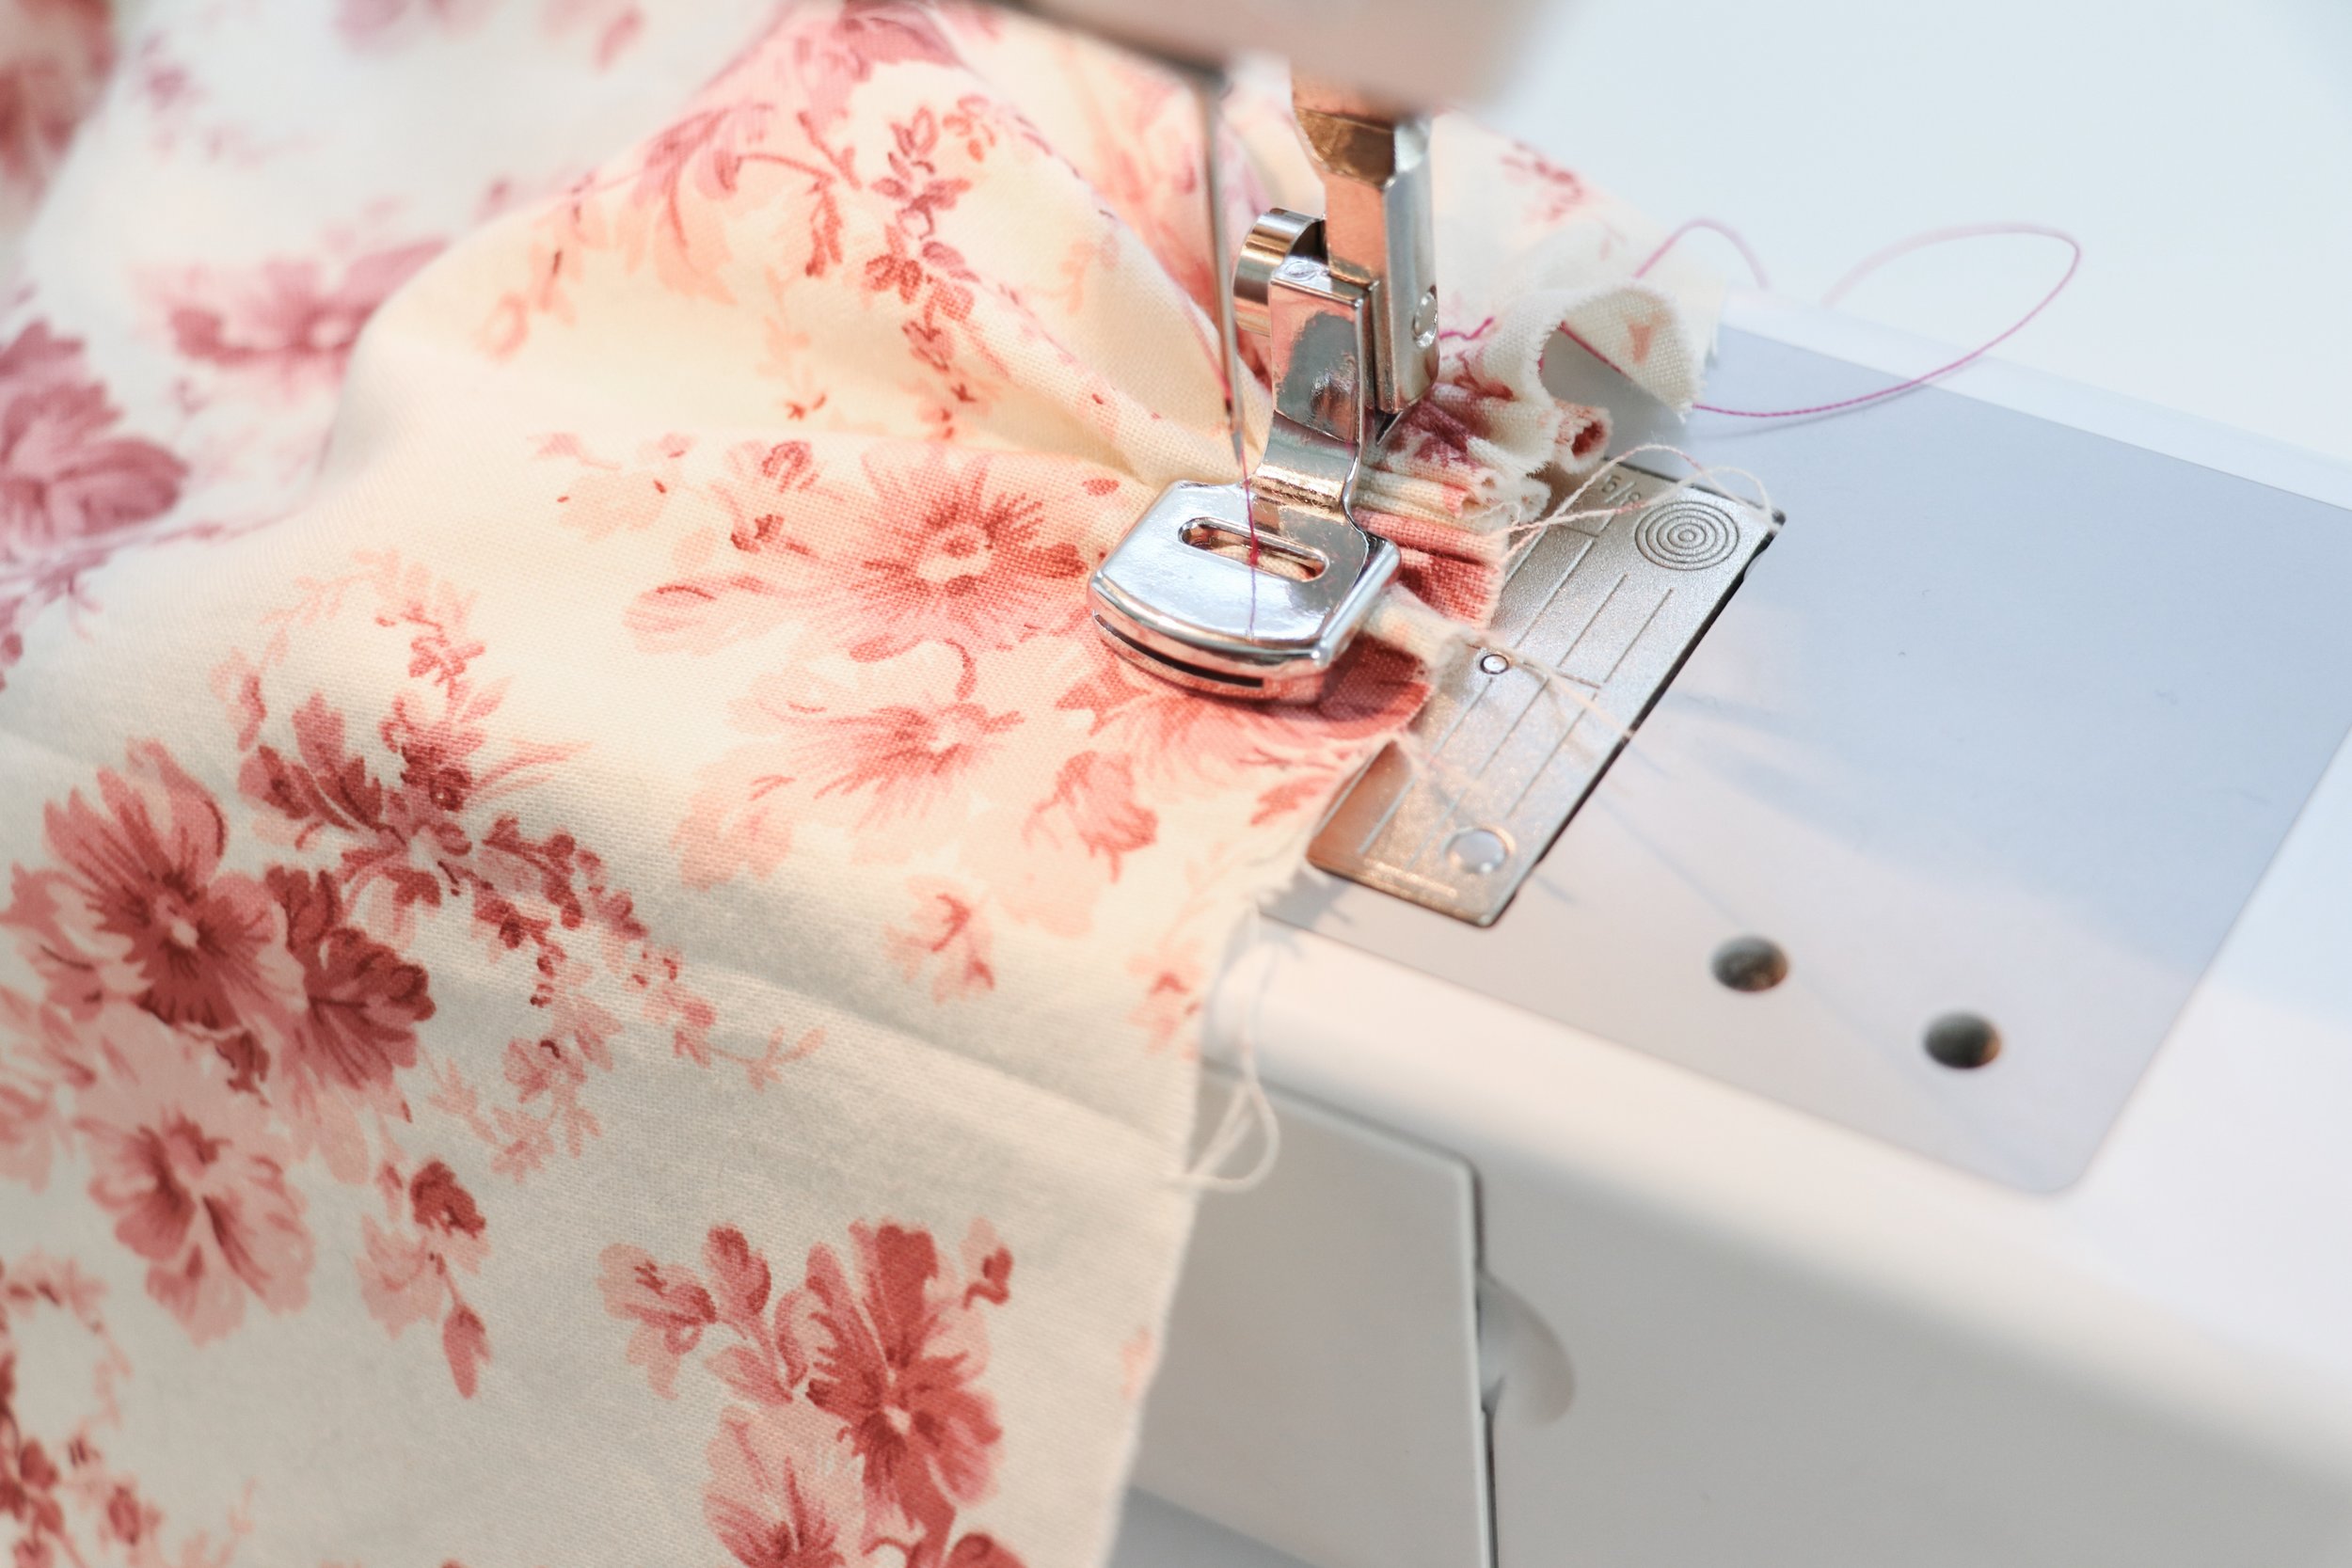
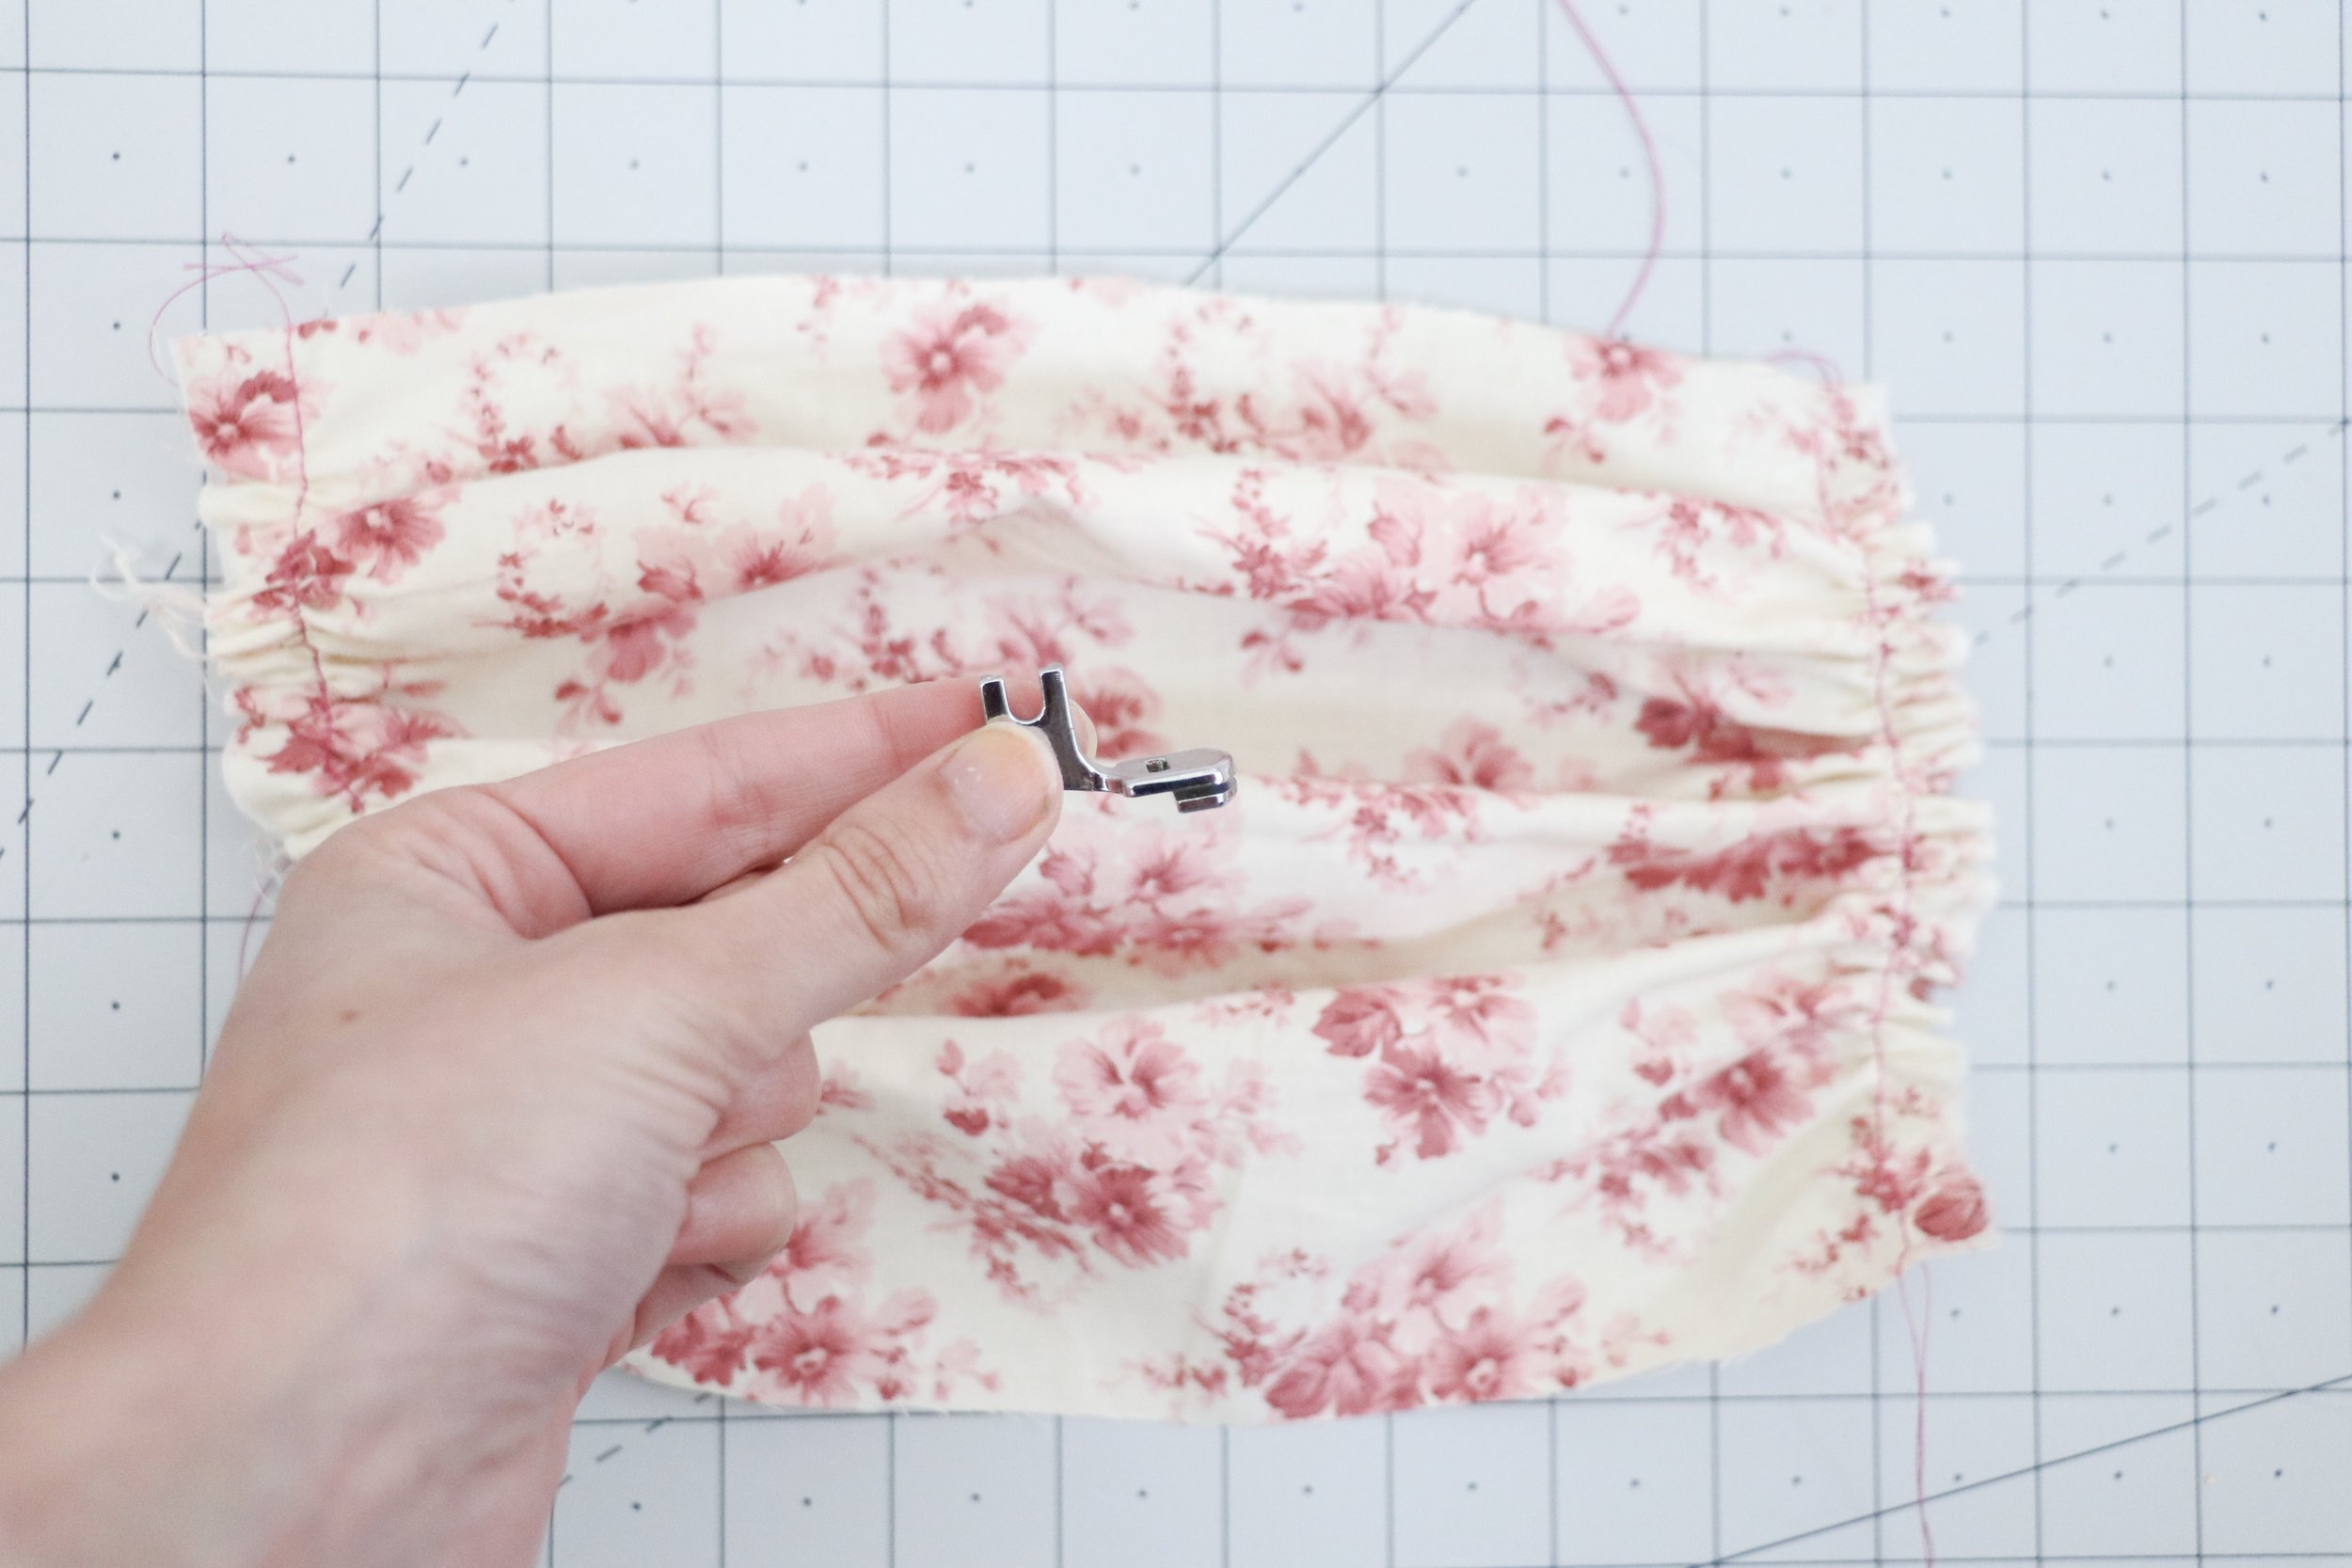
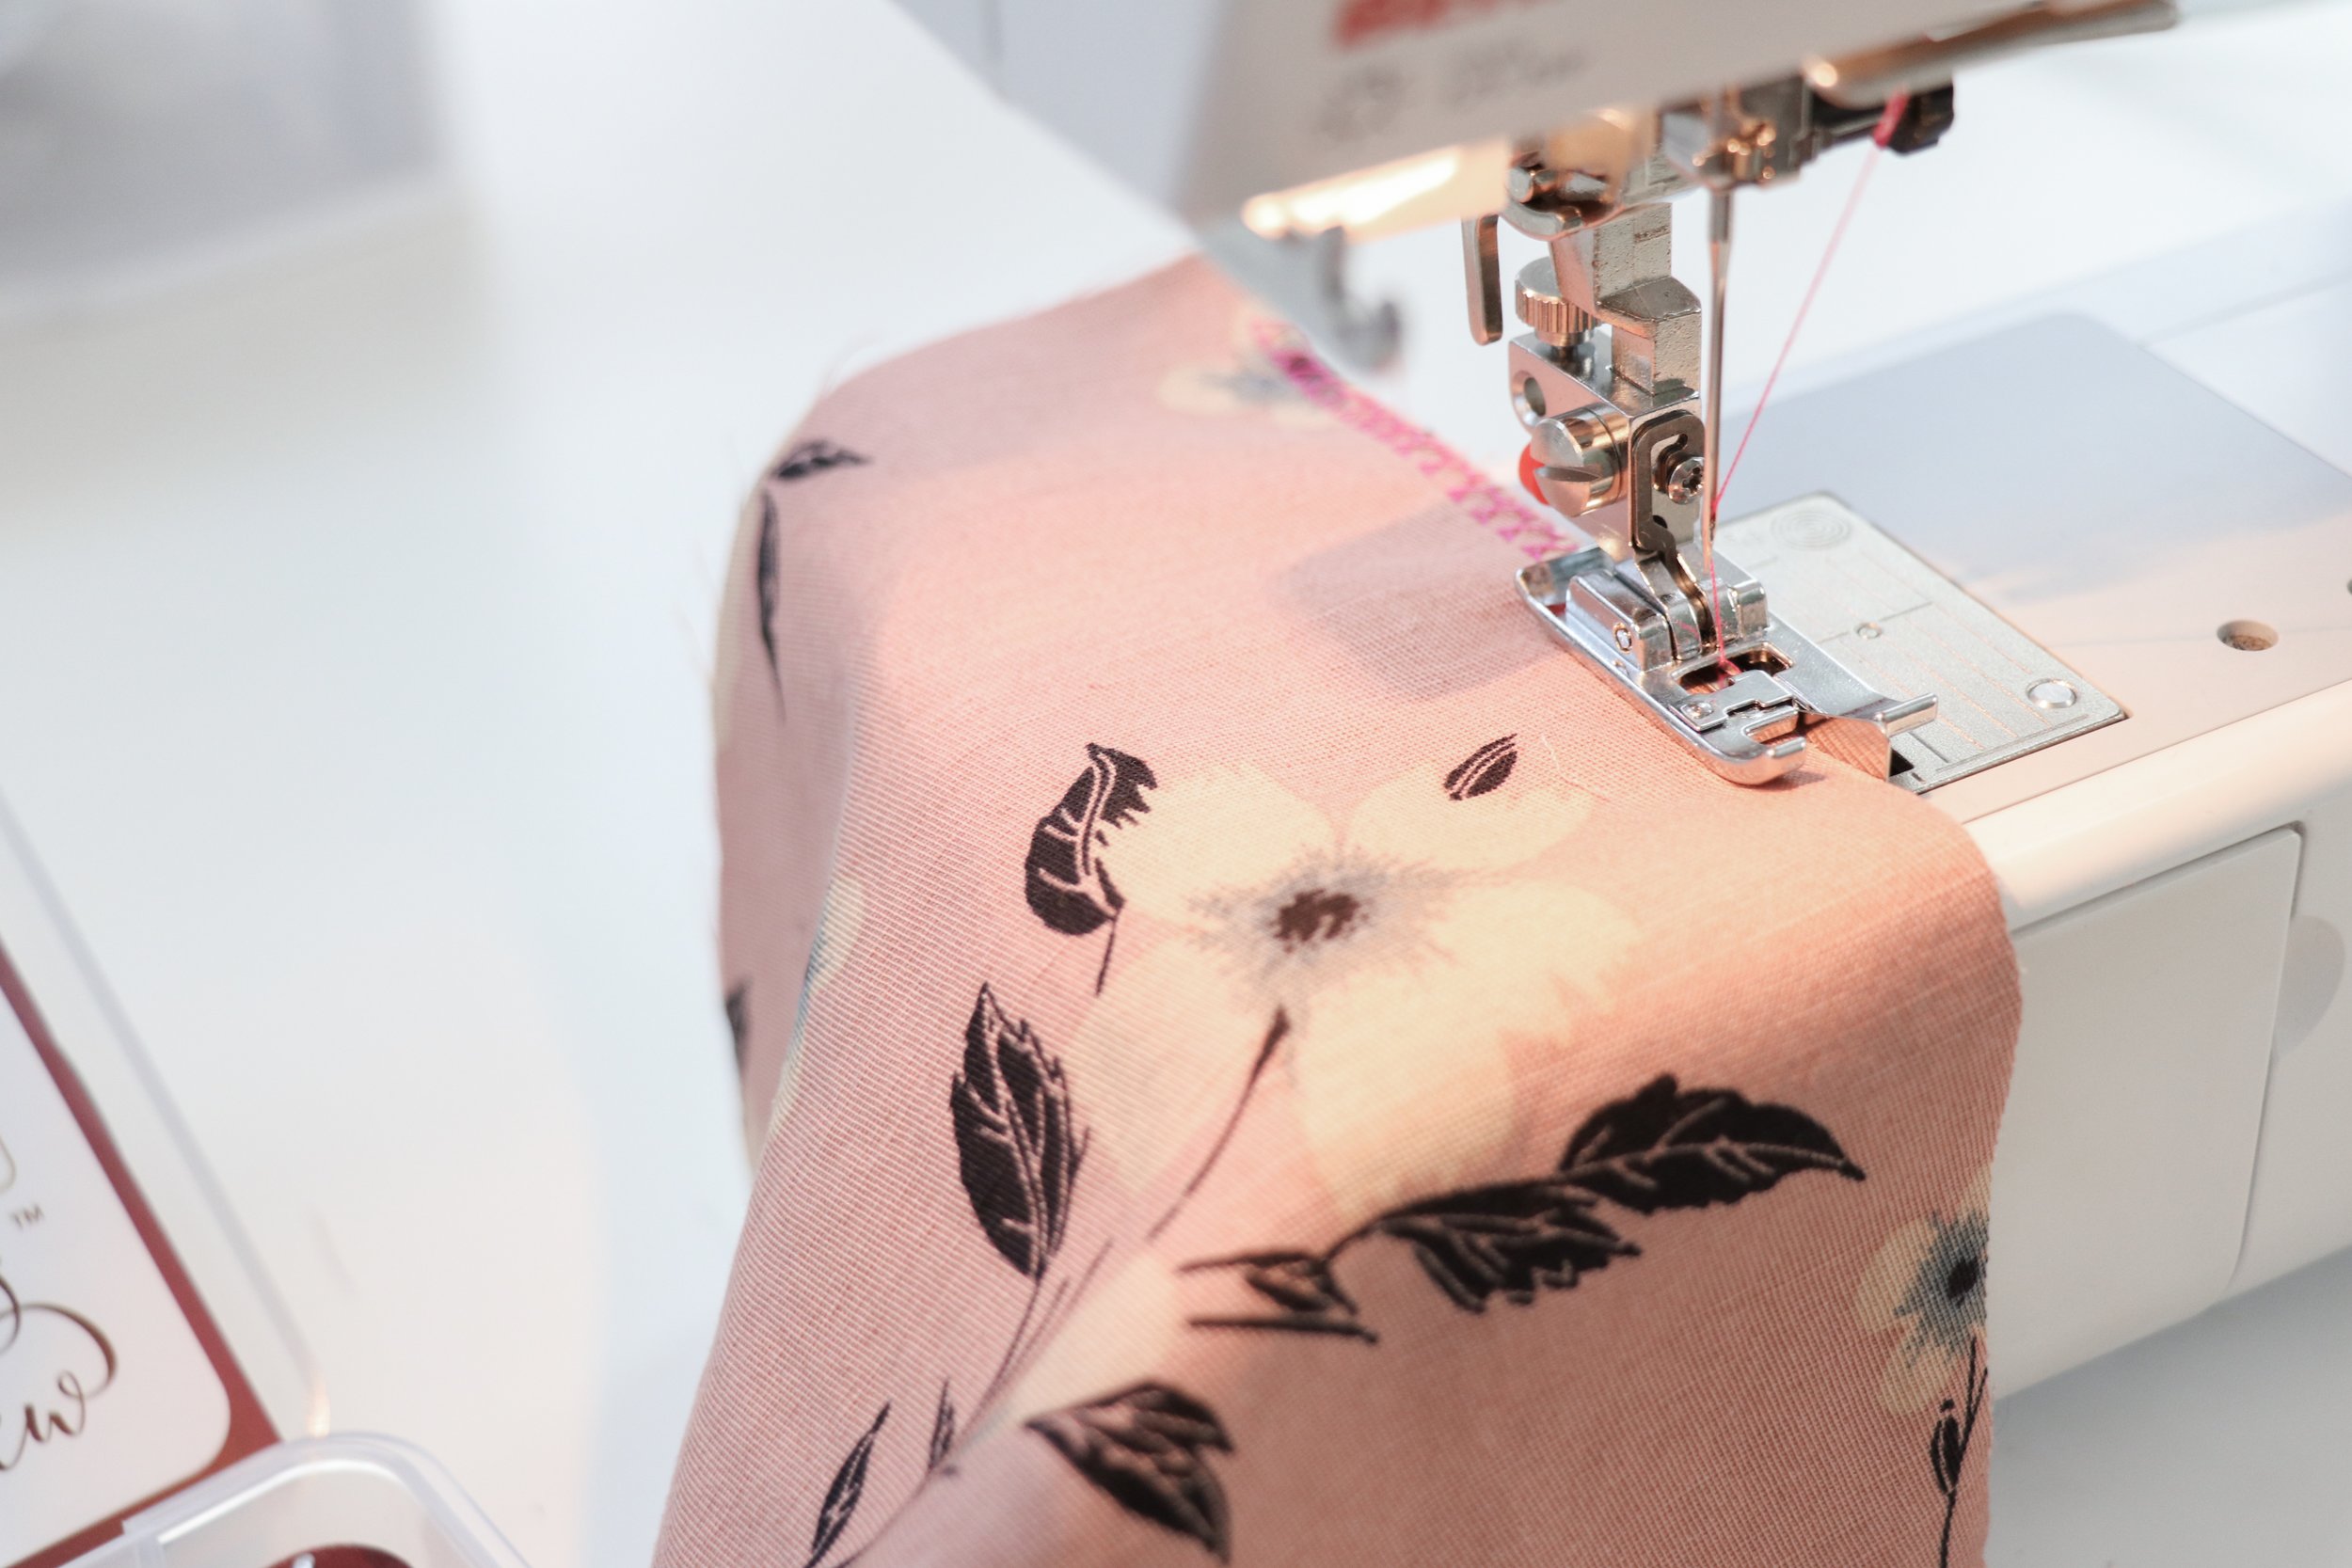
GATHERING FOOT
This foot is fun! I create gathers a lot for peplums, dresses, ruffles, etc. So this is the first one i jumped to try. Using this foot, it automatically creates gathers as you sew, no need to pull on threads and finger-gather. They are fixed-gathers though, so you can not adjust them after the fact. So you should play around on scraps before a project to find the settings for your perfect gather. By adjusting the stitch length and tension on your machine, you can create loose/farther spaced gathers, really full gather,s or anything in between. The dvd included with the presser foot kit (or the instructions in the app) is very helpful in explaining how to get the gathers you need.
The foot also has a little slot on it which allows you to gather one fabric AND attach it to another fabric at the same time!
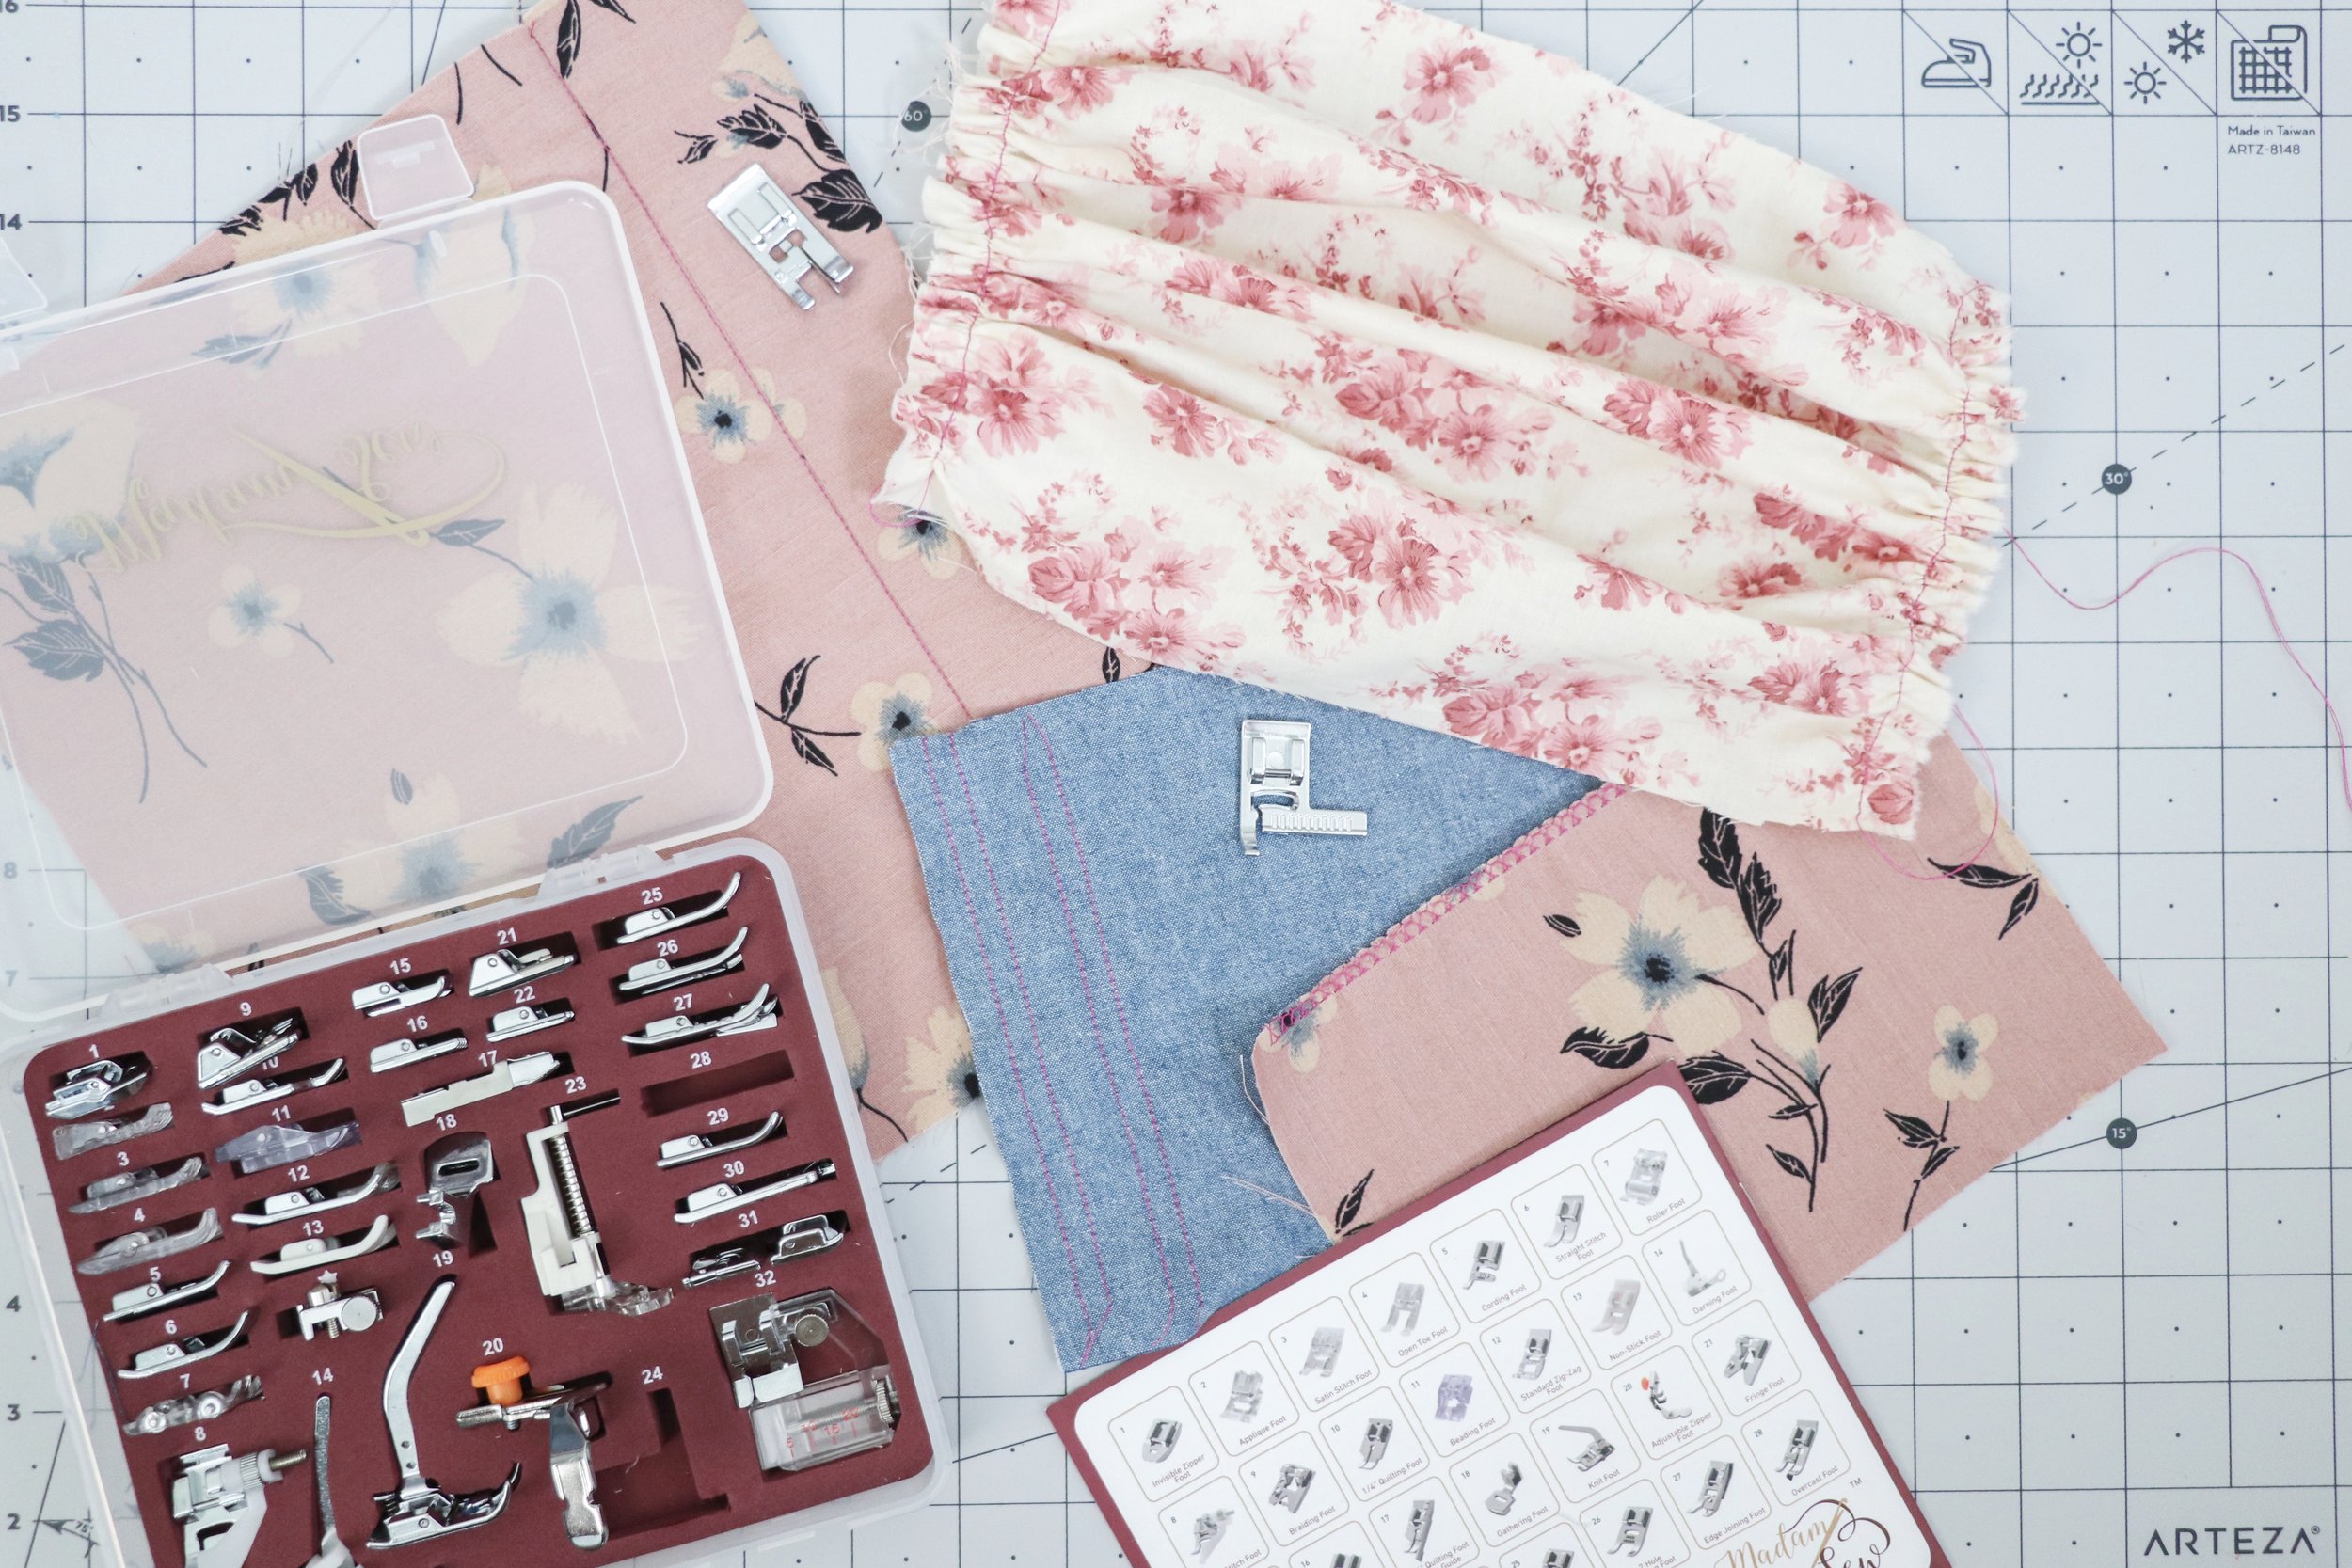
see below for my results.
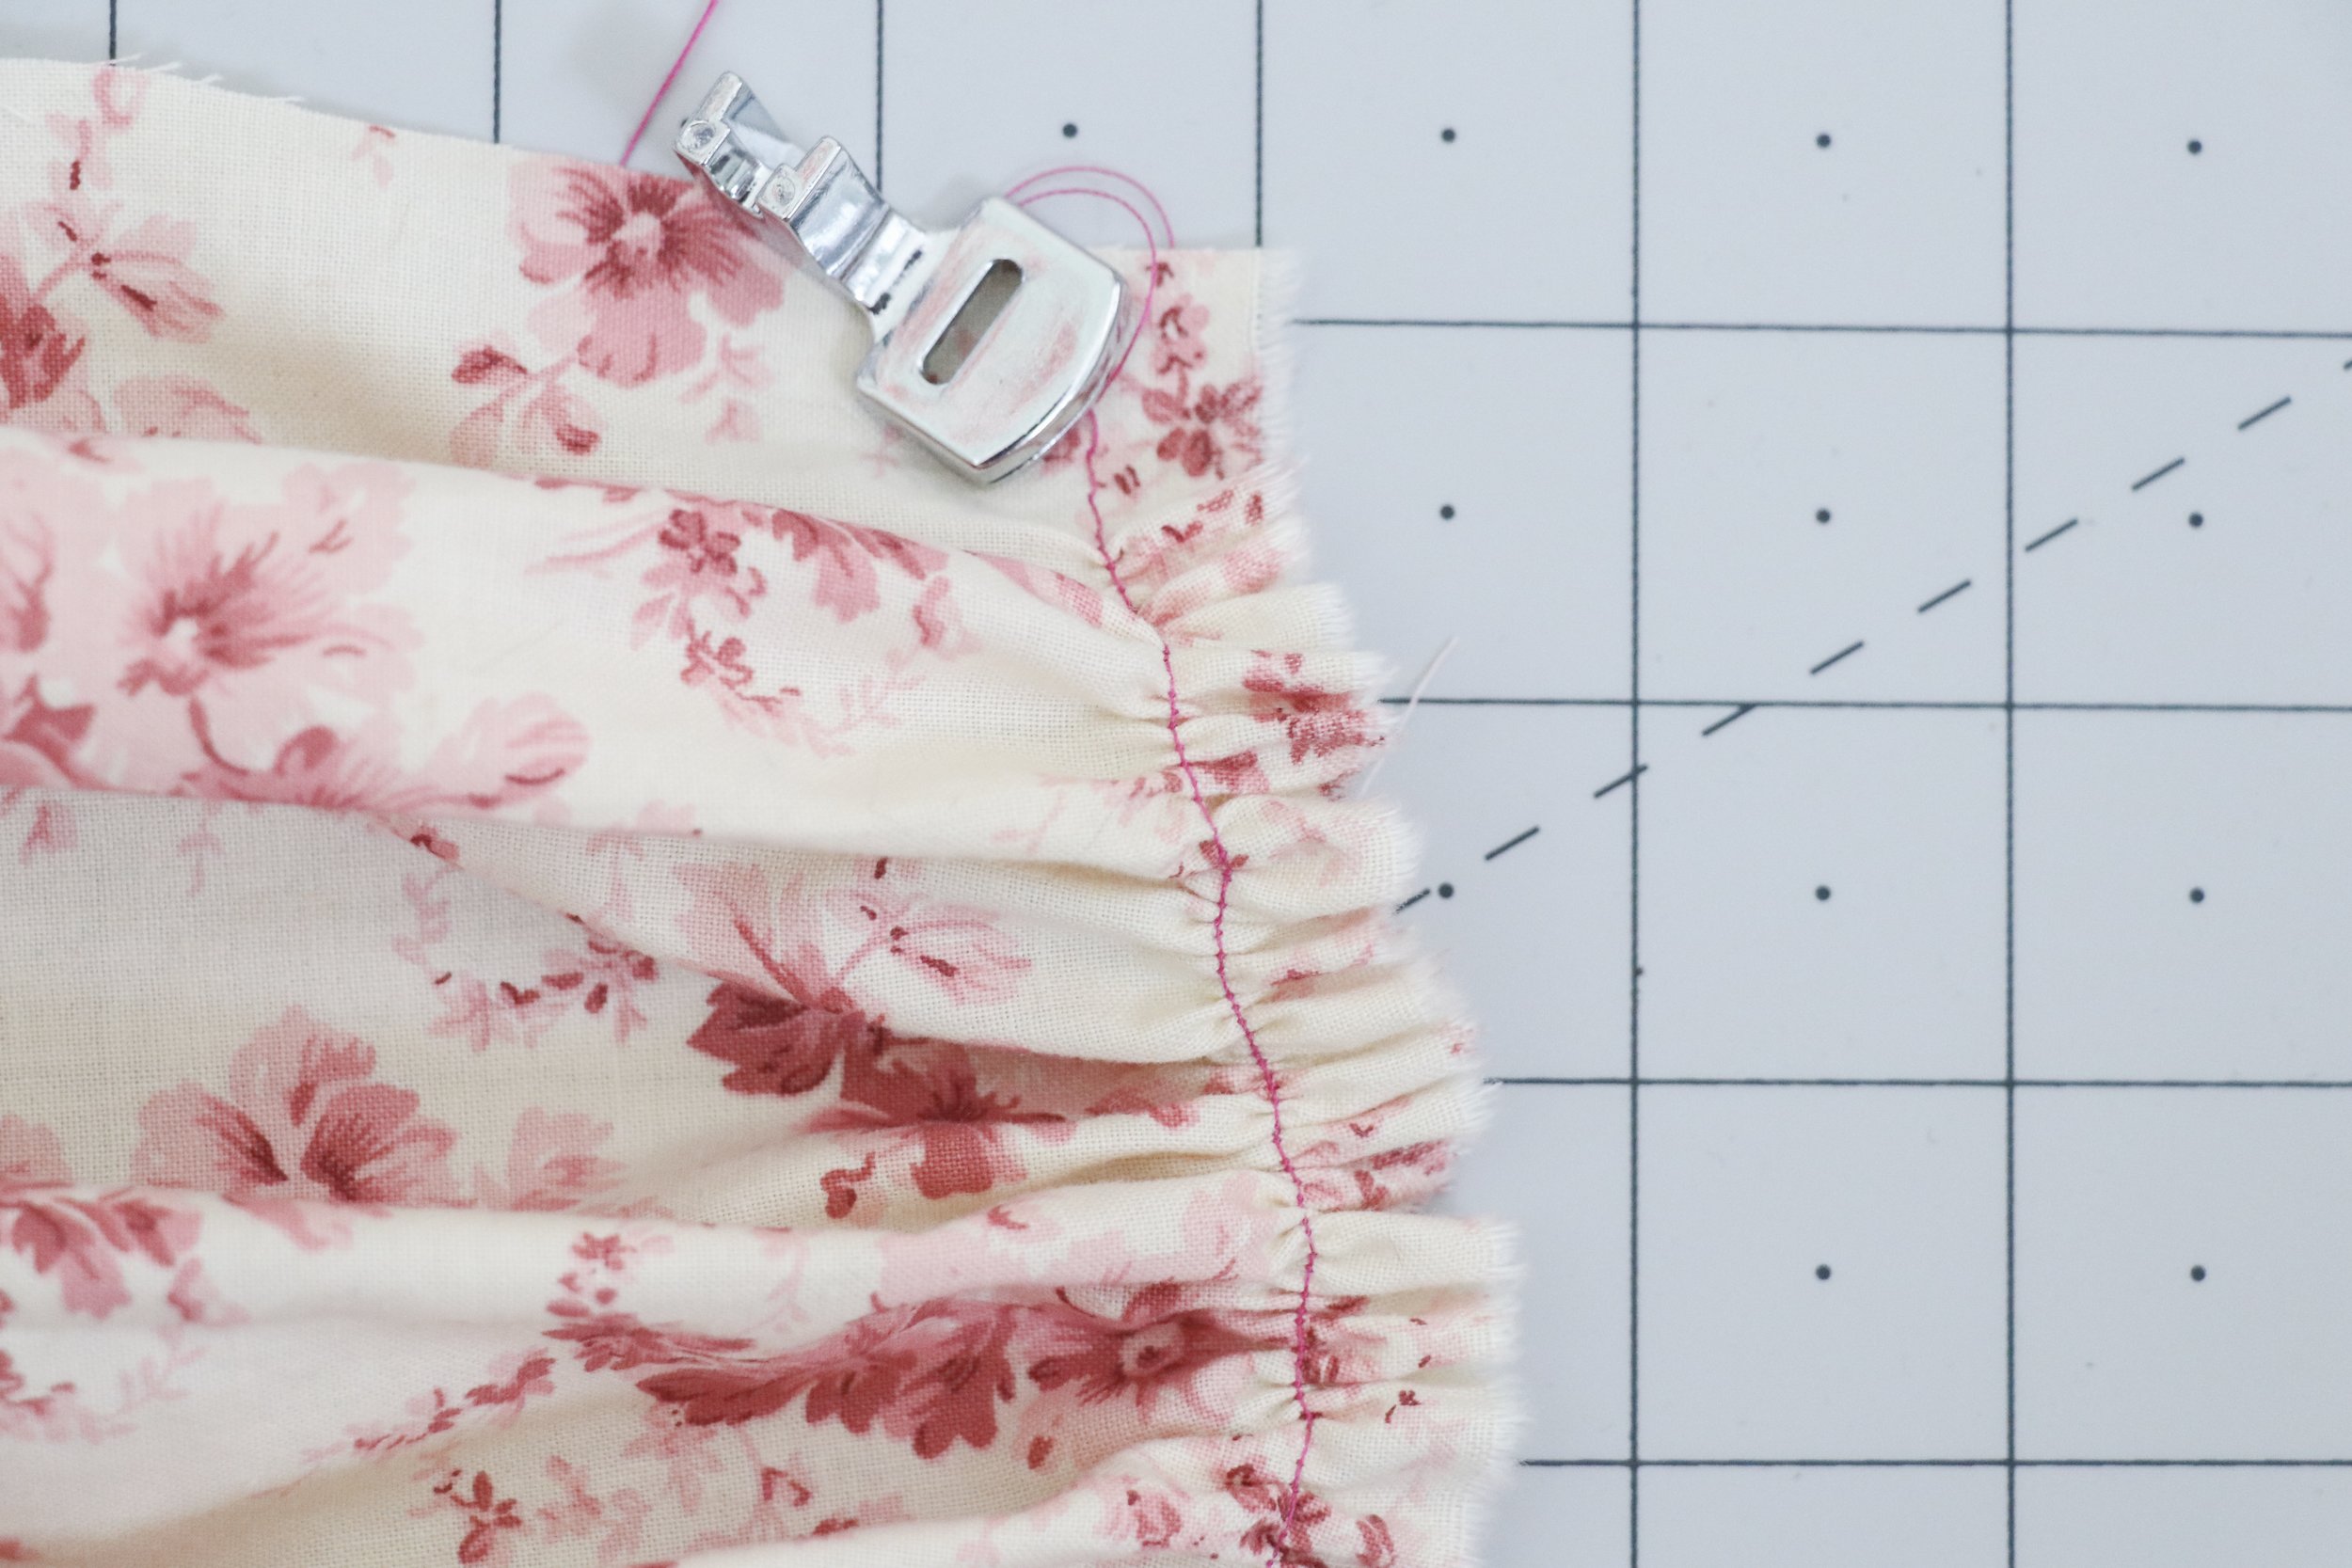
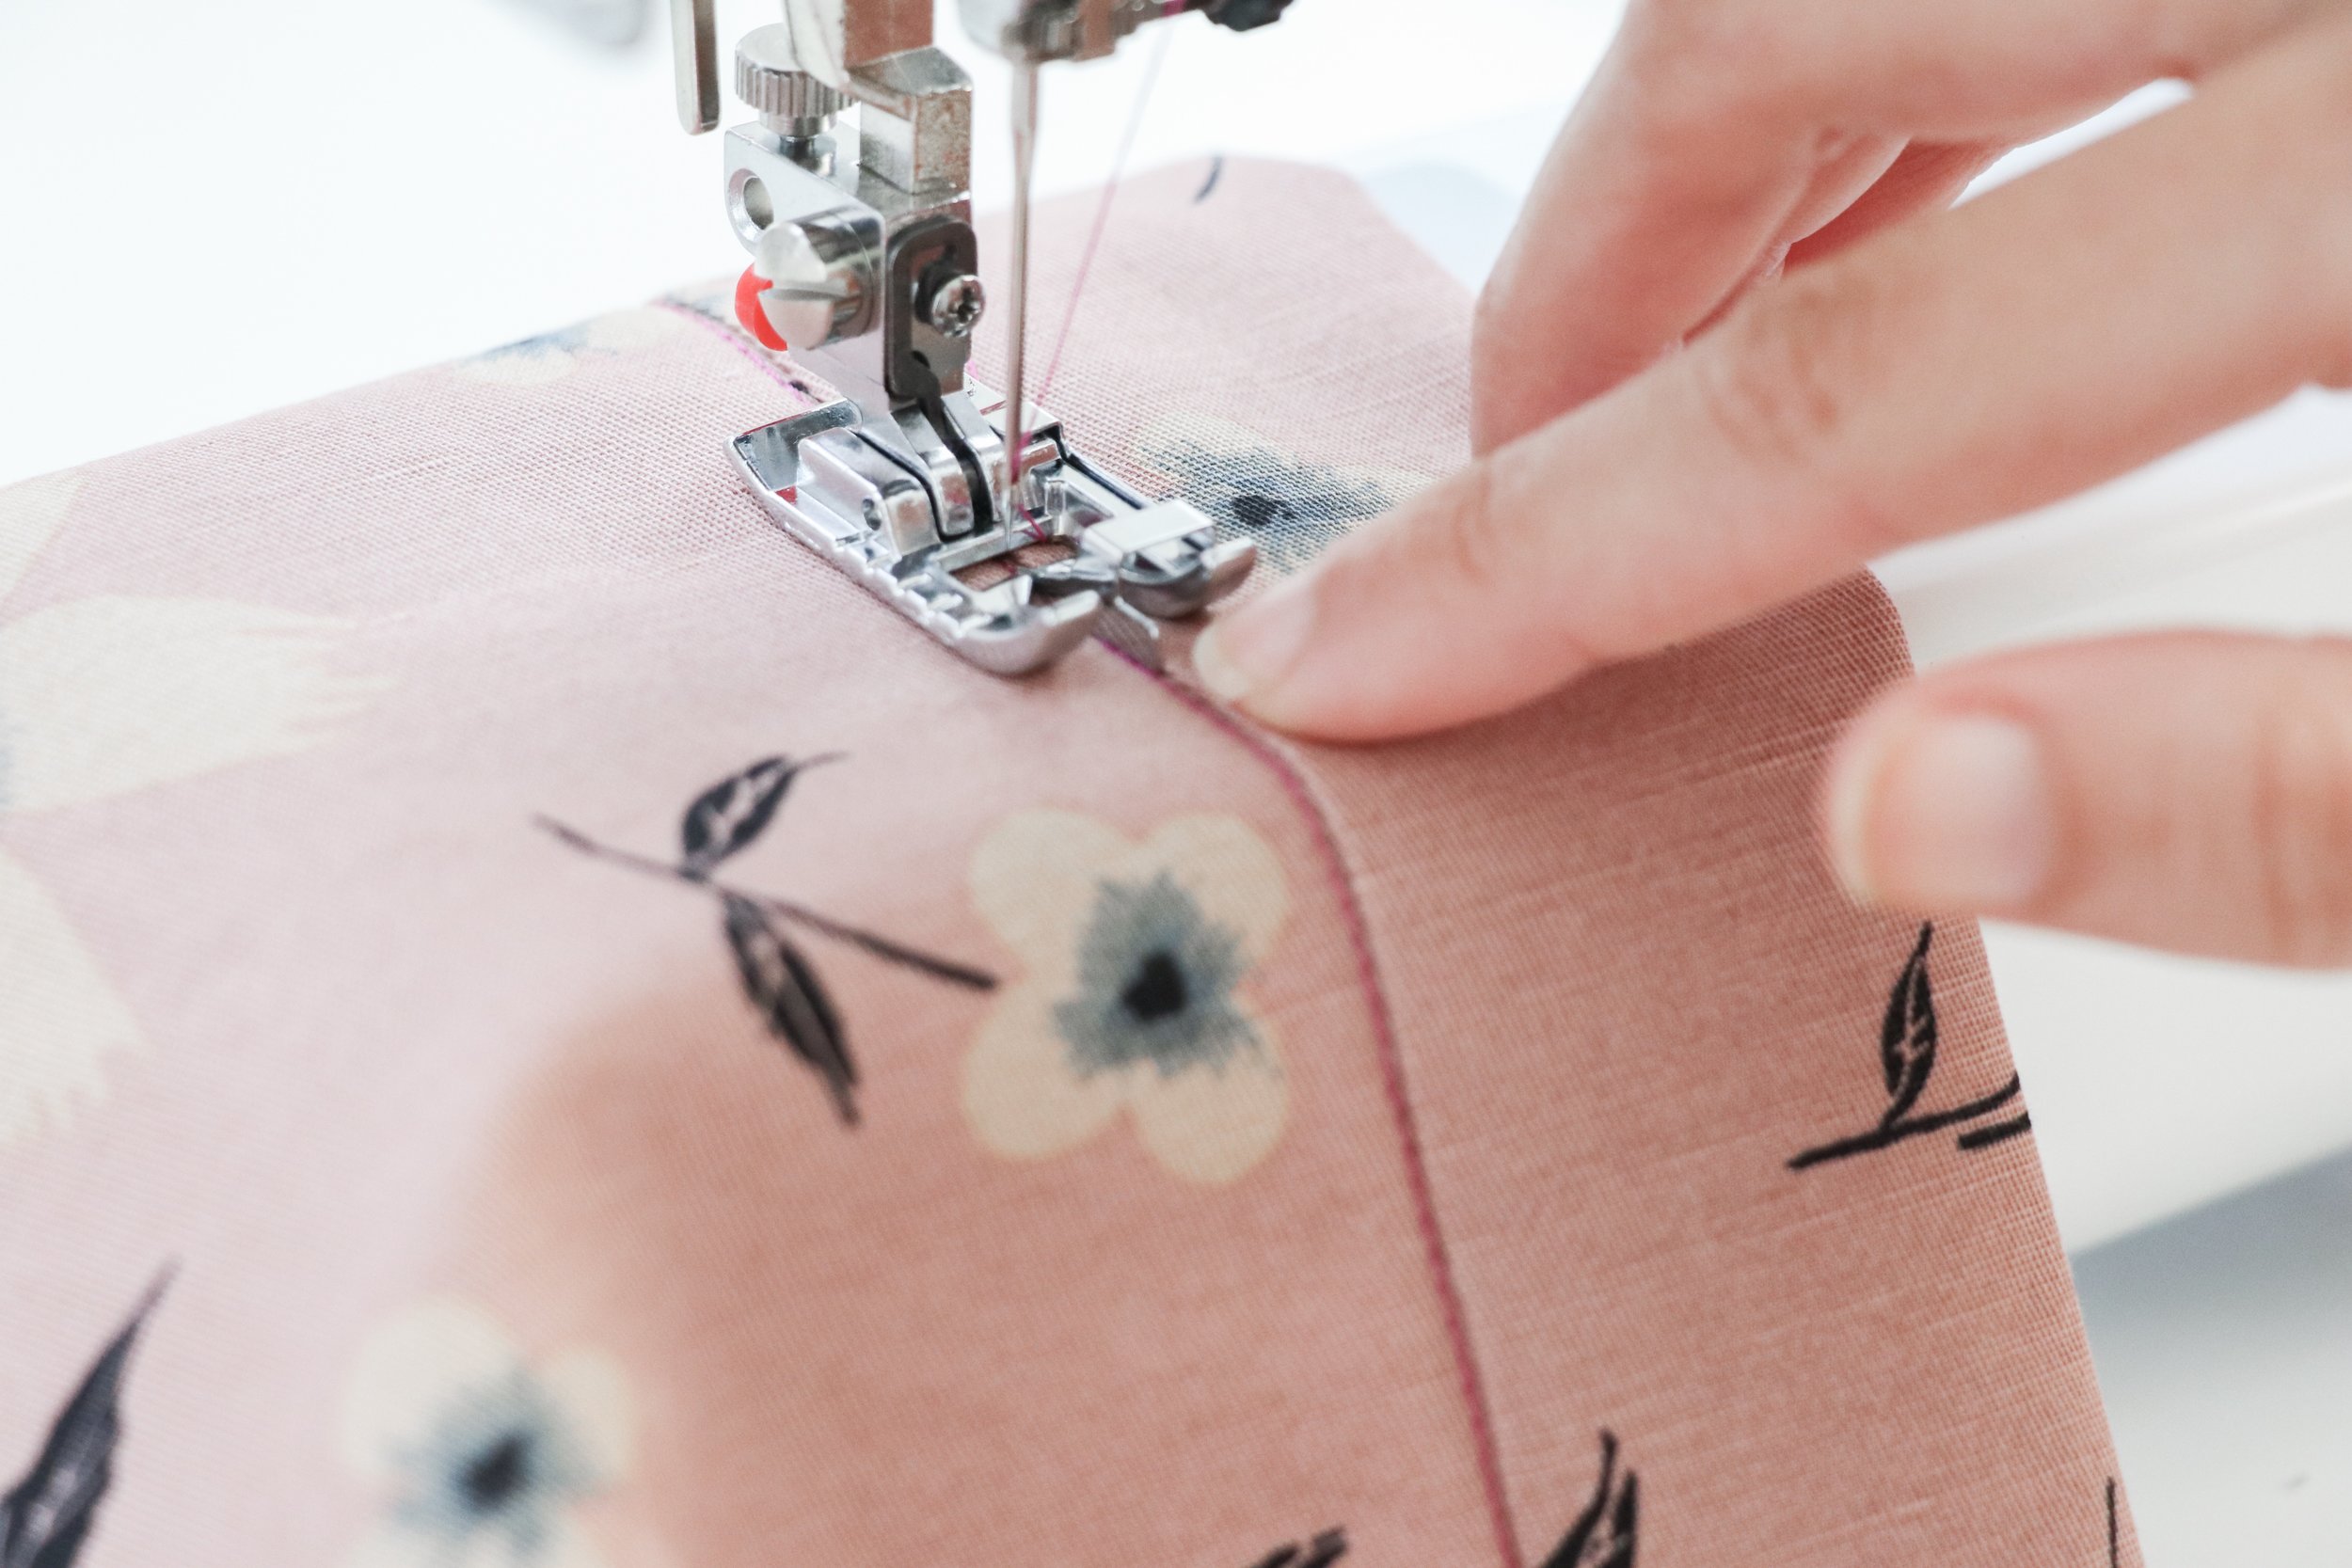
EDGE JOINING/STITCH IN THE DITCH FOOT
The main purpose of this foot is for joining the edges of two pieces of fabric together. I didn’t test that out. I was more excited about using this for stitching in the ditch - something I do a lot! The foot has a thin guide bar right in the center, which is lined up perfectly with the needle. As you sew, the bar glides right along in the ditch/seam, with the needle following behind - keeping your stitch-in-the-ditch stitching perfectly straight with barely any effort.
See below for my results.

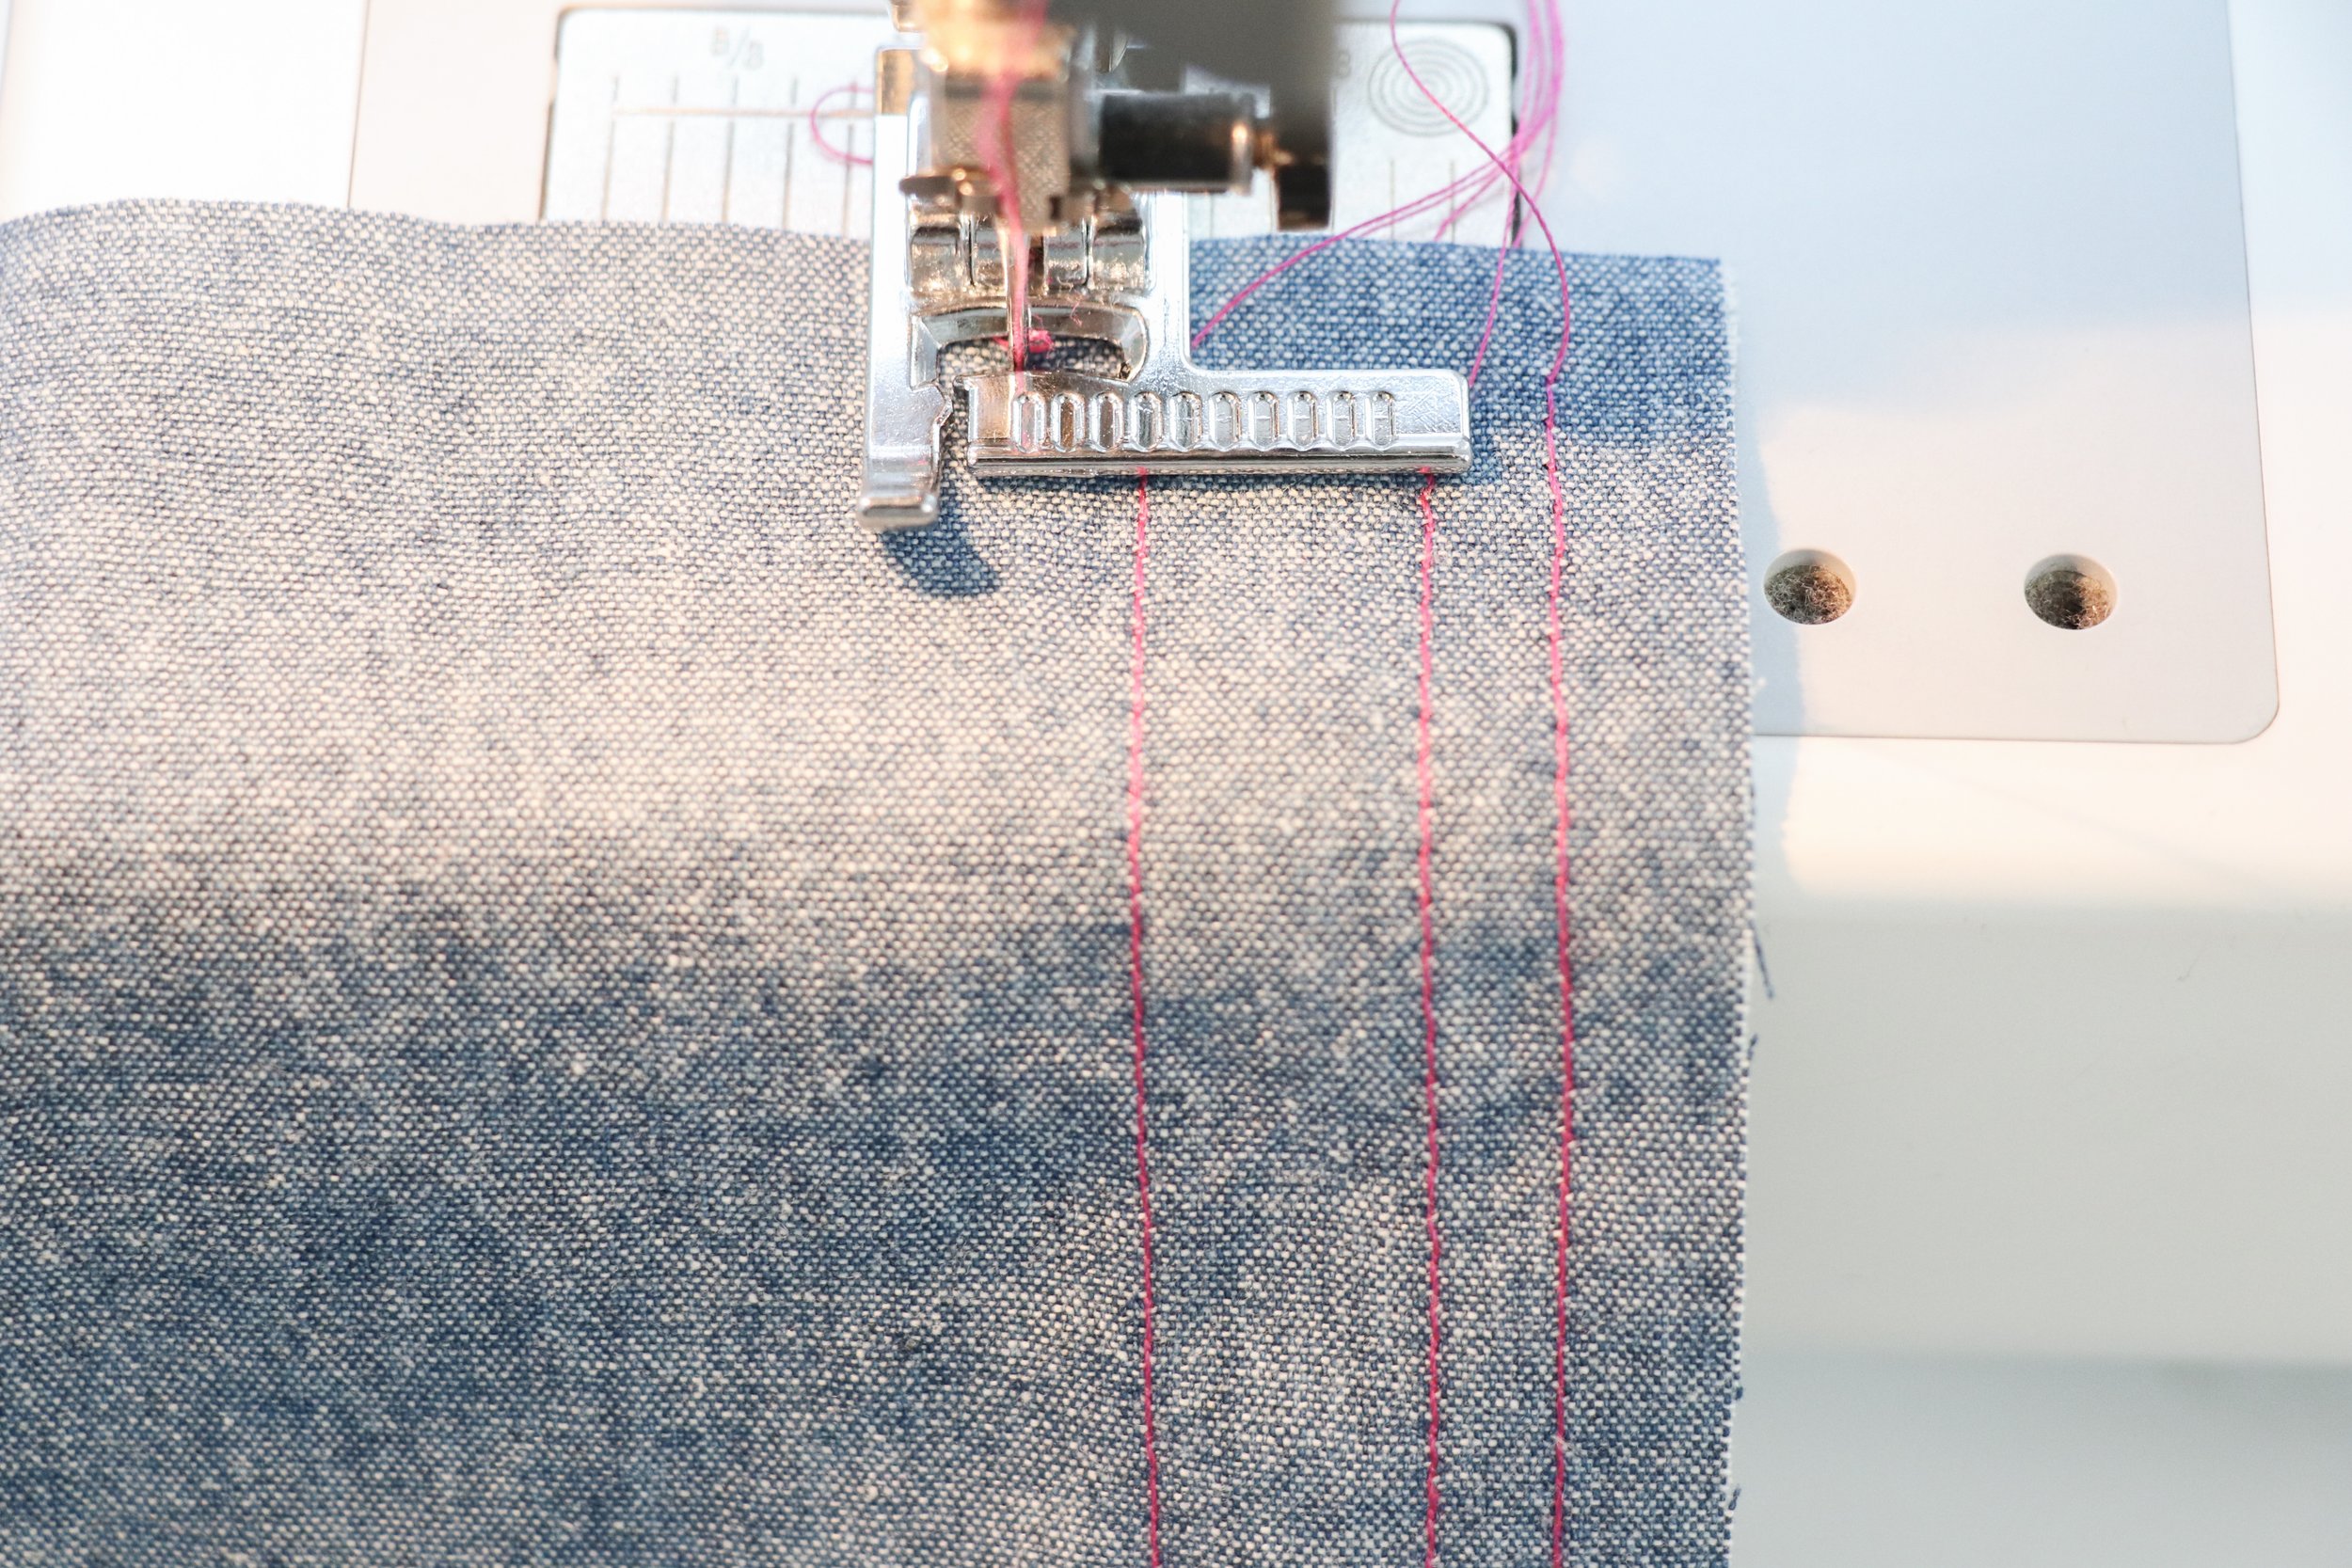
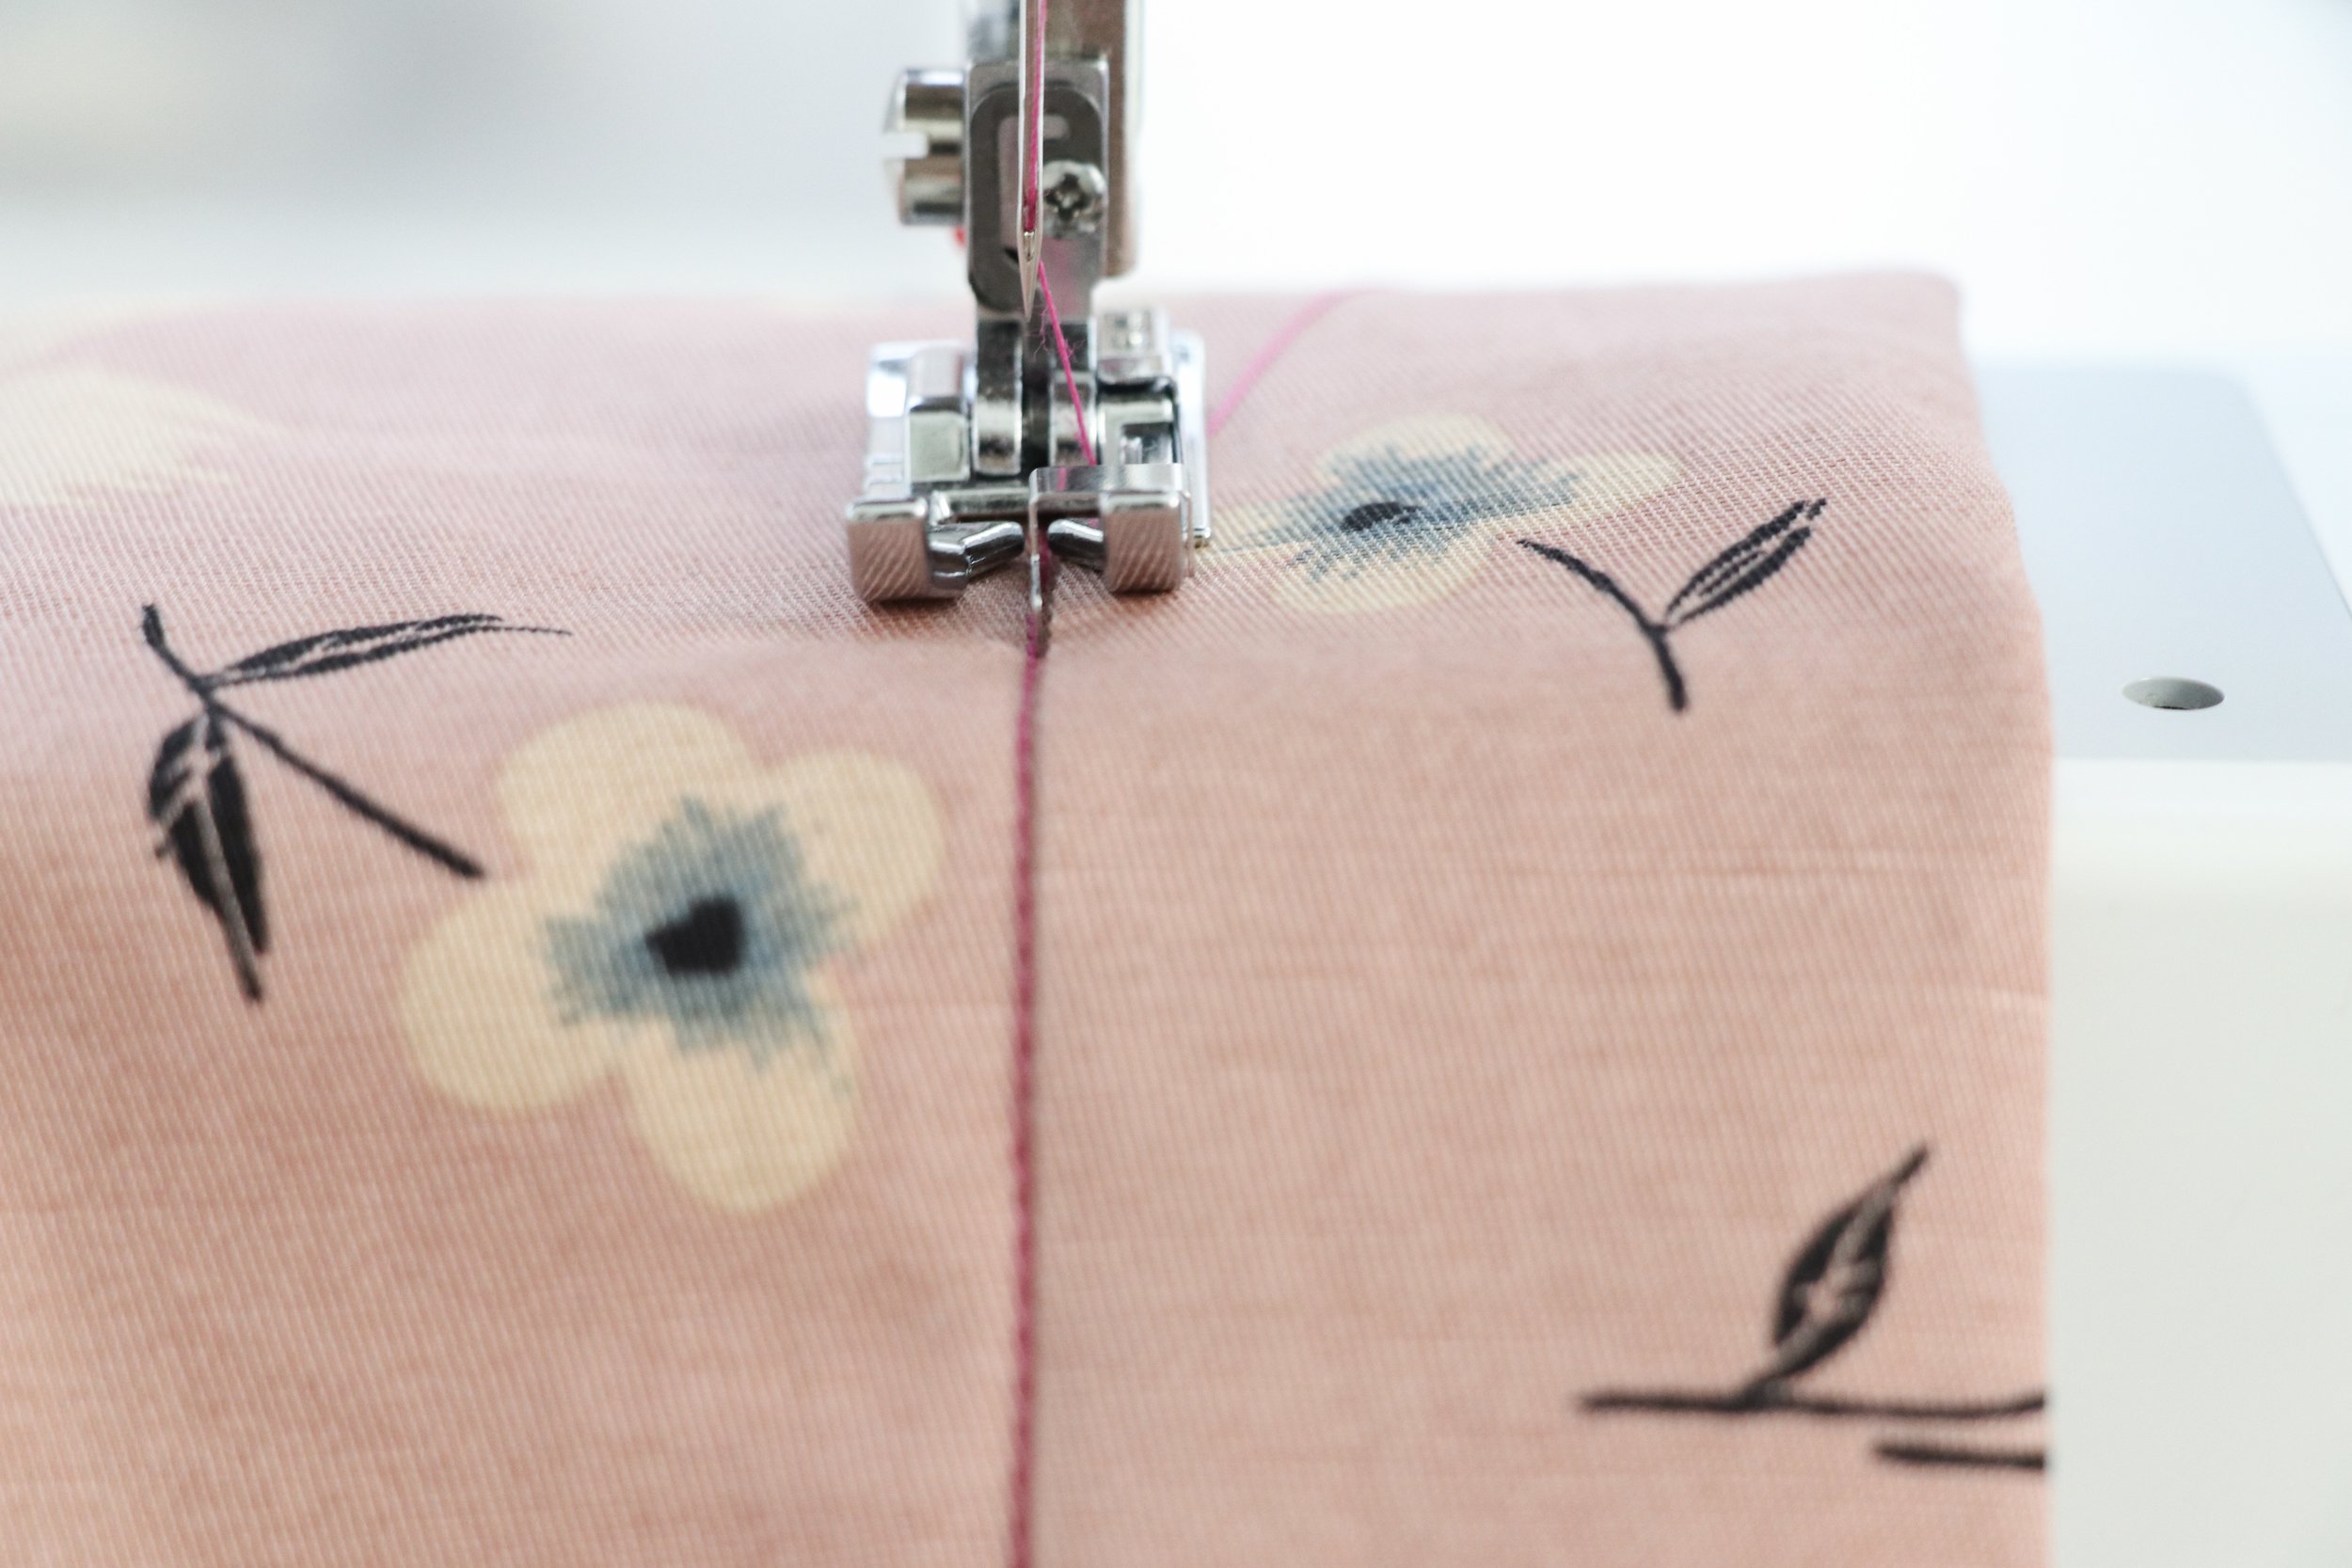
STITCH GUIDE FOOT
This is a pretty simple foot, but a very useful one that I know I’ll find myself using quite often. Especially on jeans and pants that have a lot of topstitching! Topstitching is my nemesis. I’m not the most patient person, and my topstitching often ends up uneven and wavy. This foot has a small perpendicular bar that extends out, with markings ever 2mm. You can use these guides to sew parallel topstitching lines and keep them even and straight. And because there are so many lines, you can do it at any width you need, up to an inch.
Look how straight my 4 lines of topstitching lines are below.

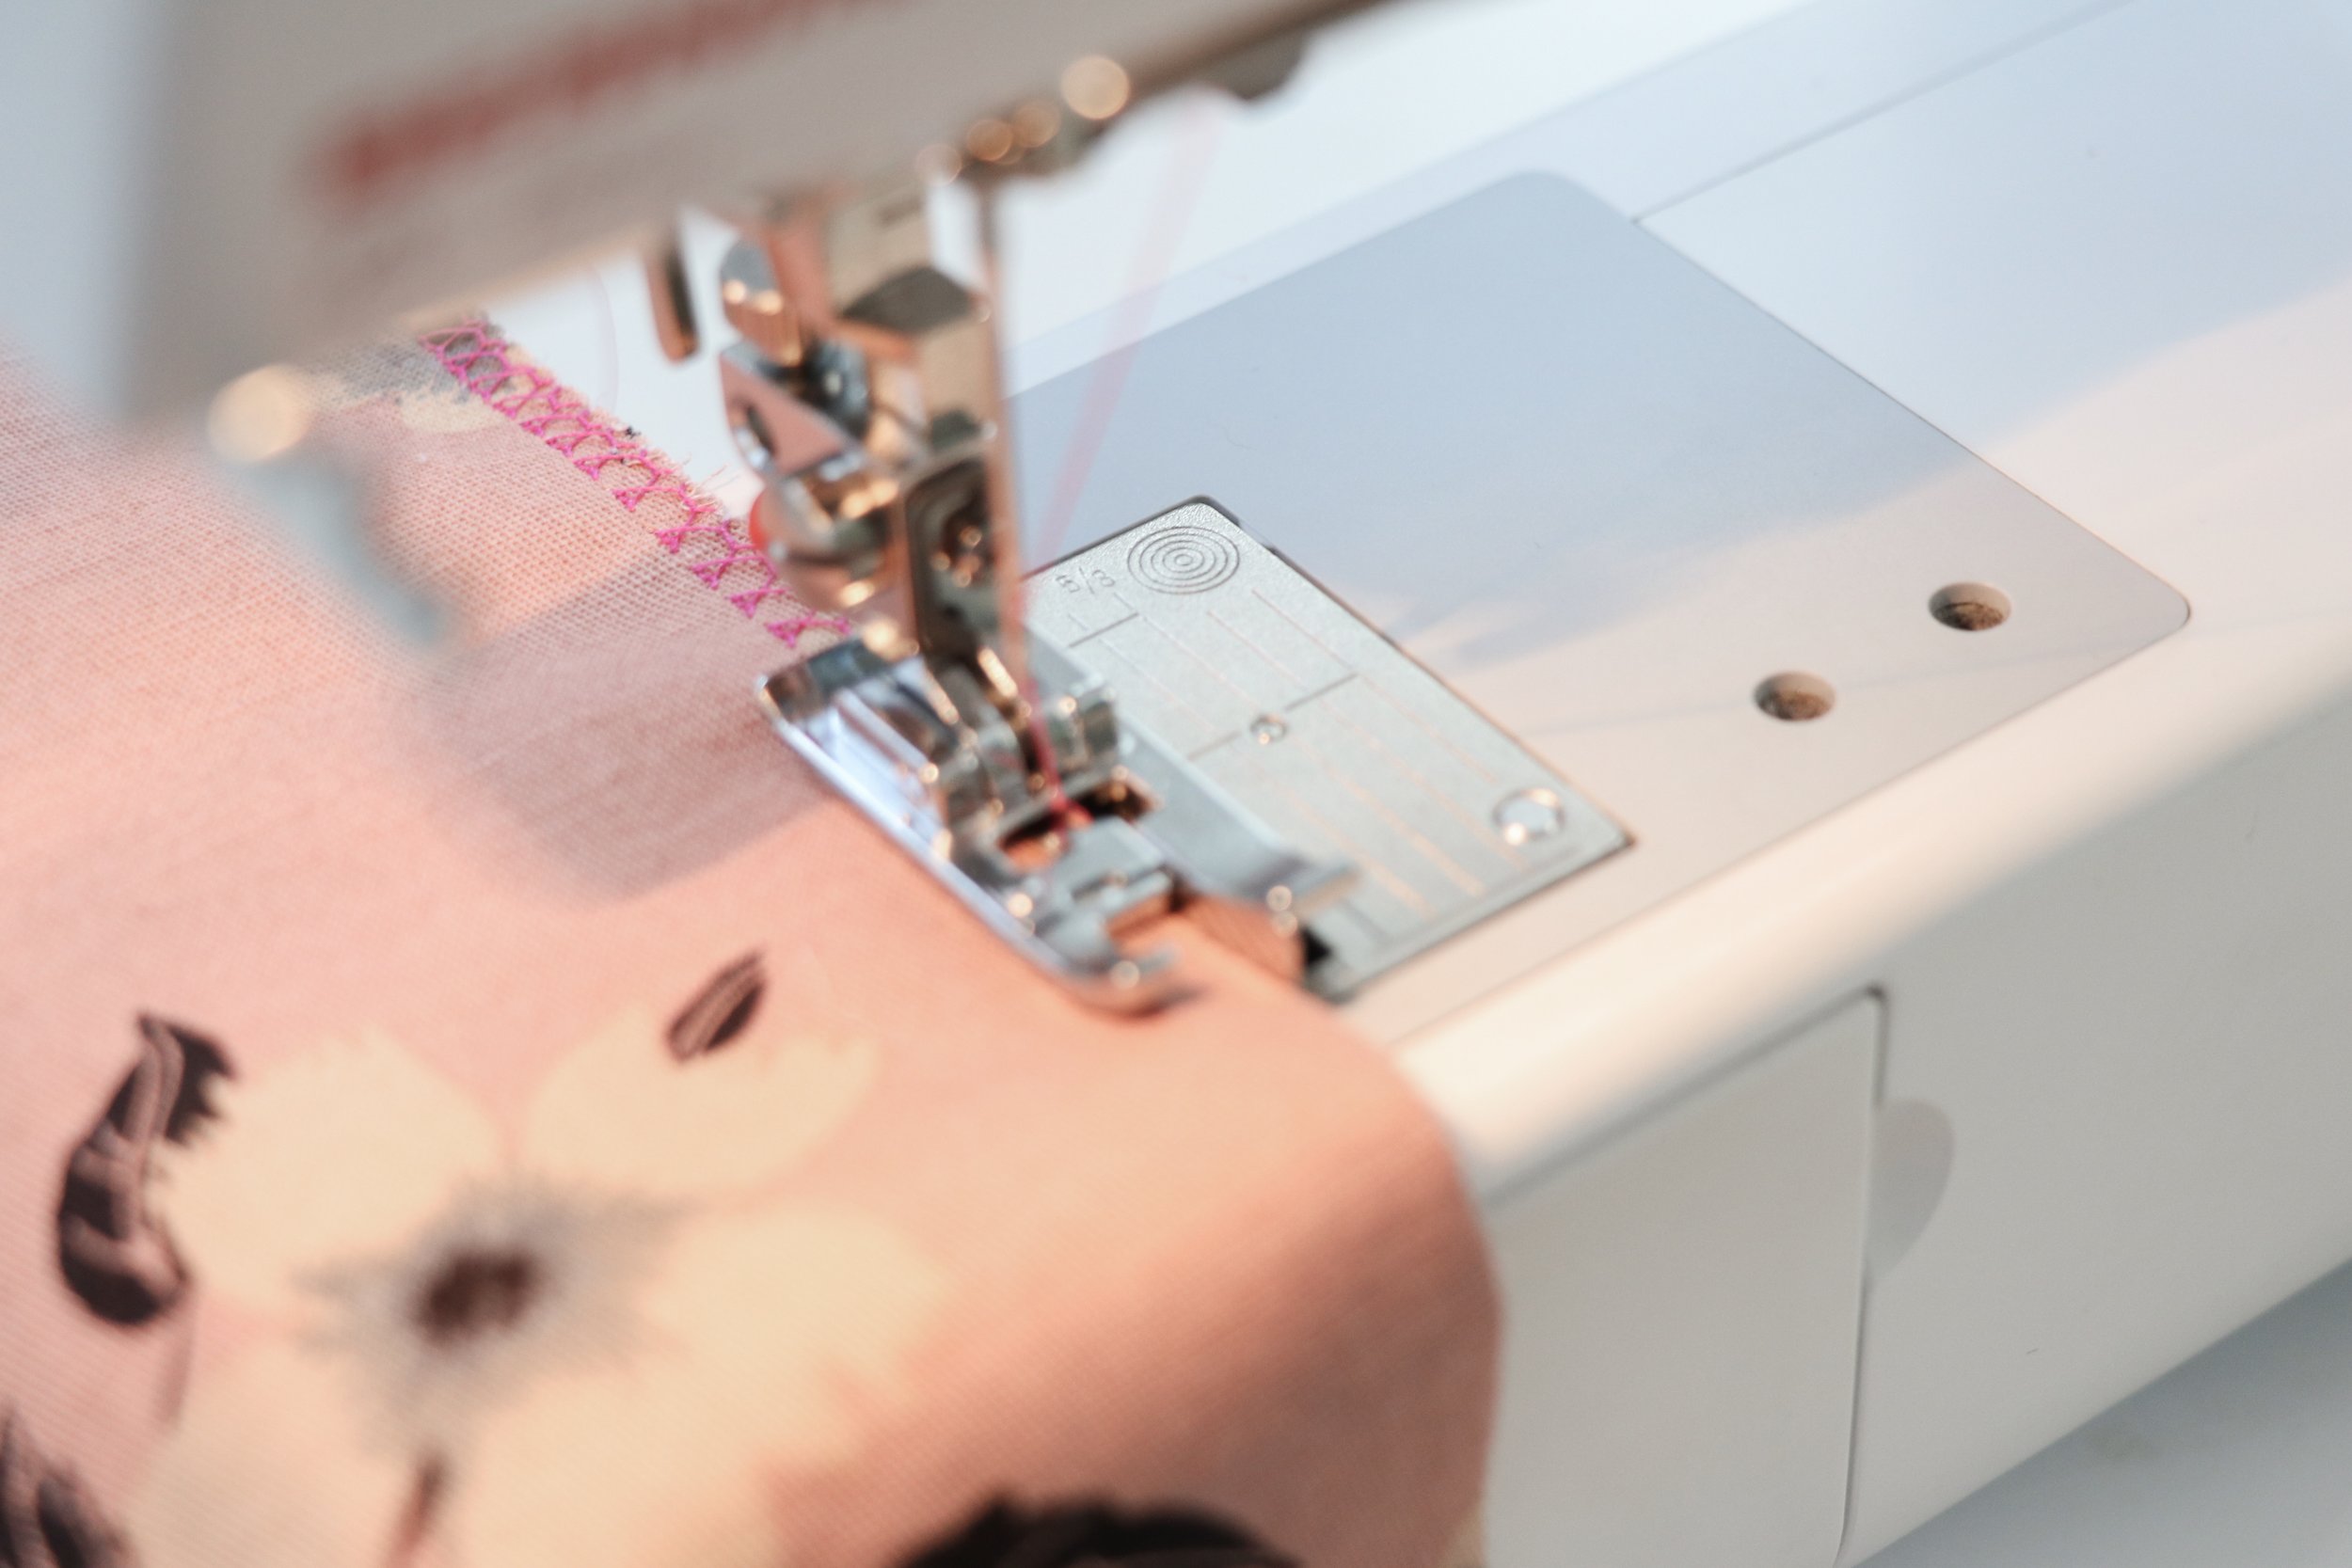
OVERCAST FOOT
This foot requires a machine that has an overcast stitch setting (there are different kinds of overcast stitching, so your machine may have a few options). An overcast stitchh is done along the edge of fabric, to finish the raw edge , in a manner that looks similar to a serger/overlock finish. And this foot helps aid your machine when using that stitch! It has a guide bar to help keep the edge of your fabric lined up, as well as a center piece that helps create overlock stitching without rolling.
I’ve actually never used this stitch before, since I have a serger. But I thought it would e fun to show for those of you that don’t!