

I’ve seen so many of these DIYs around the web lately. And I’m a polka dot addict, so I couldn’t resist.
This one is pretty easy, folks. Here’s what you need:
- a pair of old or thrifted shorts
- ruler
- chalk or fabric pencil
- fabric paint
- small dabber or pencil eraser
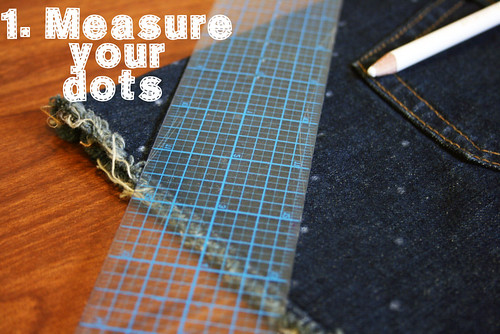
First, mark where your polka dots will go. Starting at the corner, and using your fabric chalk or pencil, make small dots an inch apart.
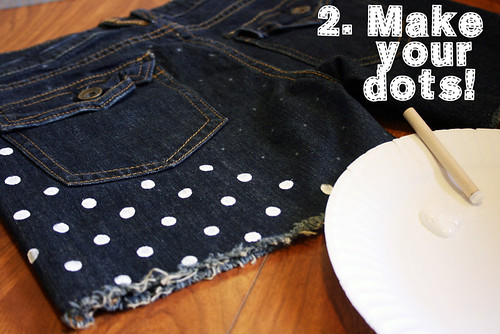
Then get to dabbing! I used a small foam dabber made for stenciling, but an eraser at the end of a pencil will work just as well. Lightly dab your dabber in your paint, making sure to get rid of an excess, and dab over your marks. That’s it! Depending on the colors you are working with, you may need to go over them again, once they are dry, if they are too sheer.
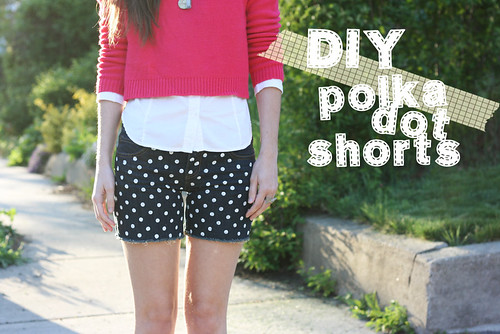
You can see more of my final product in tomorrows outfit post.
