Gift Guide: for the Sewers and Makers

I’m going to be sharing two gift guides this holiday season, for two areas that I think I know a good amount about - sewing and tiny humans! haha. Today is all about those sewists and makers. Whether you know a maker in your life that you need a fun gift for, or you yourself are a maker and need some ideas of what to ask for - here are some of my favorite ideas!

MadamSew Sew Happy Box

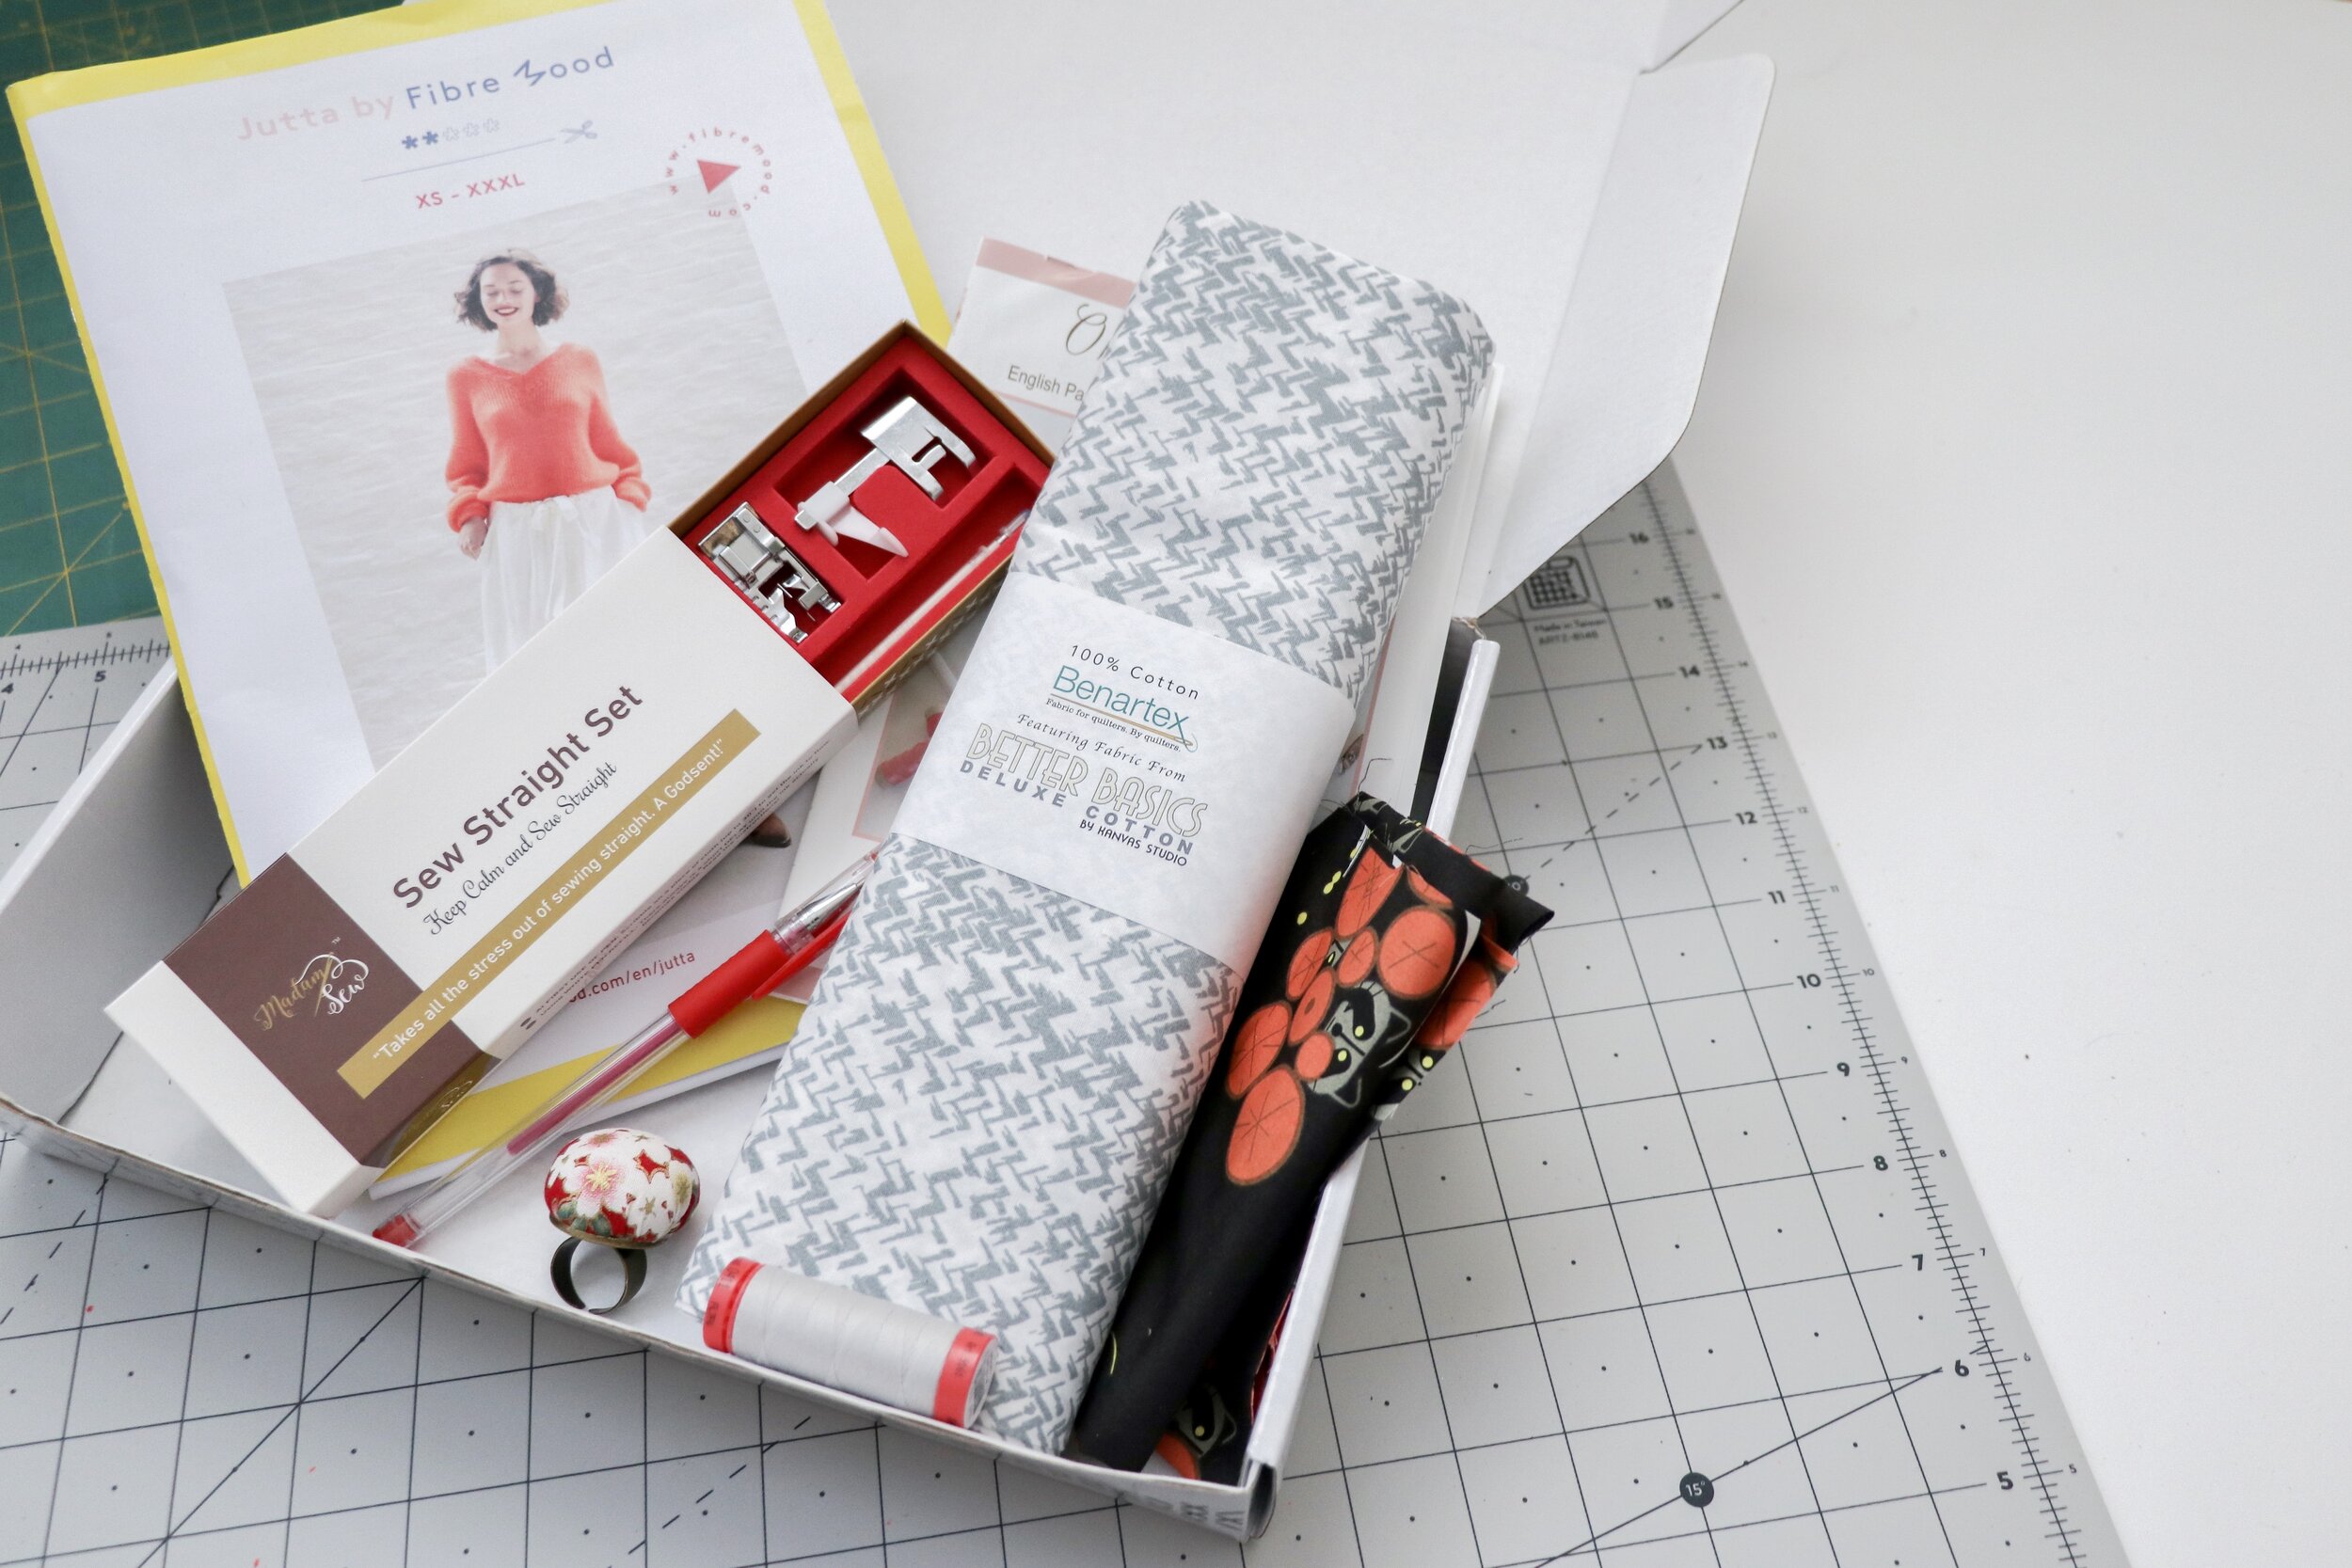
If you follow me on Instagram, you may have seen me sharing an unboxing of Madam Sew’s new subscription box. I mentioned during the unboxing that I think a subscription for a box or two (or more) would make a great Christmas gift! Who doesnt love a surprise box full of goodies? Each box comes with a sewing pattern, a scrap busting project/pattern, fabric, matching thread, a fat quarter of a featured fabric designer, And a handful of fun tools. In November’s box, those tools included heat erasable marking pens, a few presser feet, and a pin cushion ring. Super cute!

*** I was provided this subscription box for review and blog feature. Though, all thoughts are my own.

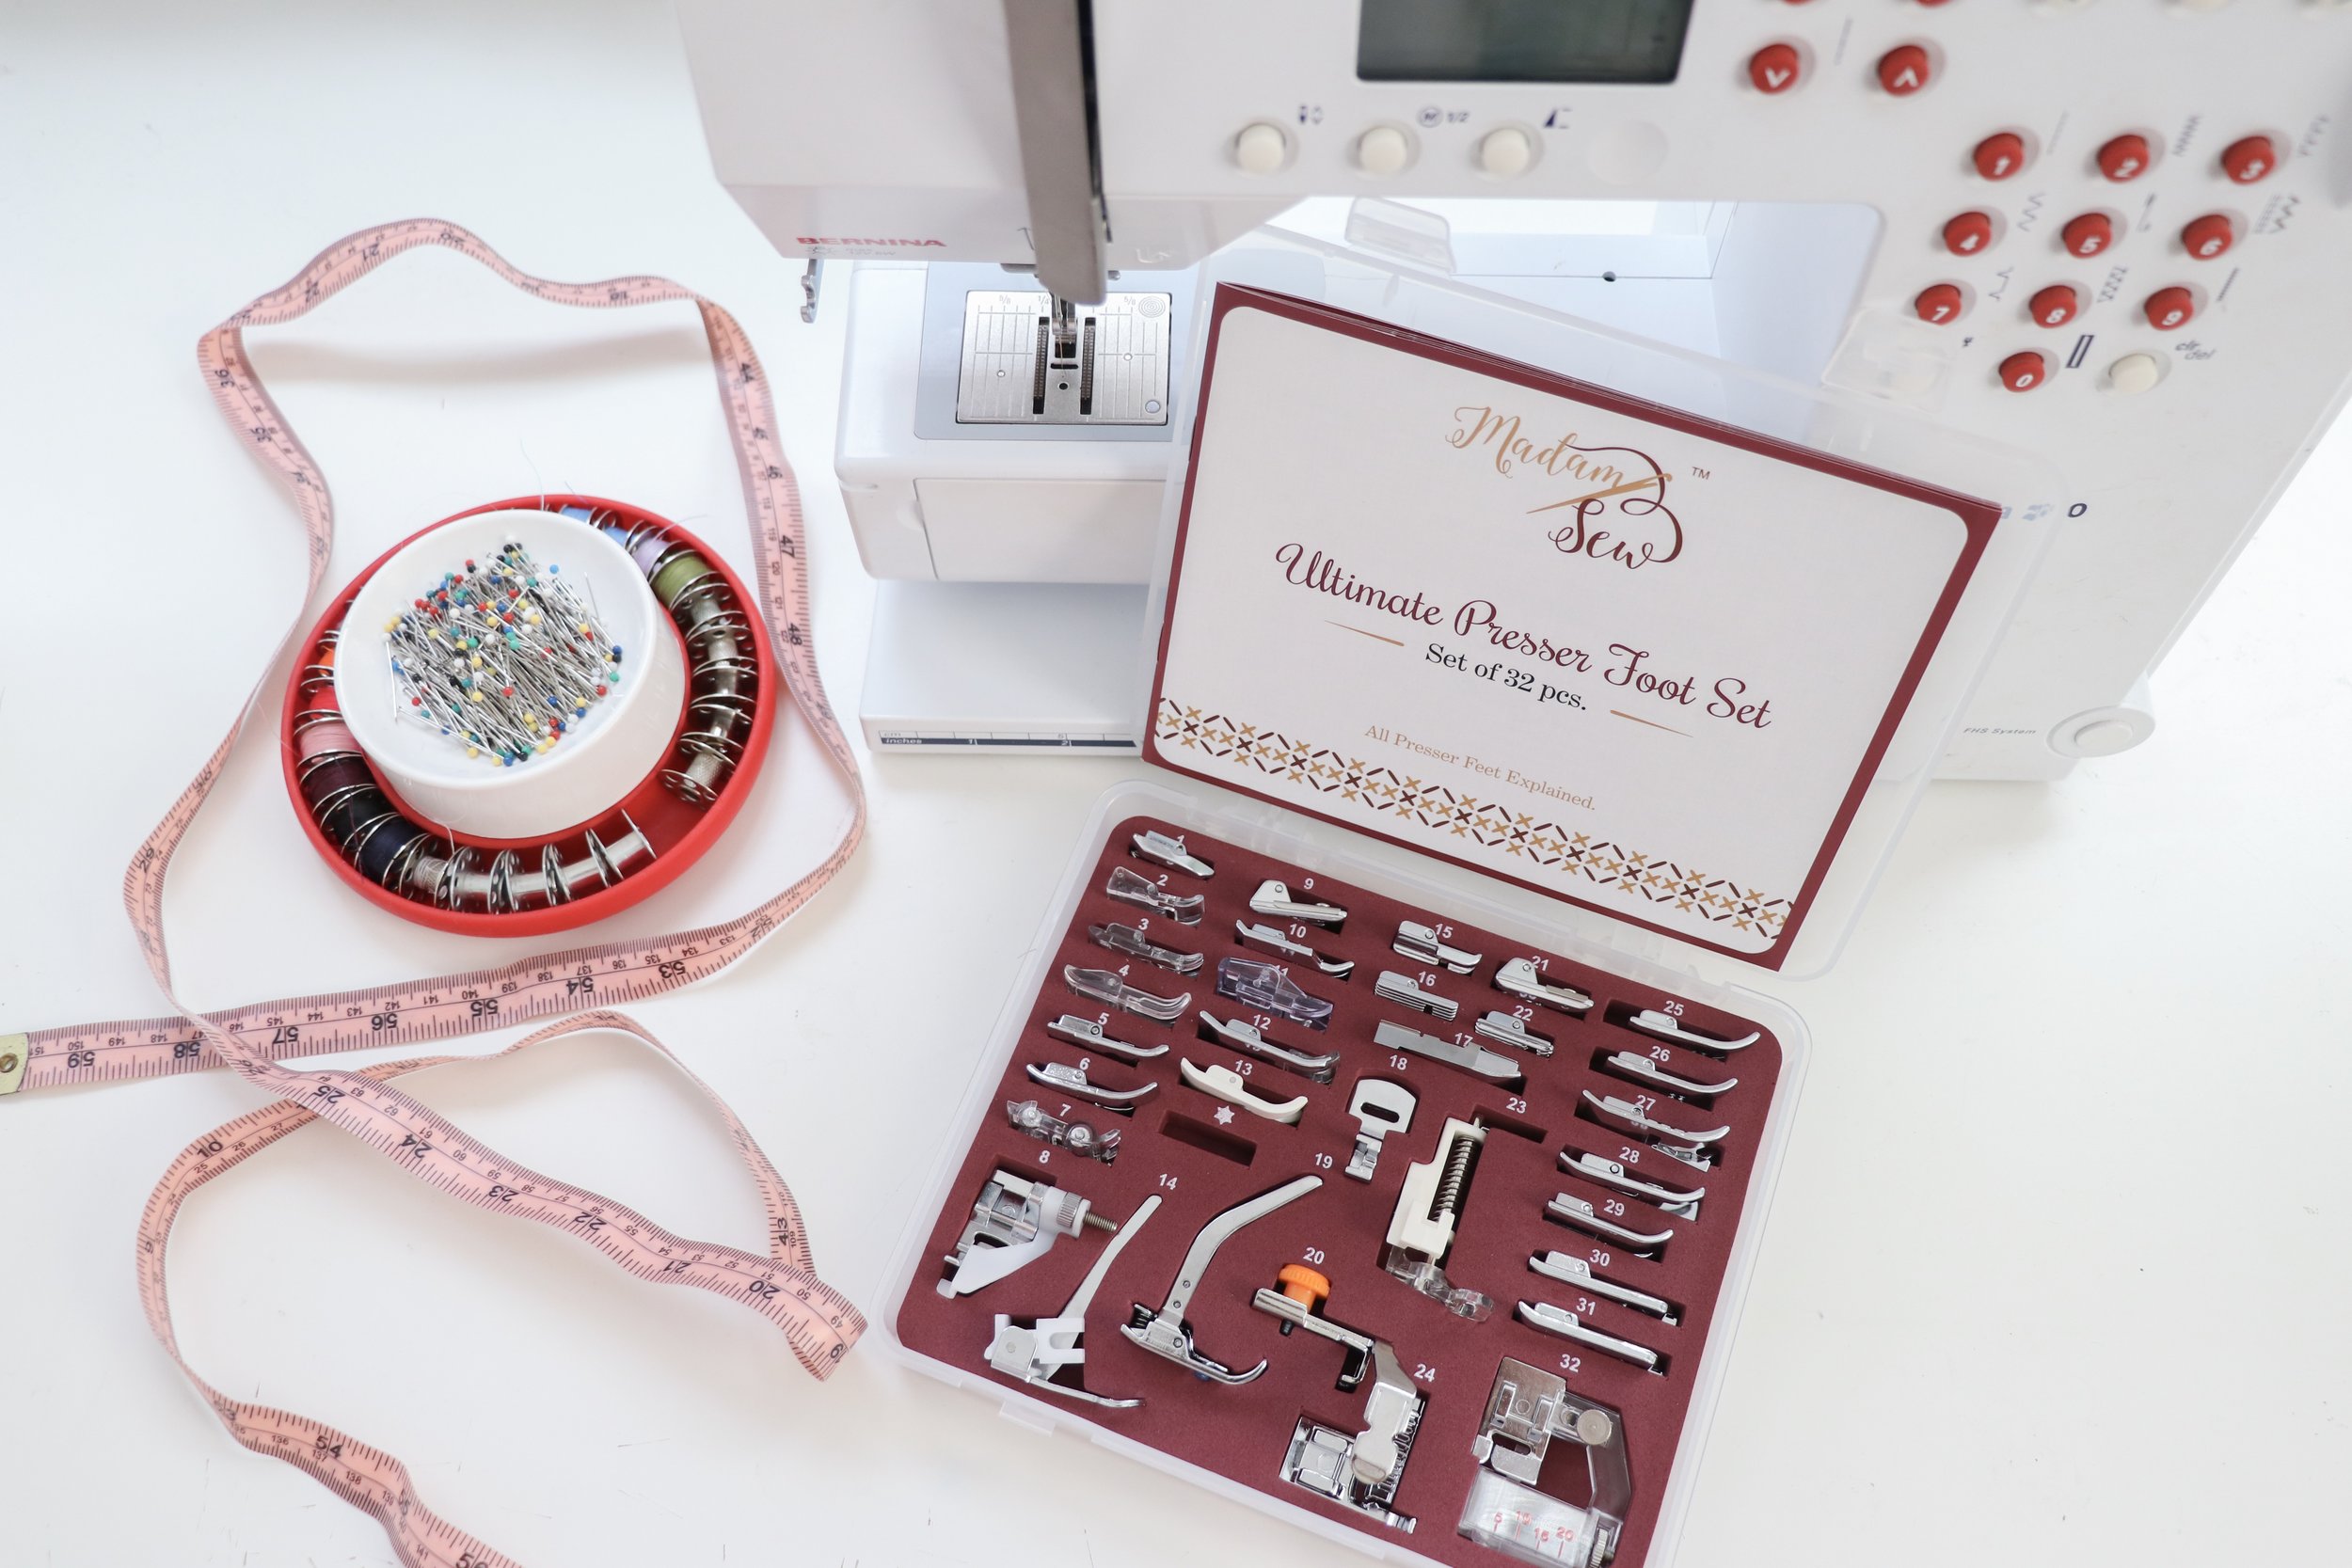
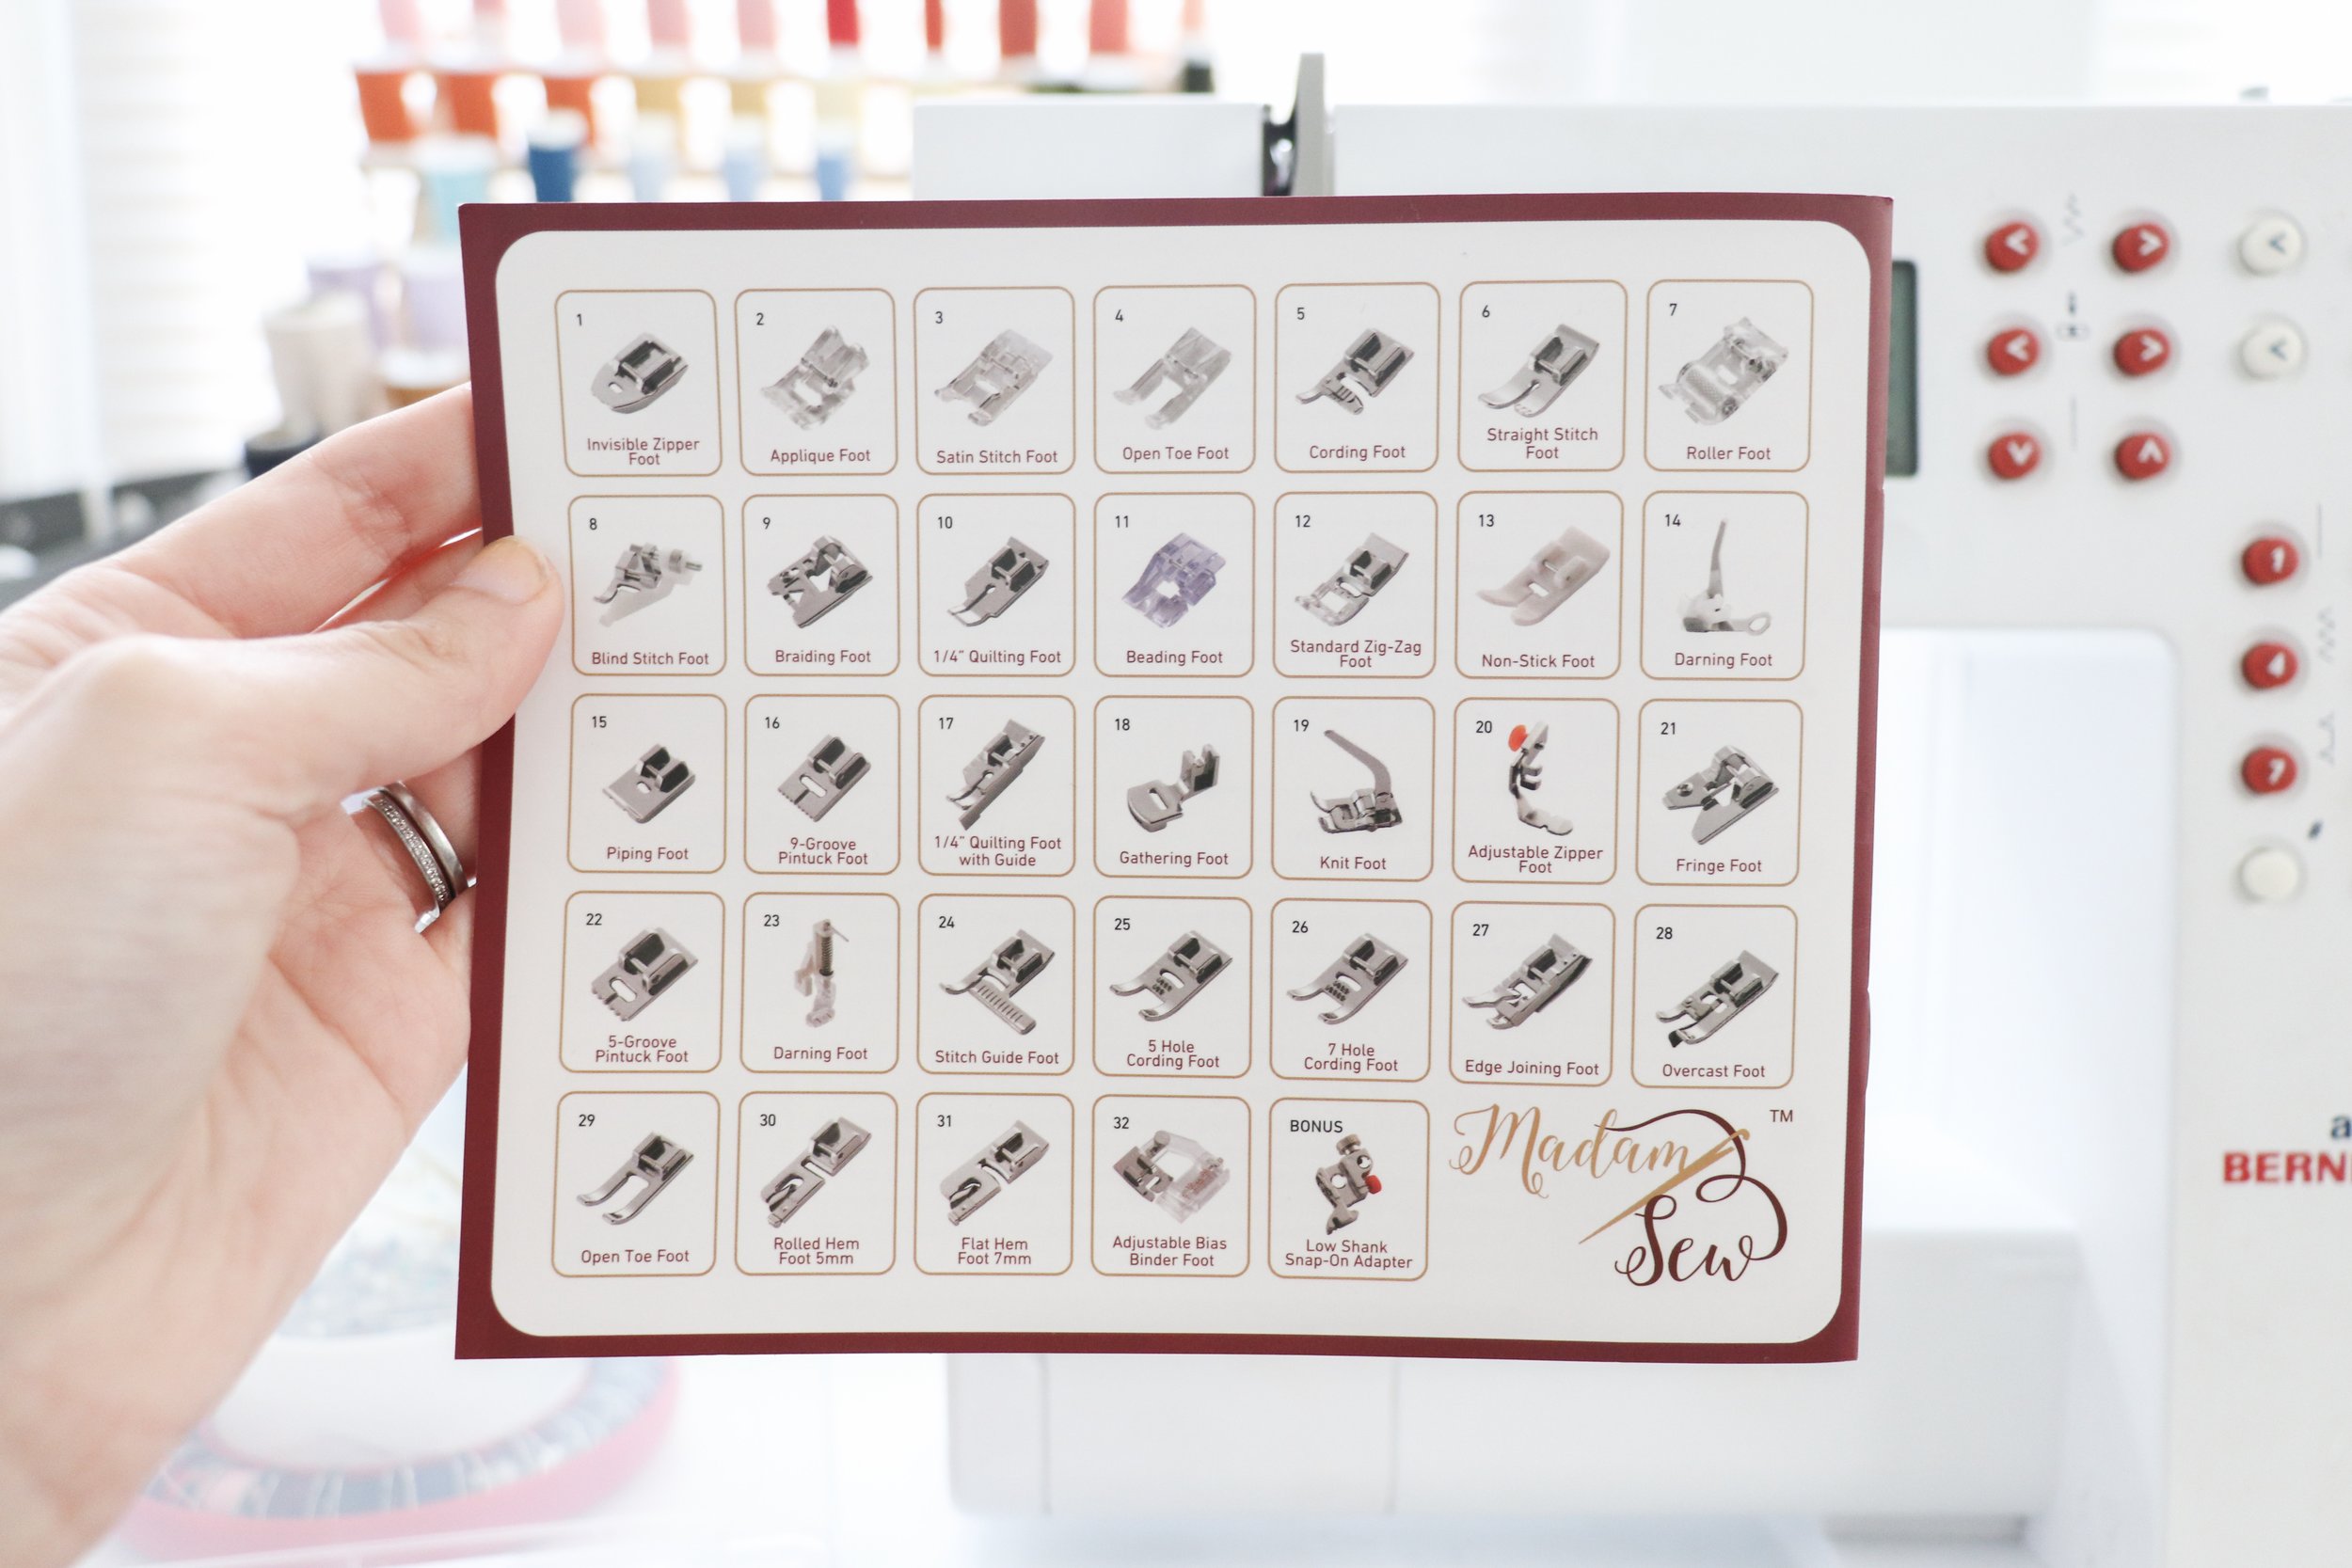
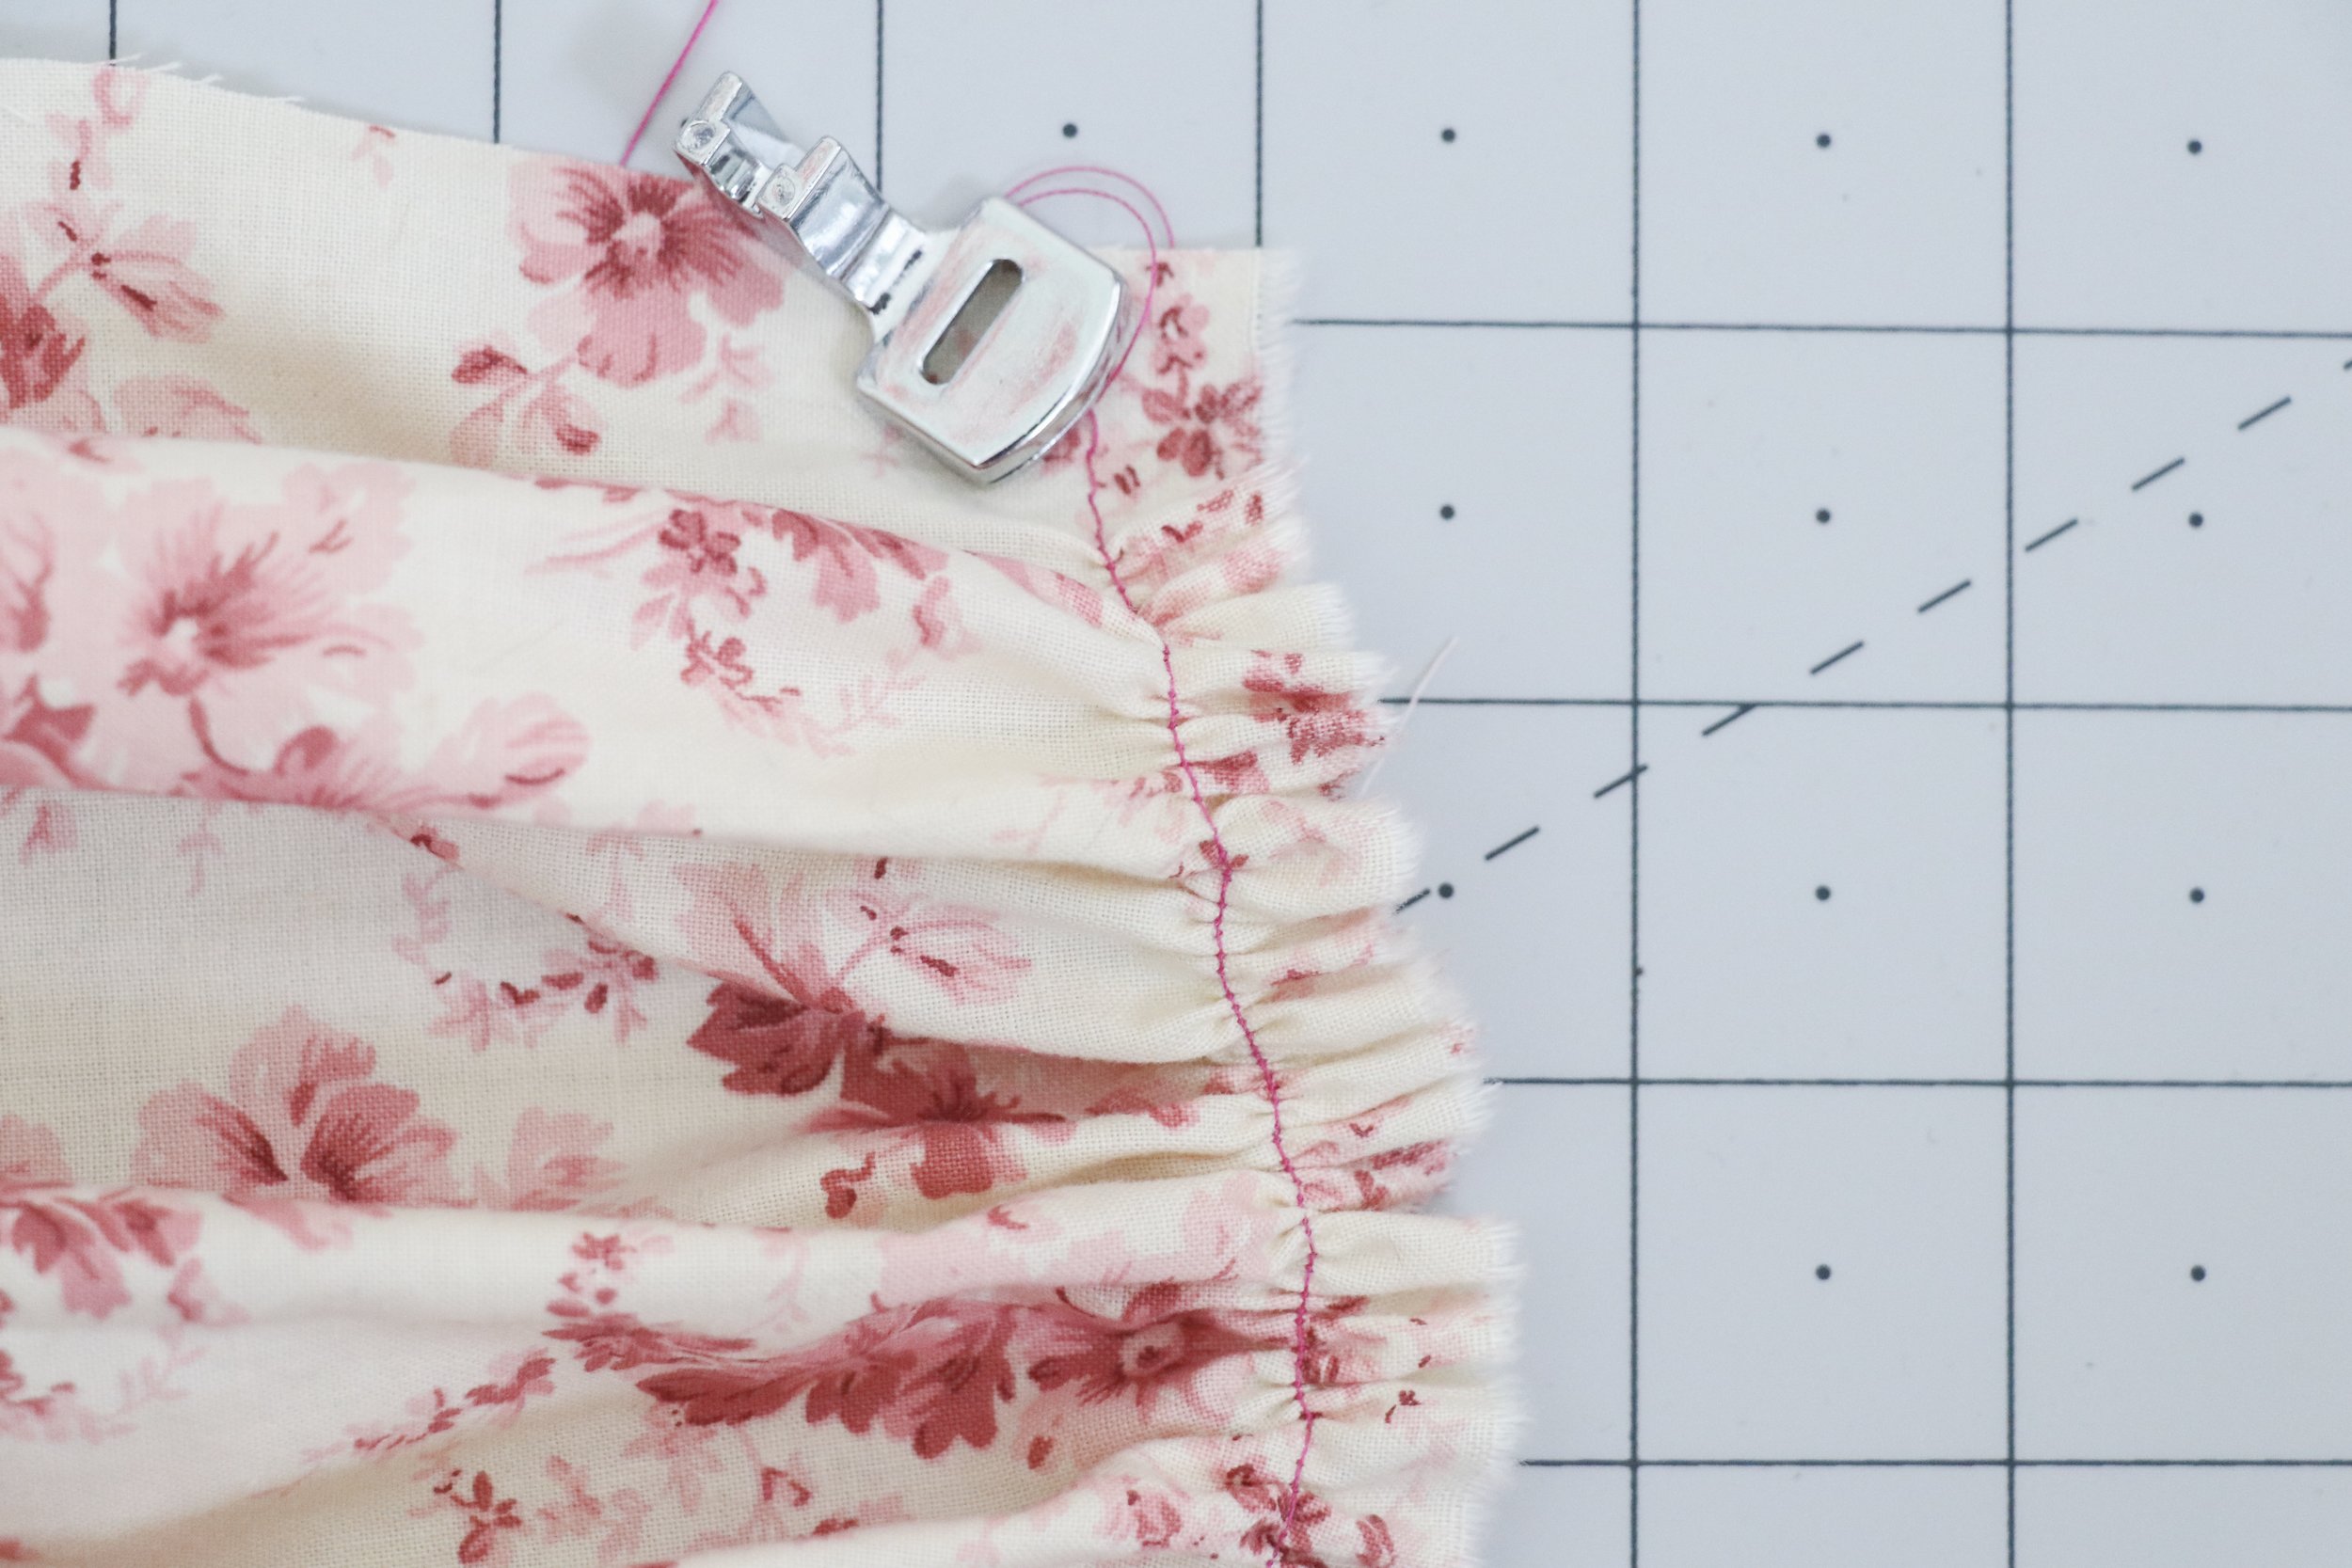
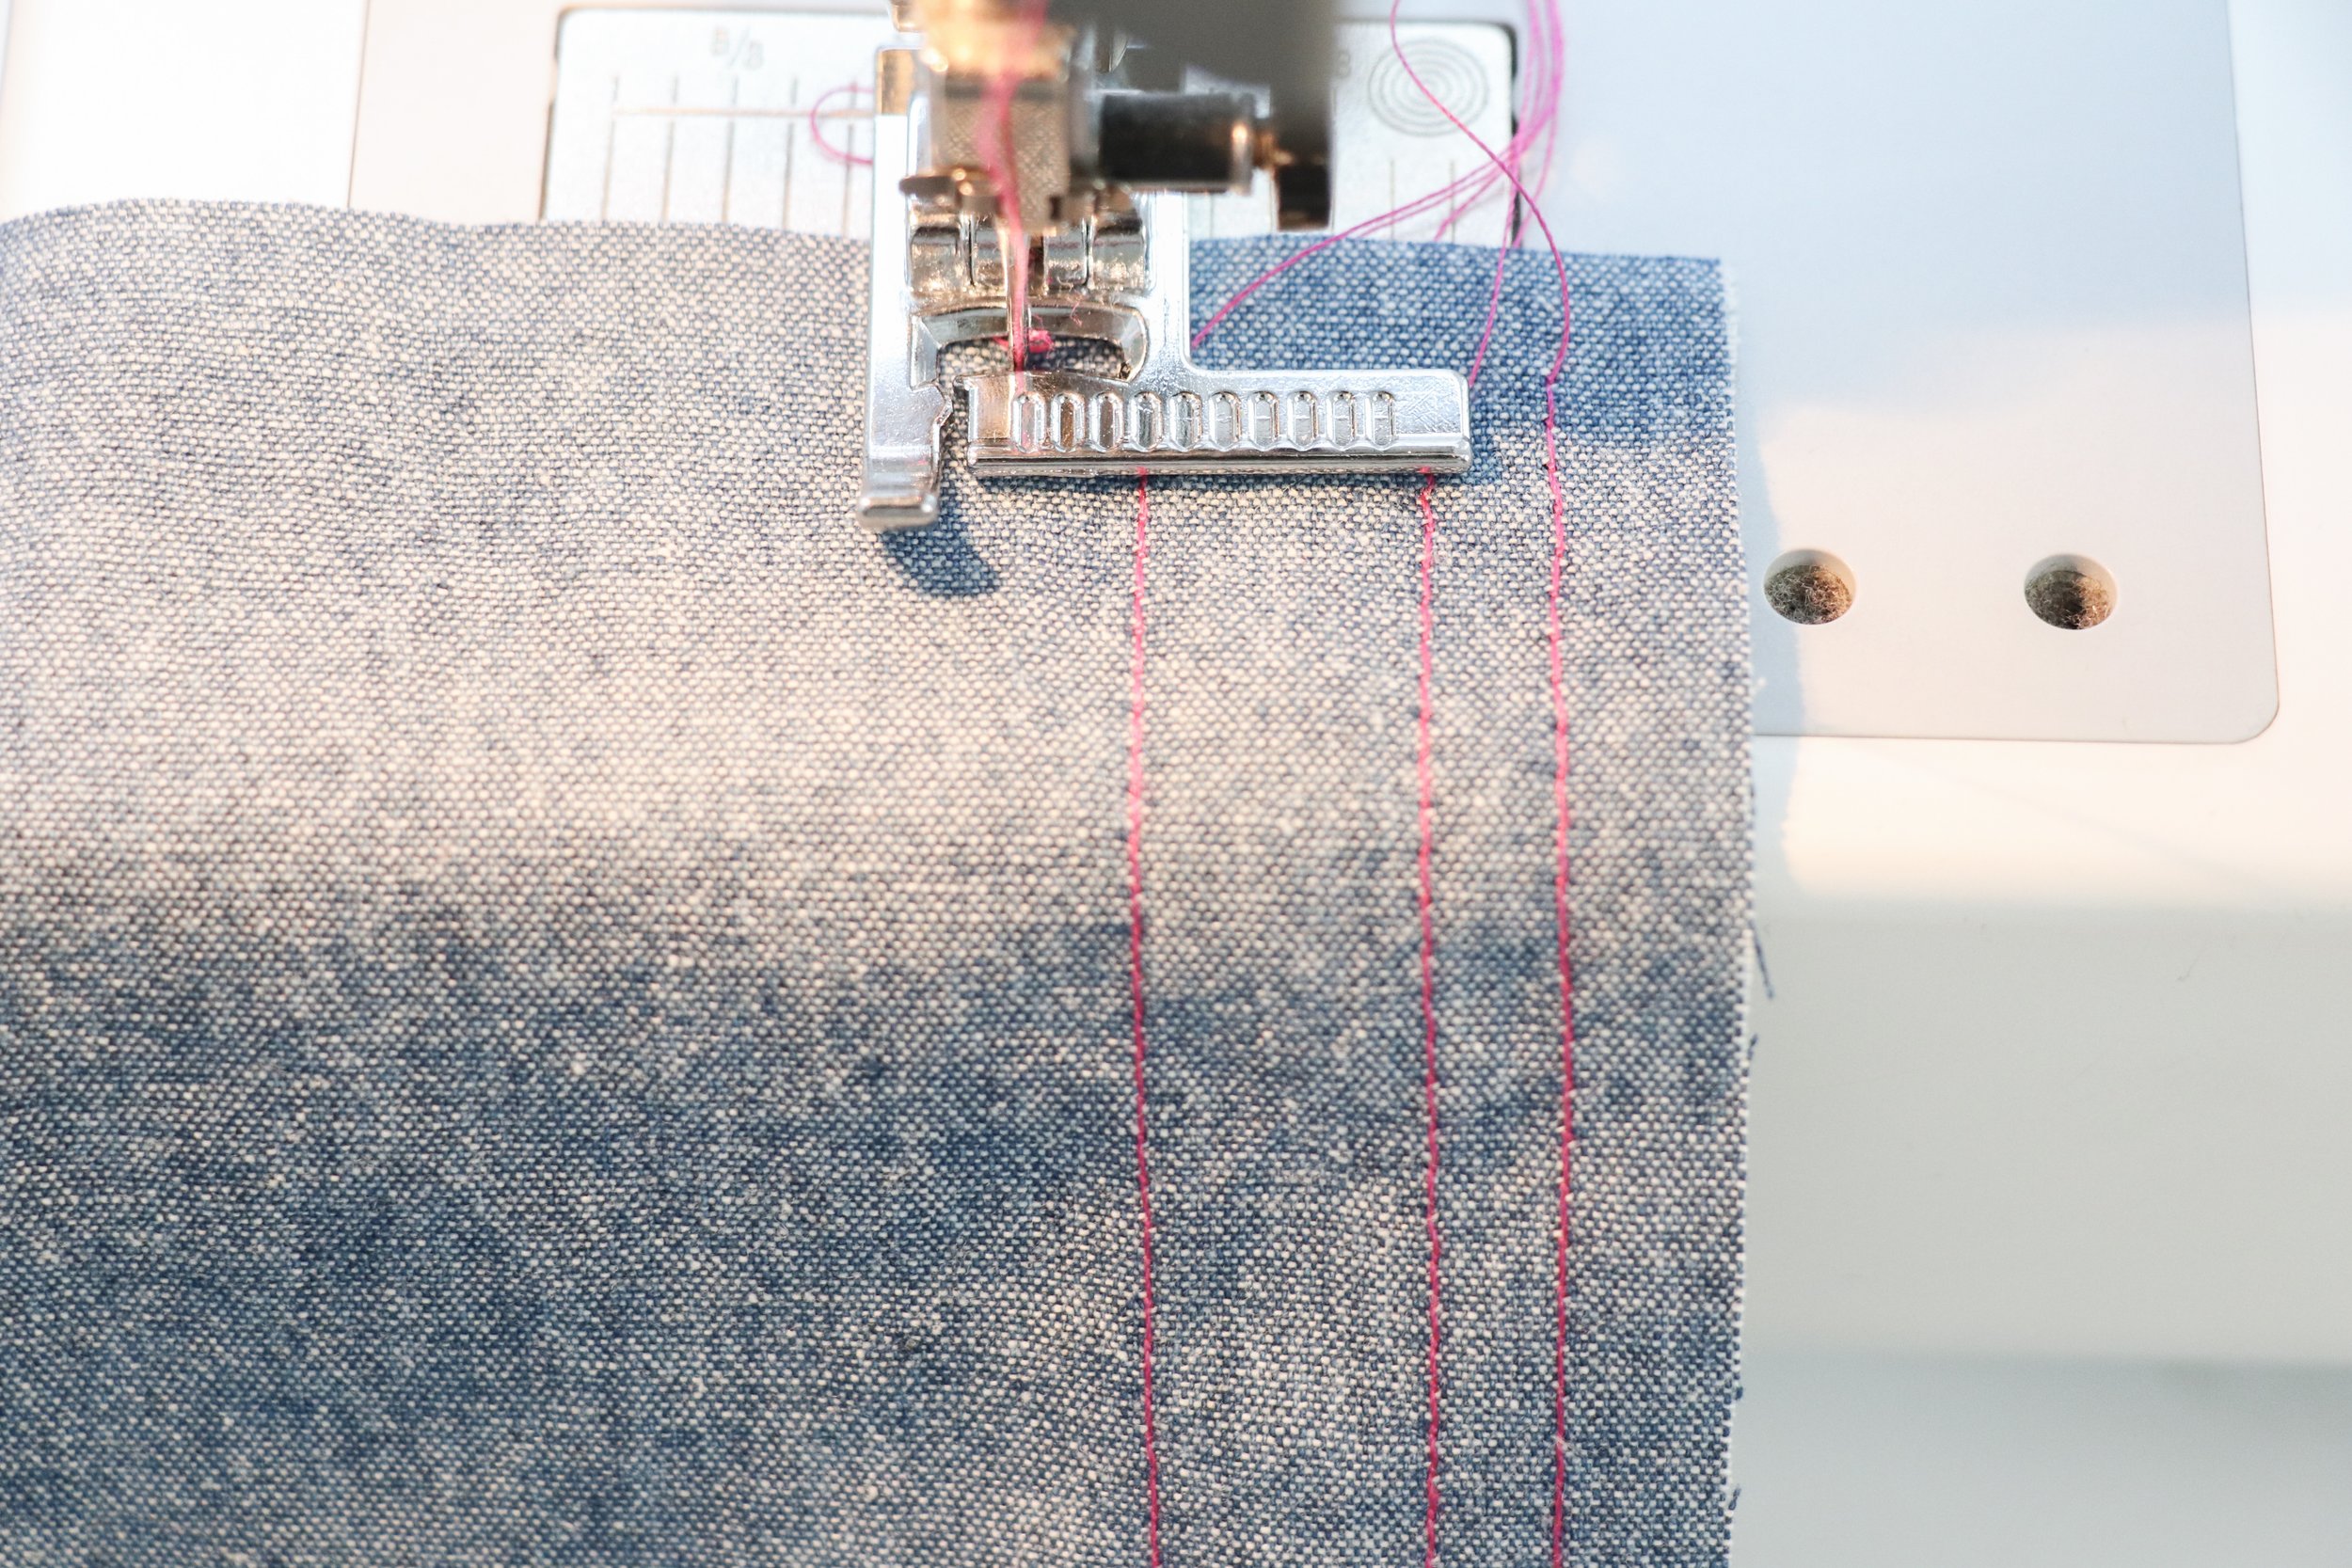
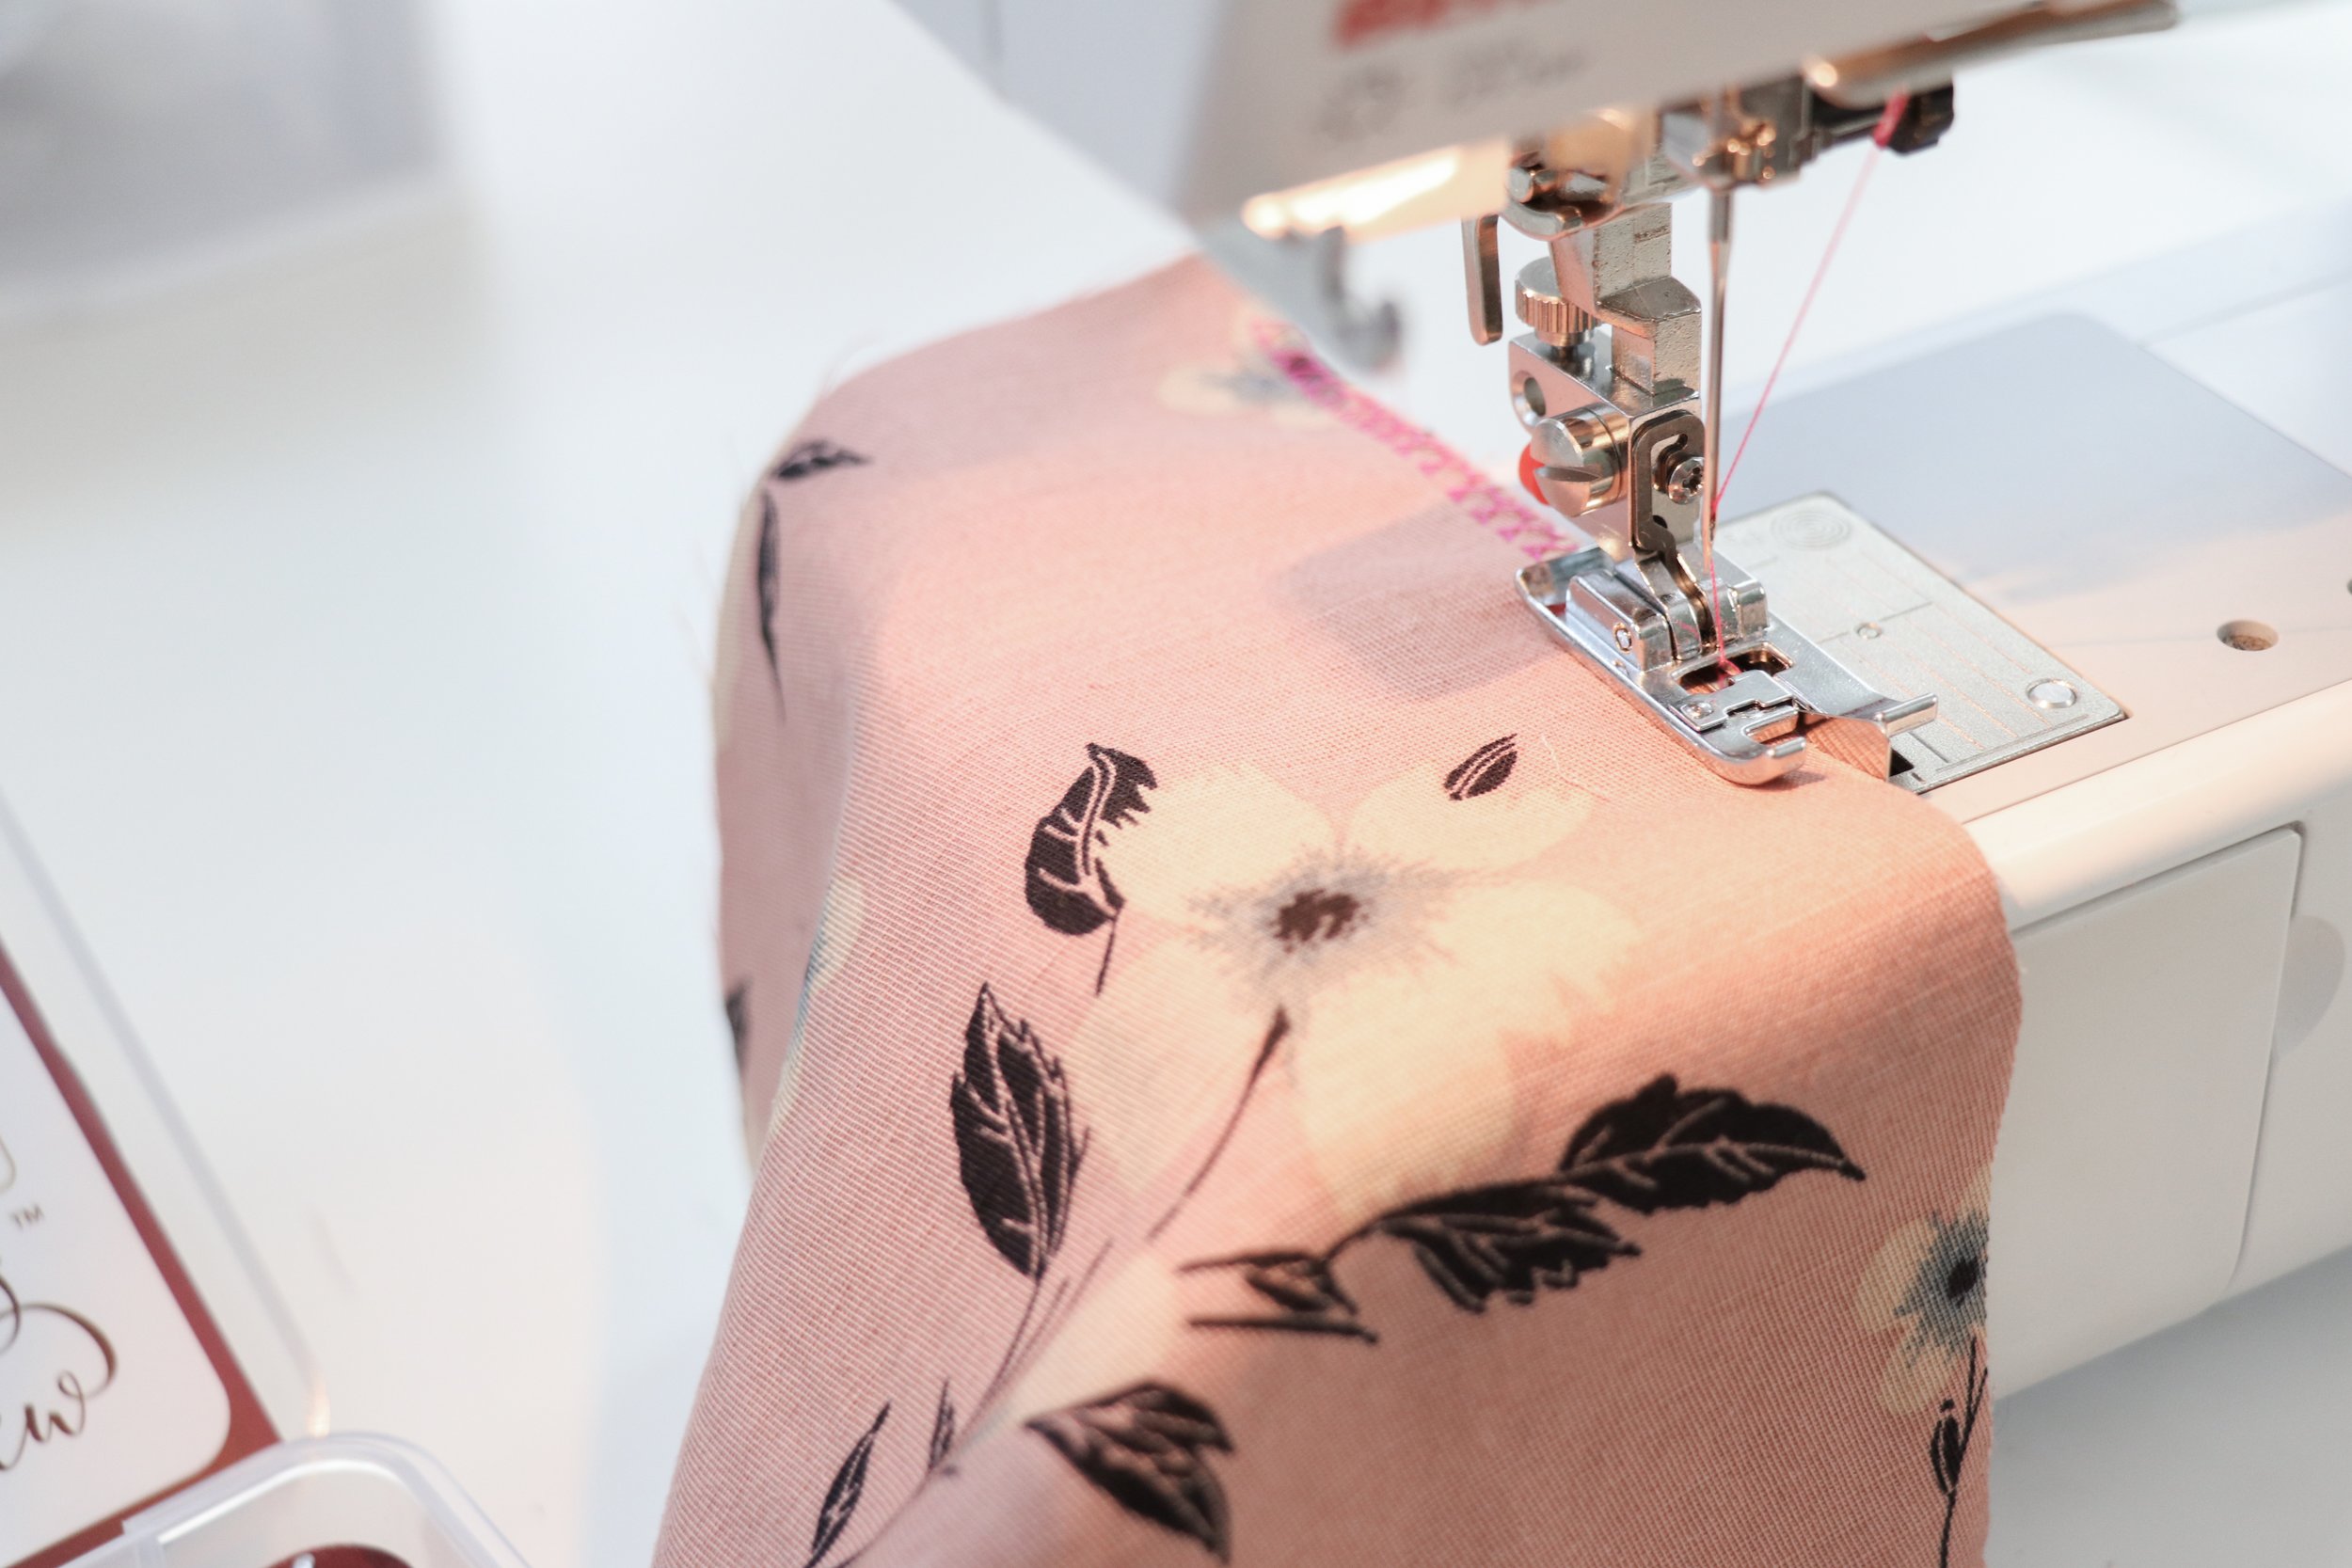
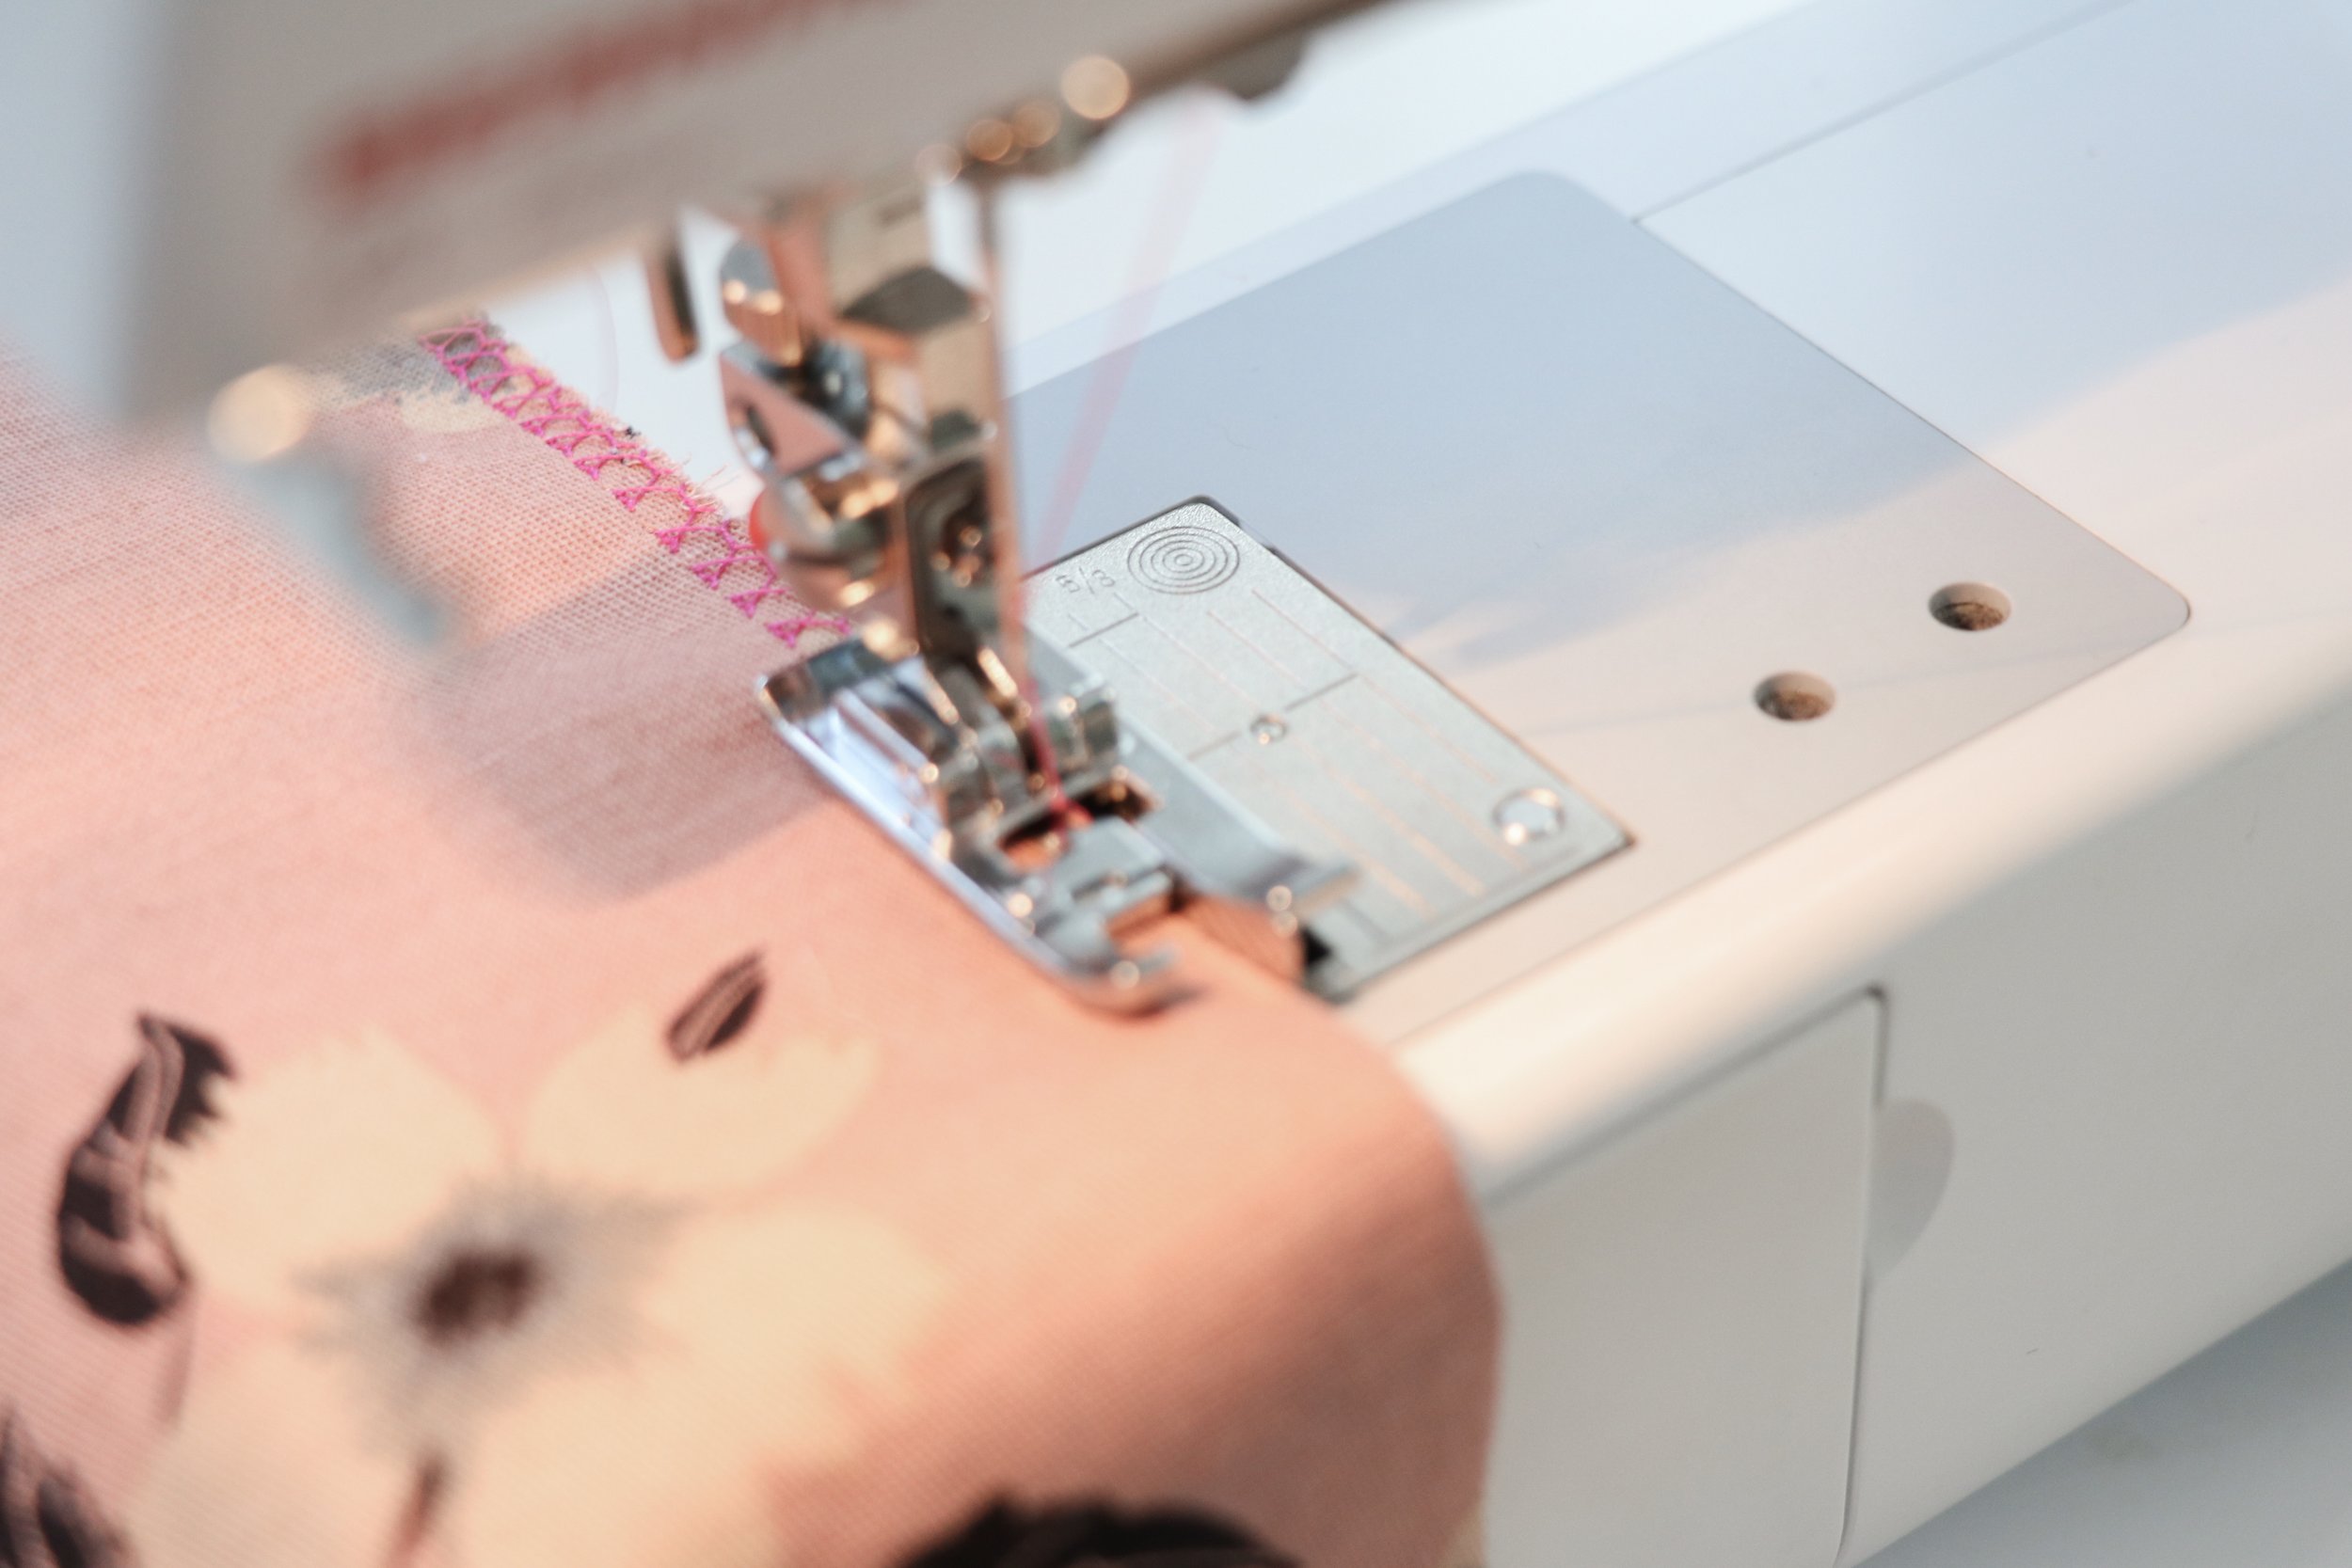
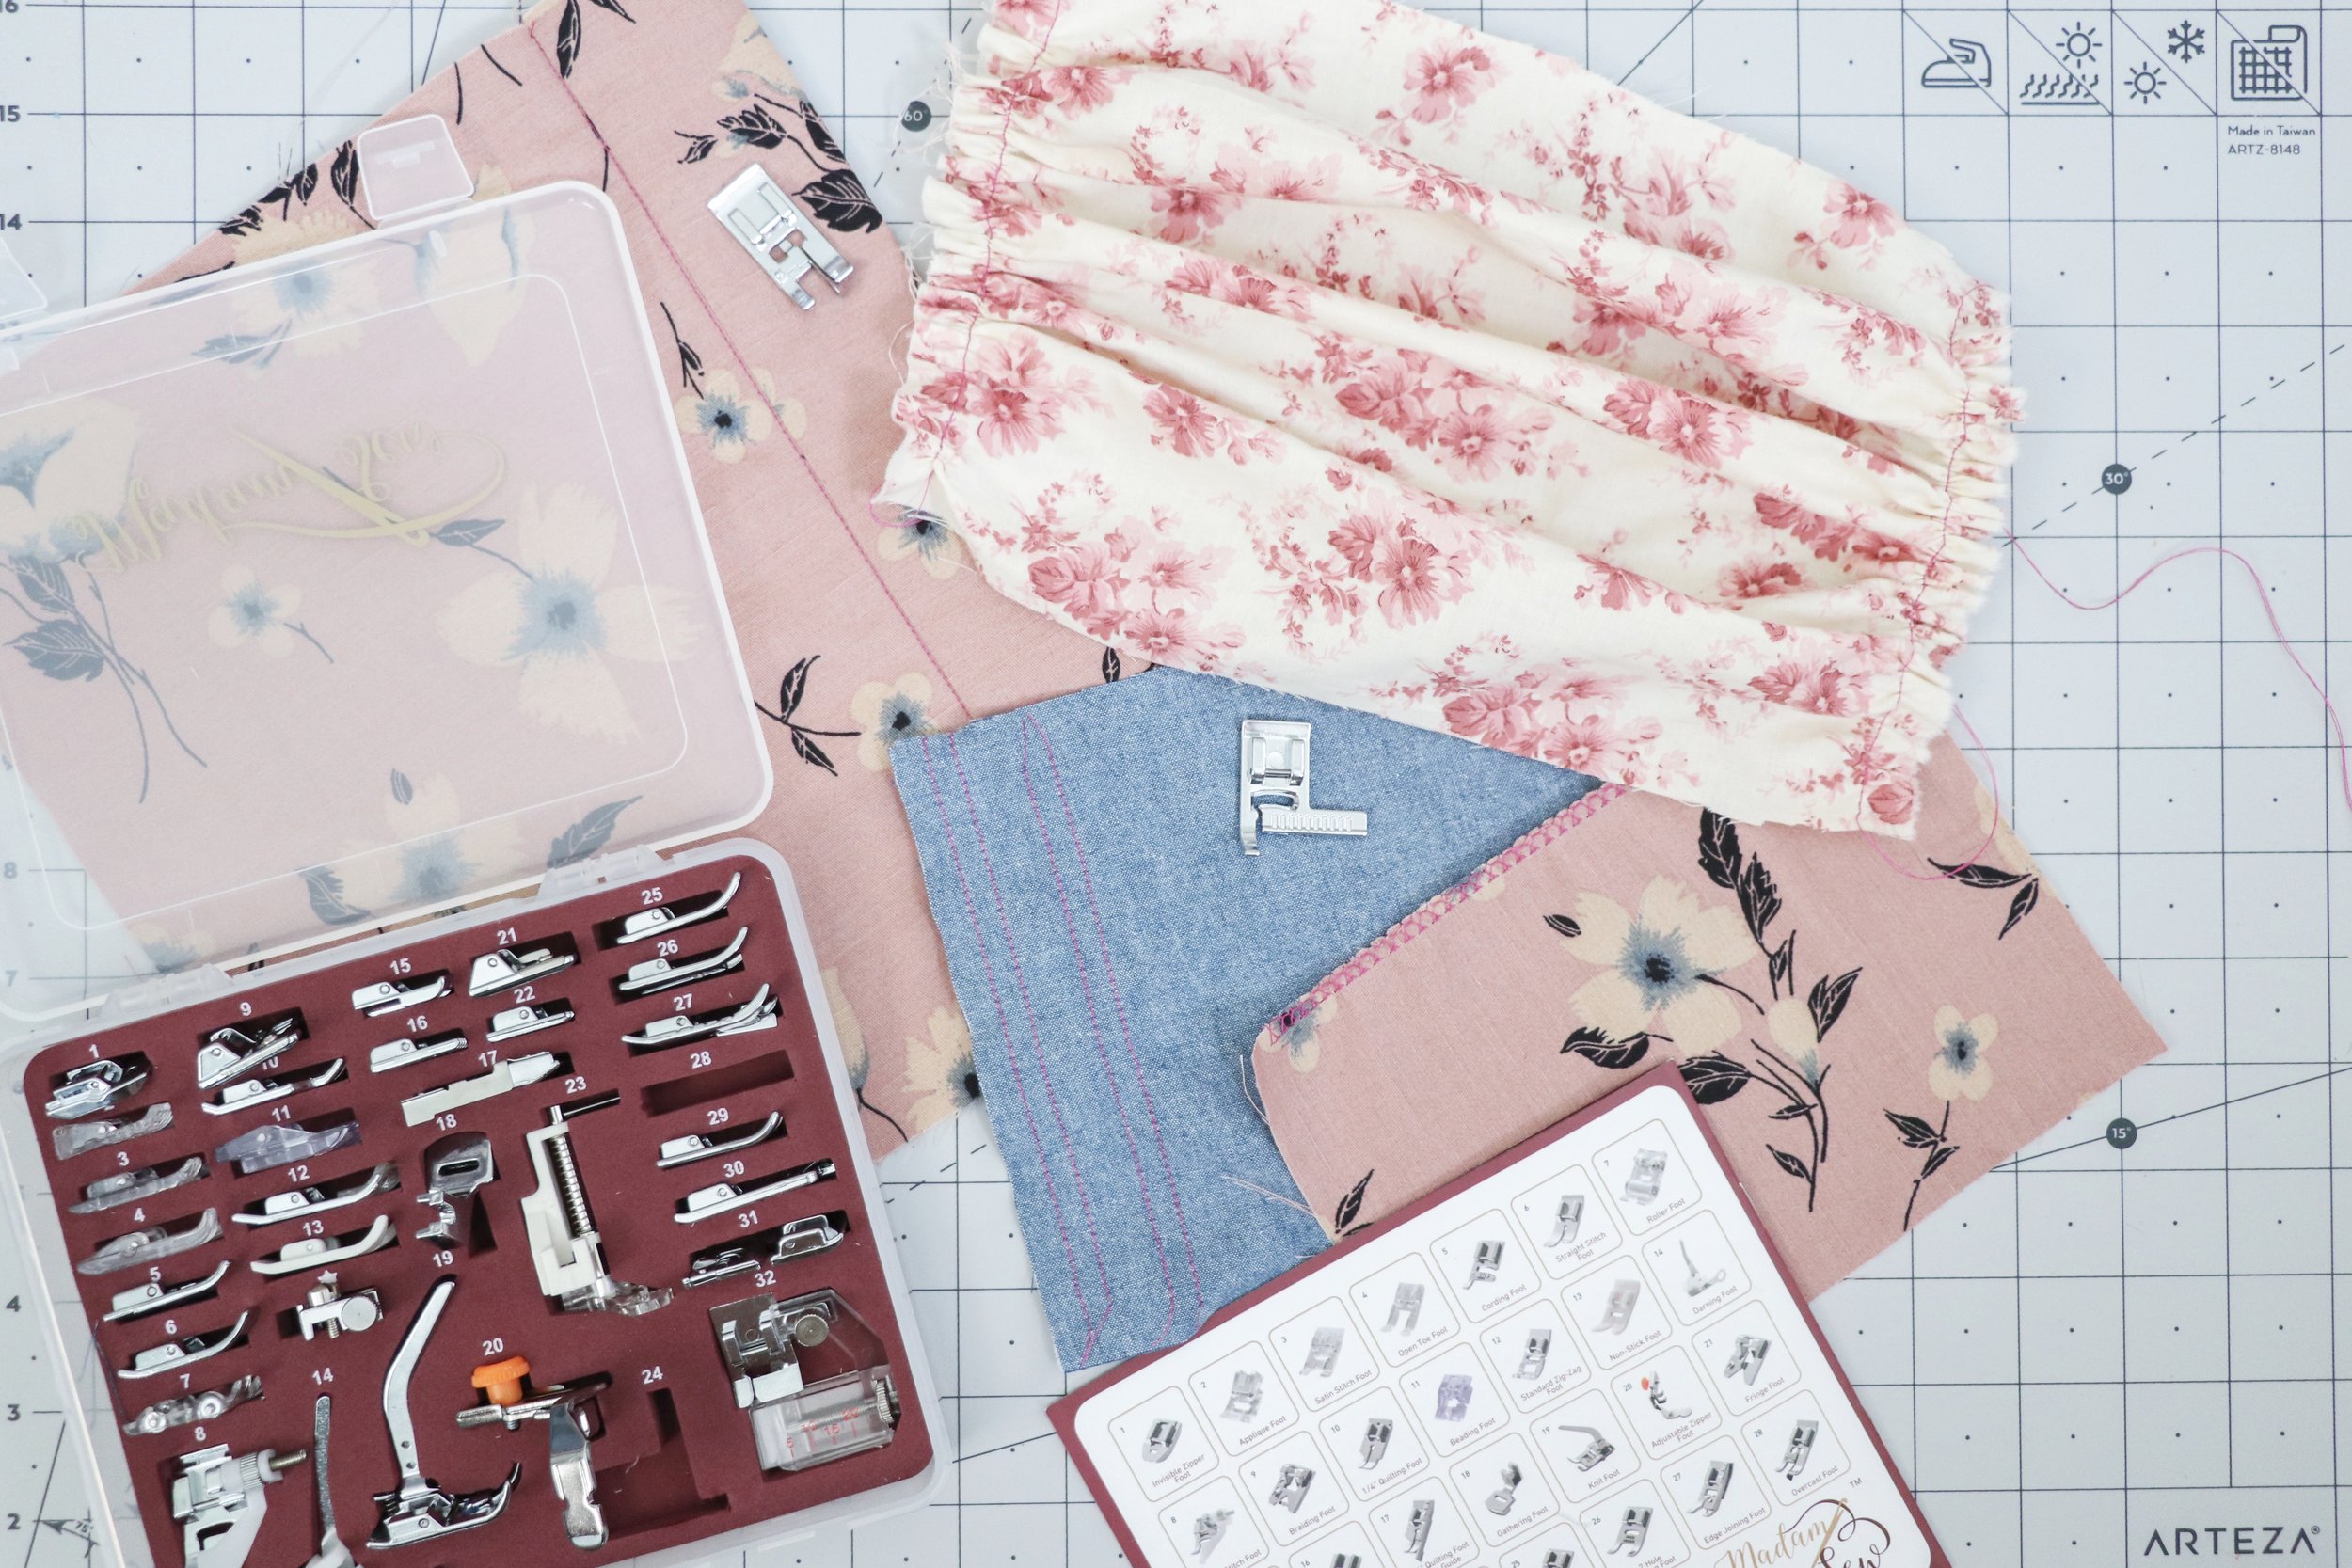
MadamSew Ultimate Presser Foot Kit

Another fun item from Madam Sew to gift is their Ultimate Presser Foot kit. It comes with 32 different presser feet, for any kind of application you can imagine, and it also comes with an adapter so that they can be used with almost any brand sewing machine. It comes with an instruction booklet, as well as tutorial videos for each foot.

*** I had previously received this item in the past in exchange for a review, but I actually still use these presser feet all the time! Check out my highlights on Instagram for some example videos I shared in the past. I’ll also be sharing some more video examples next week.

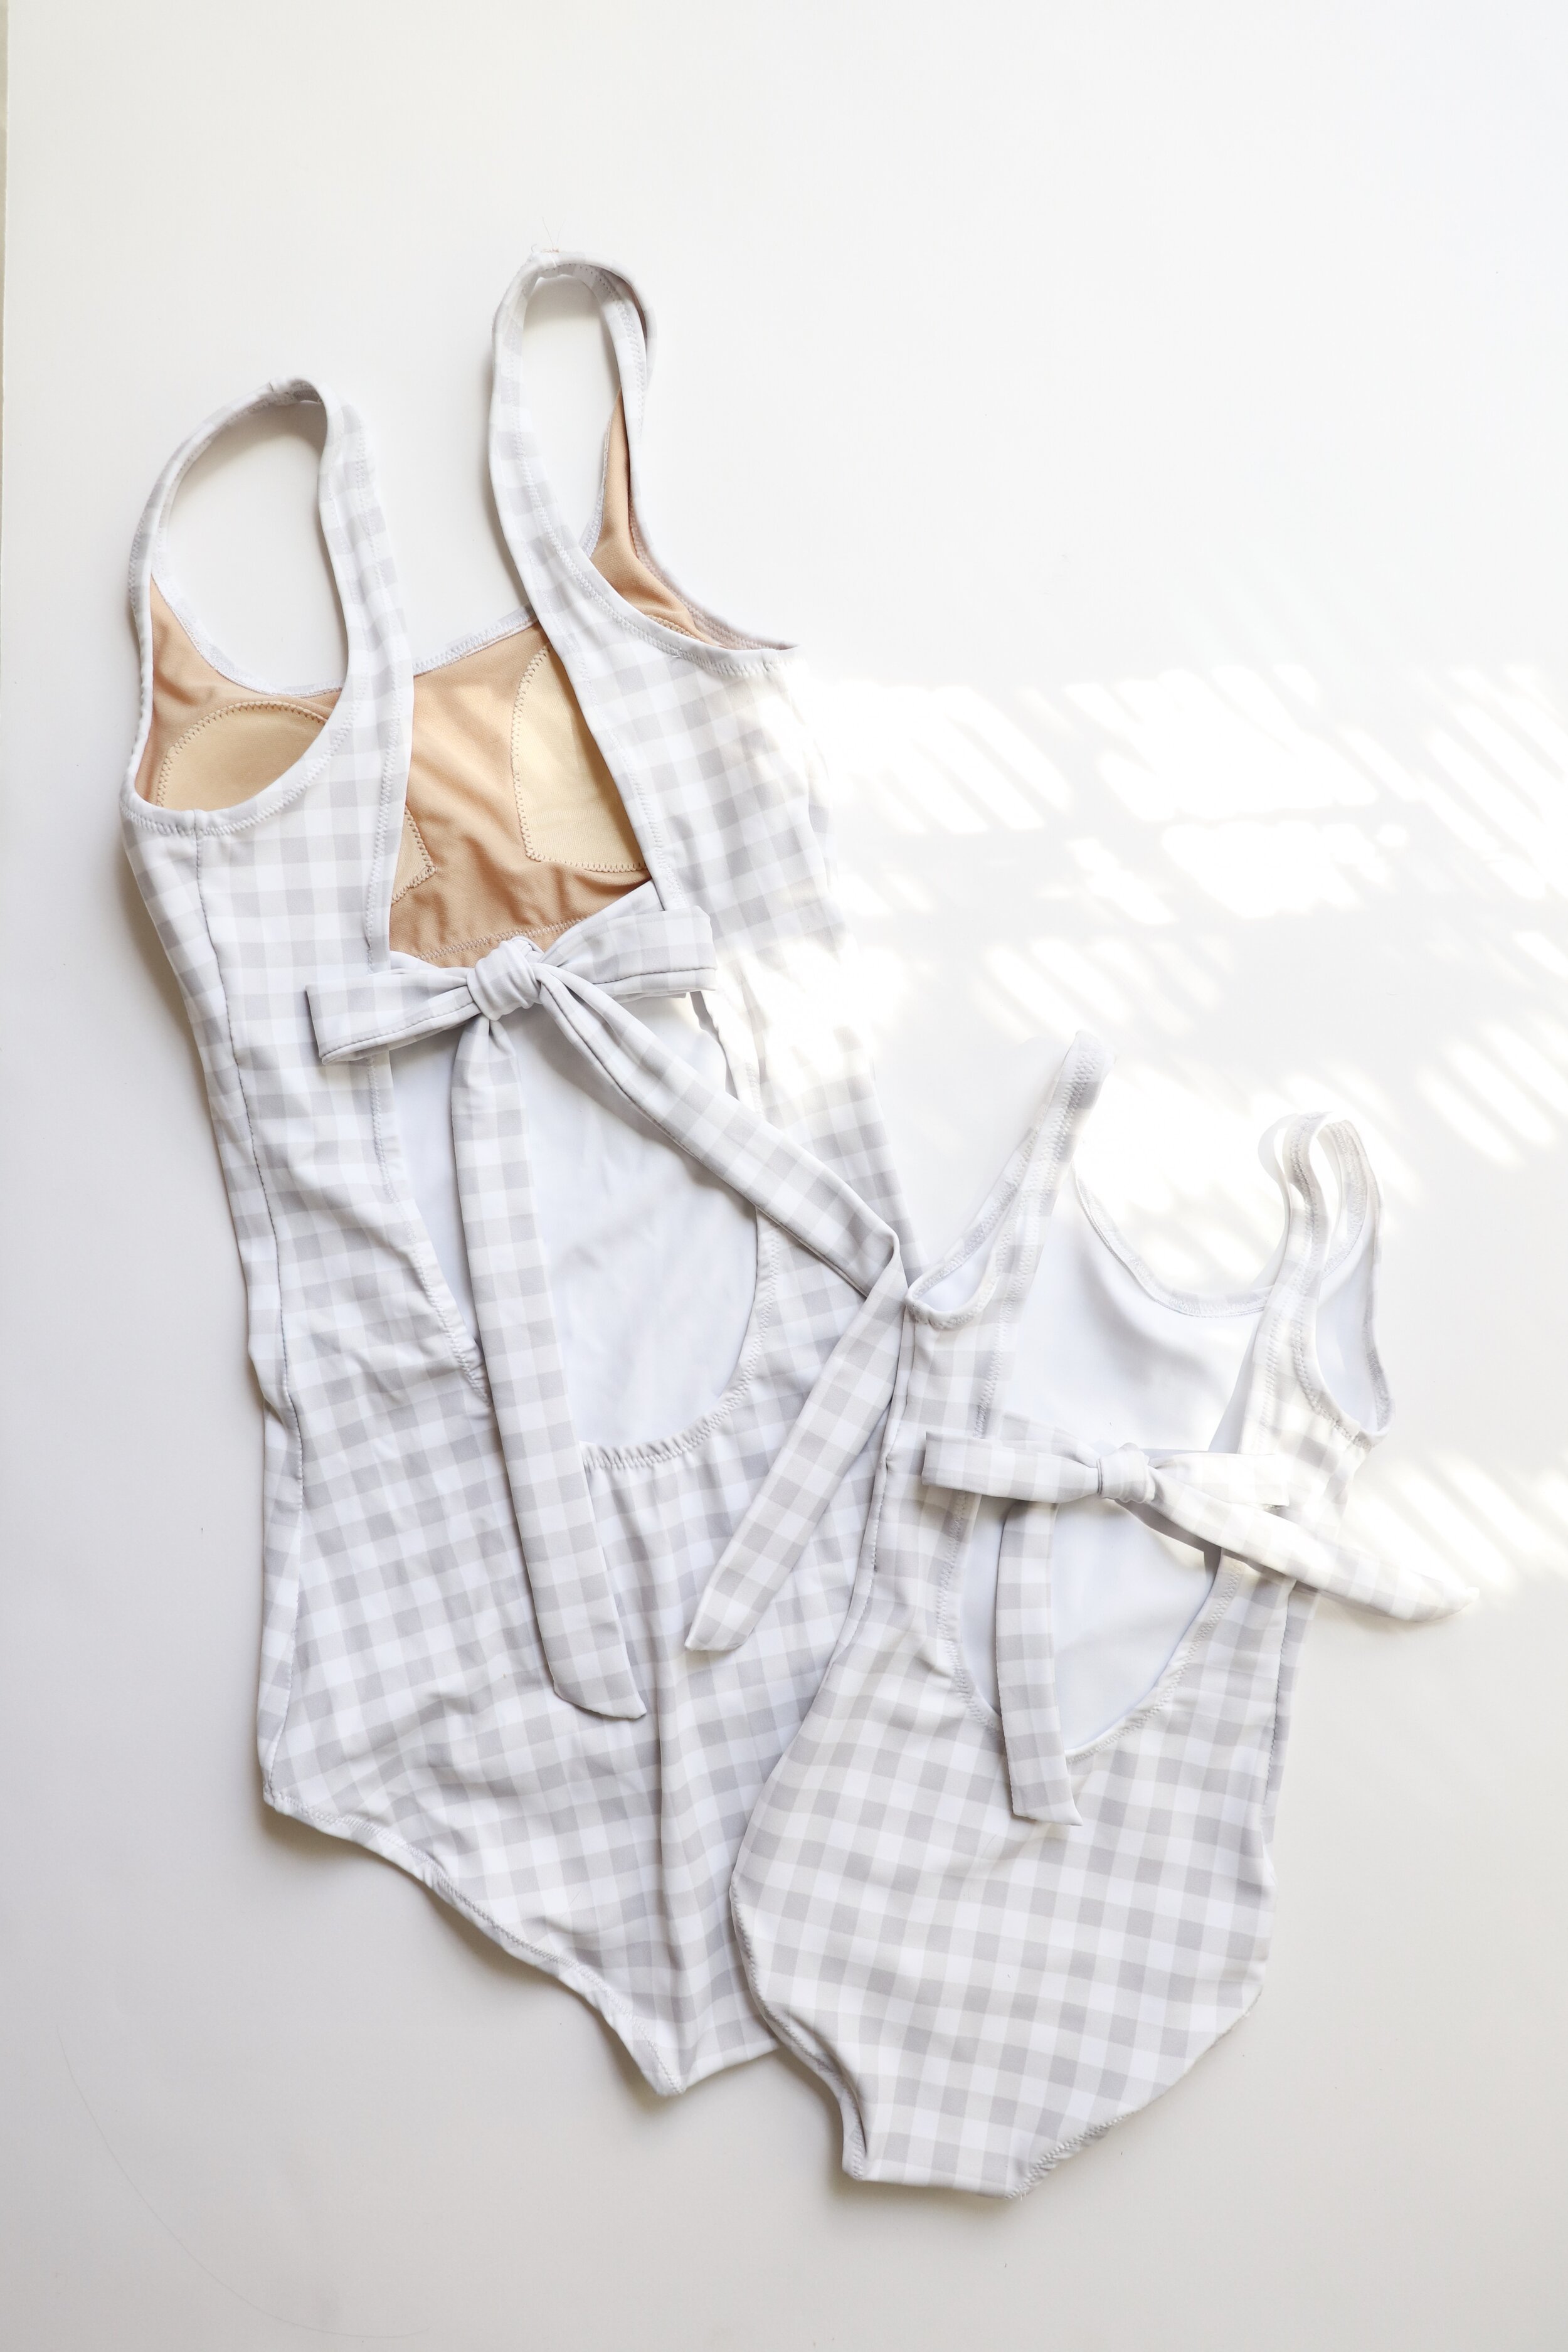
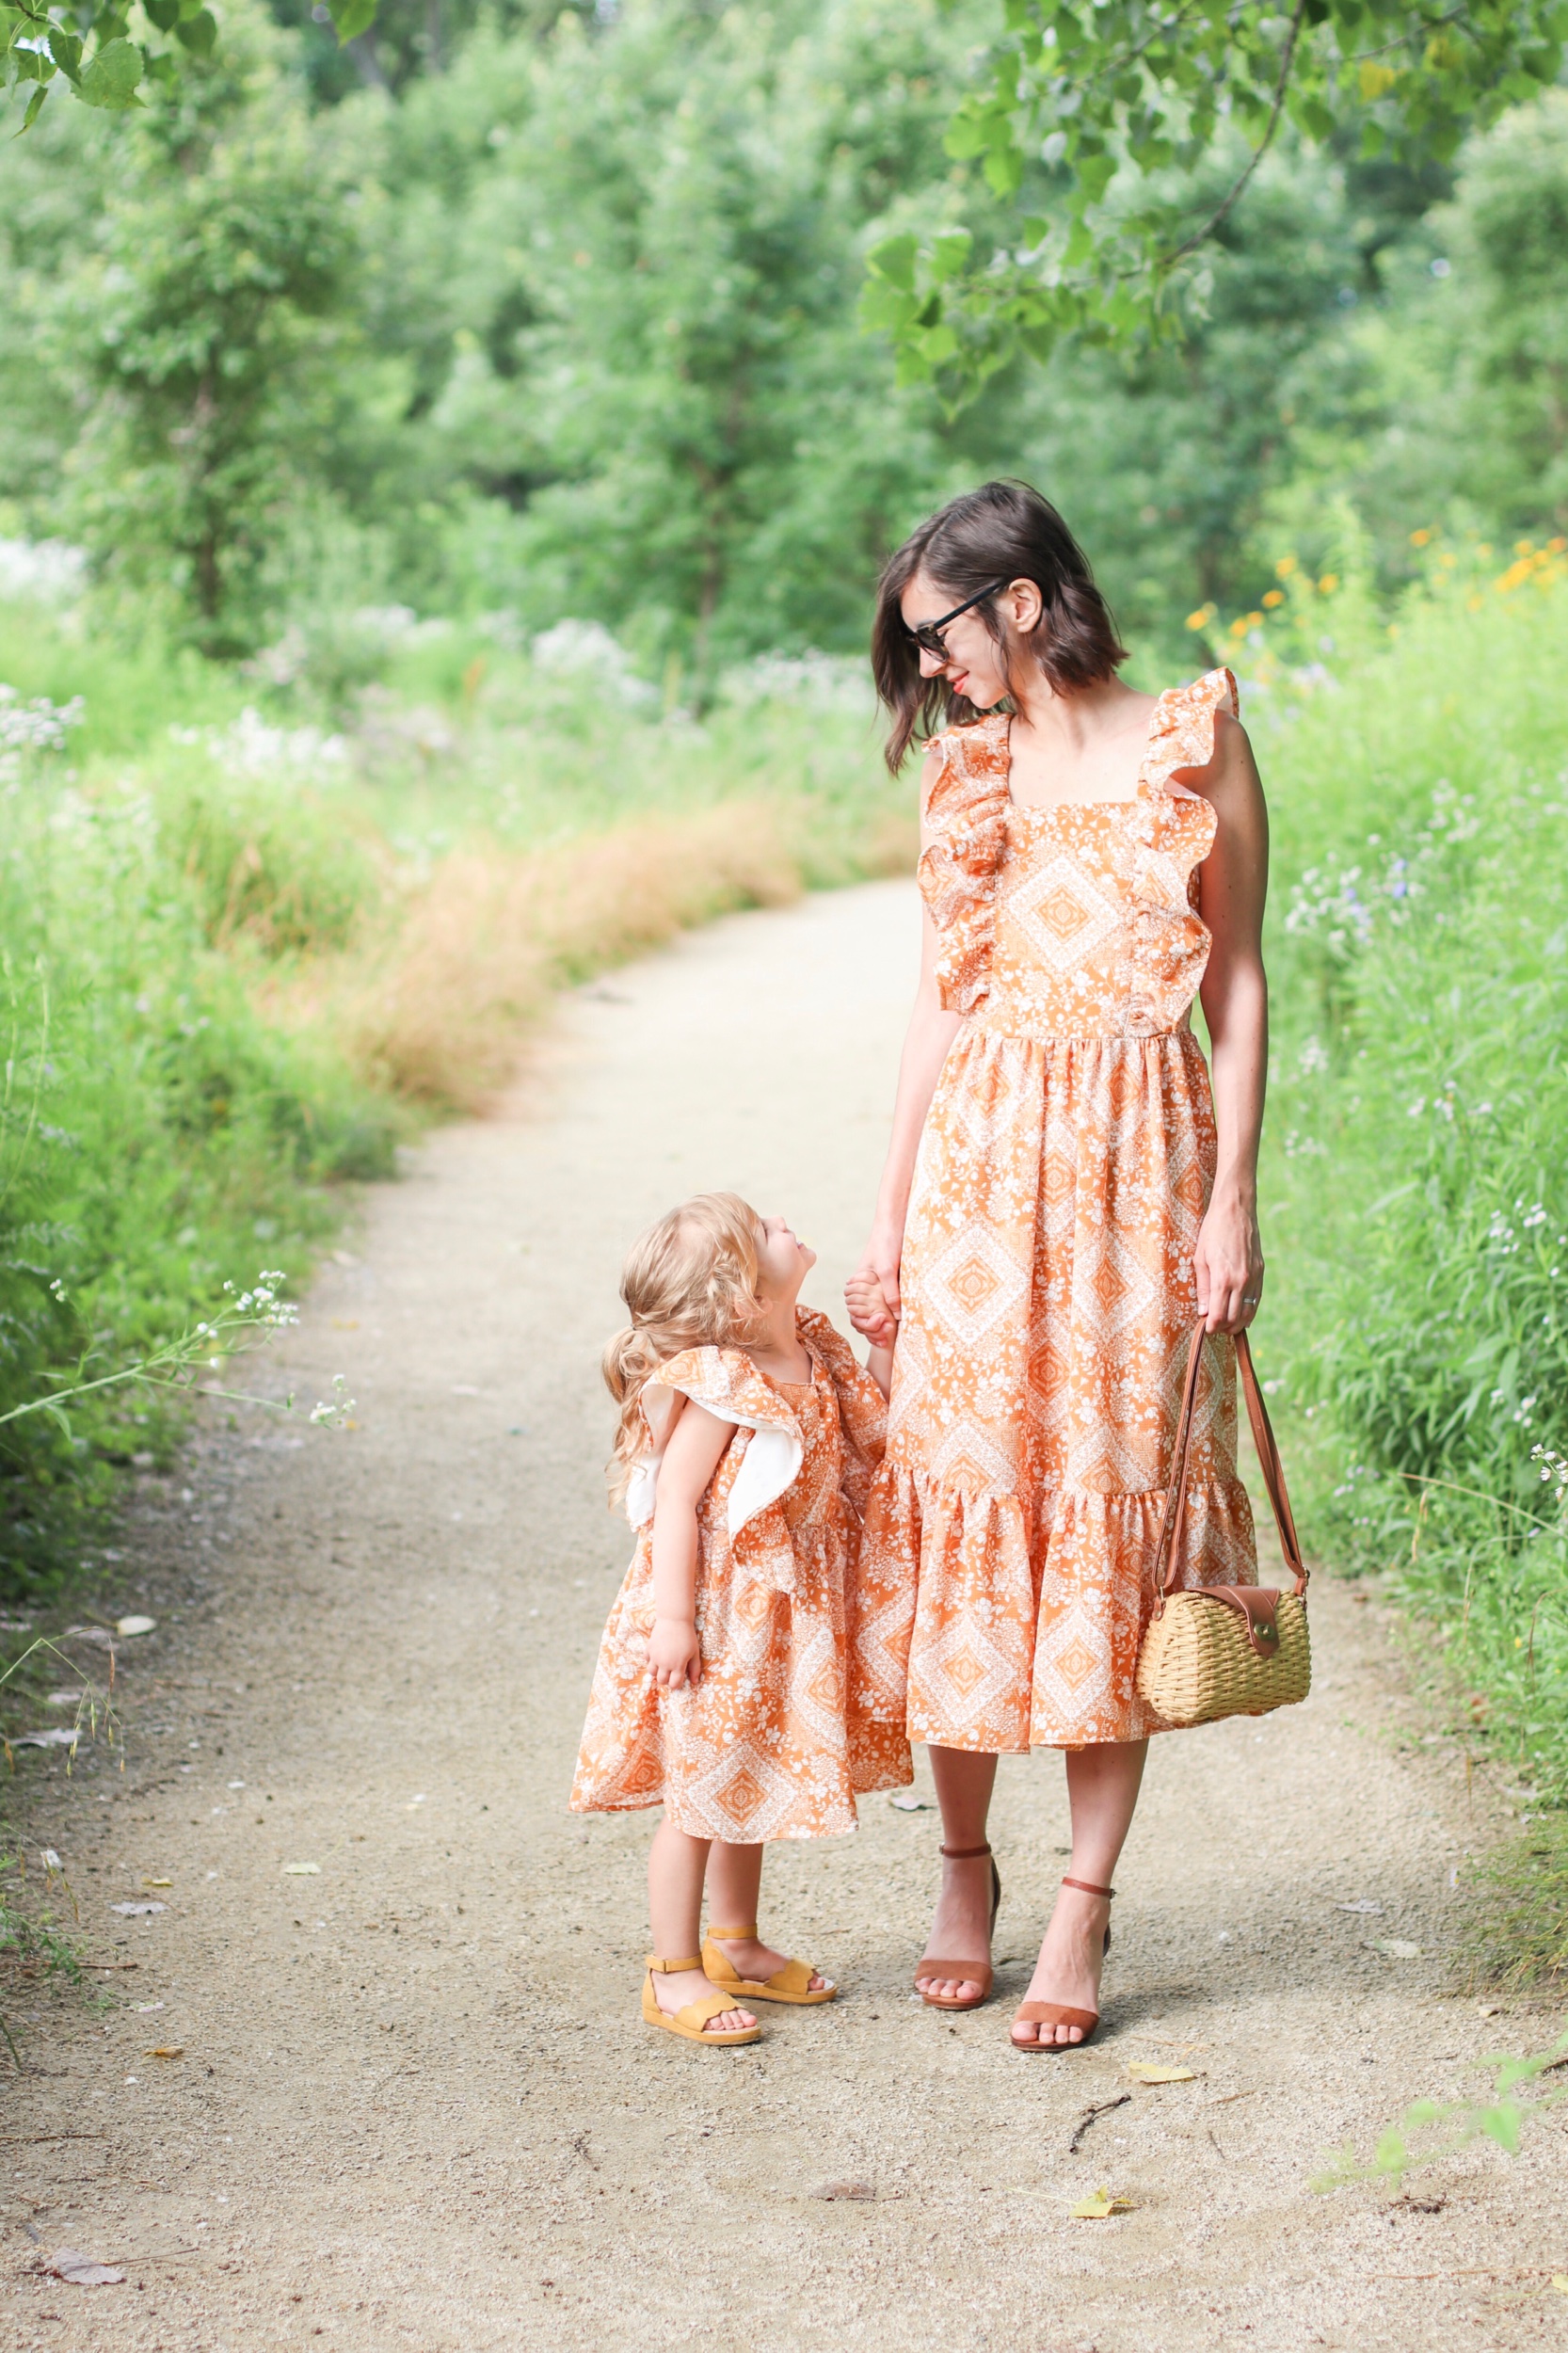
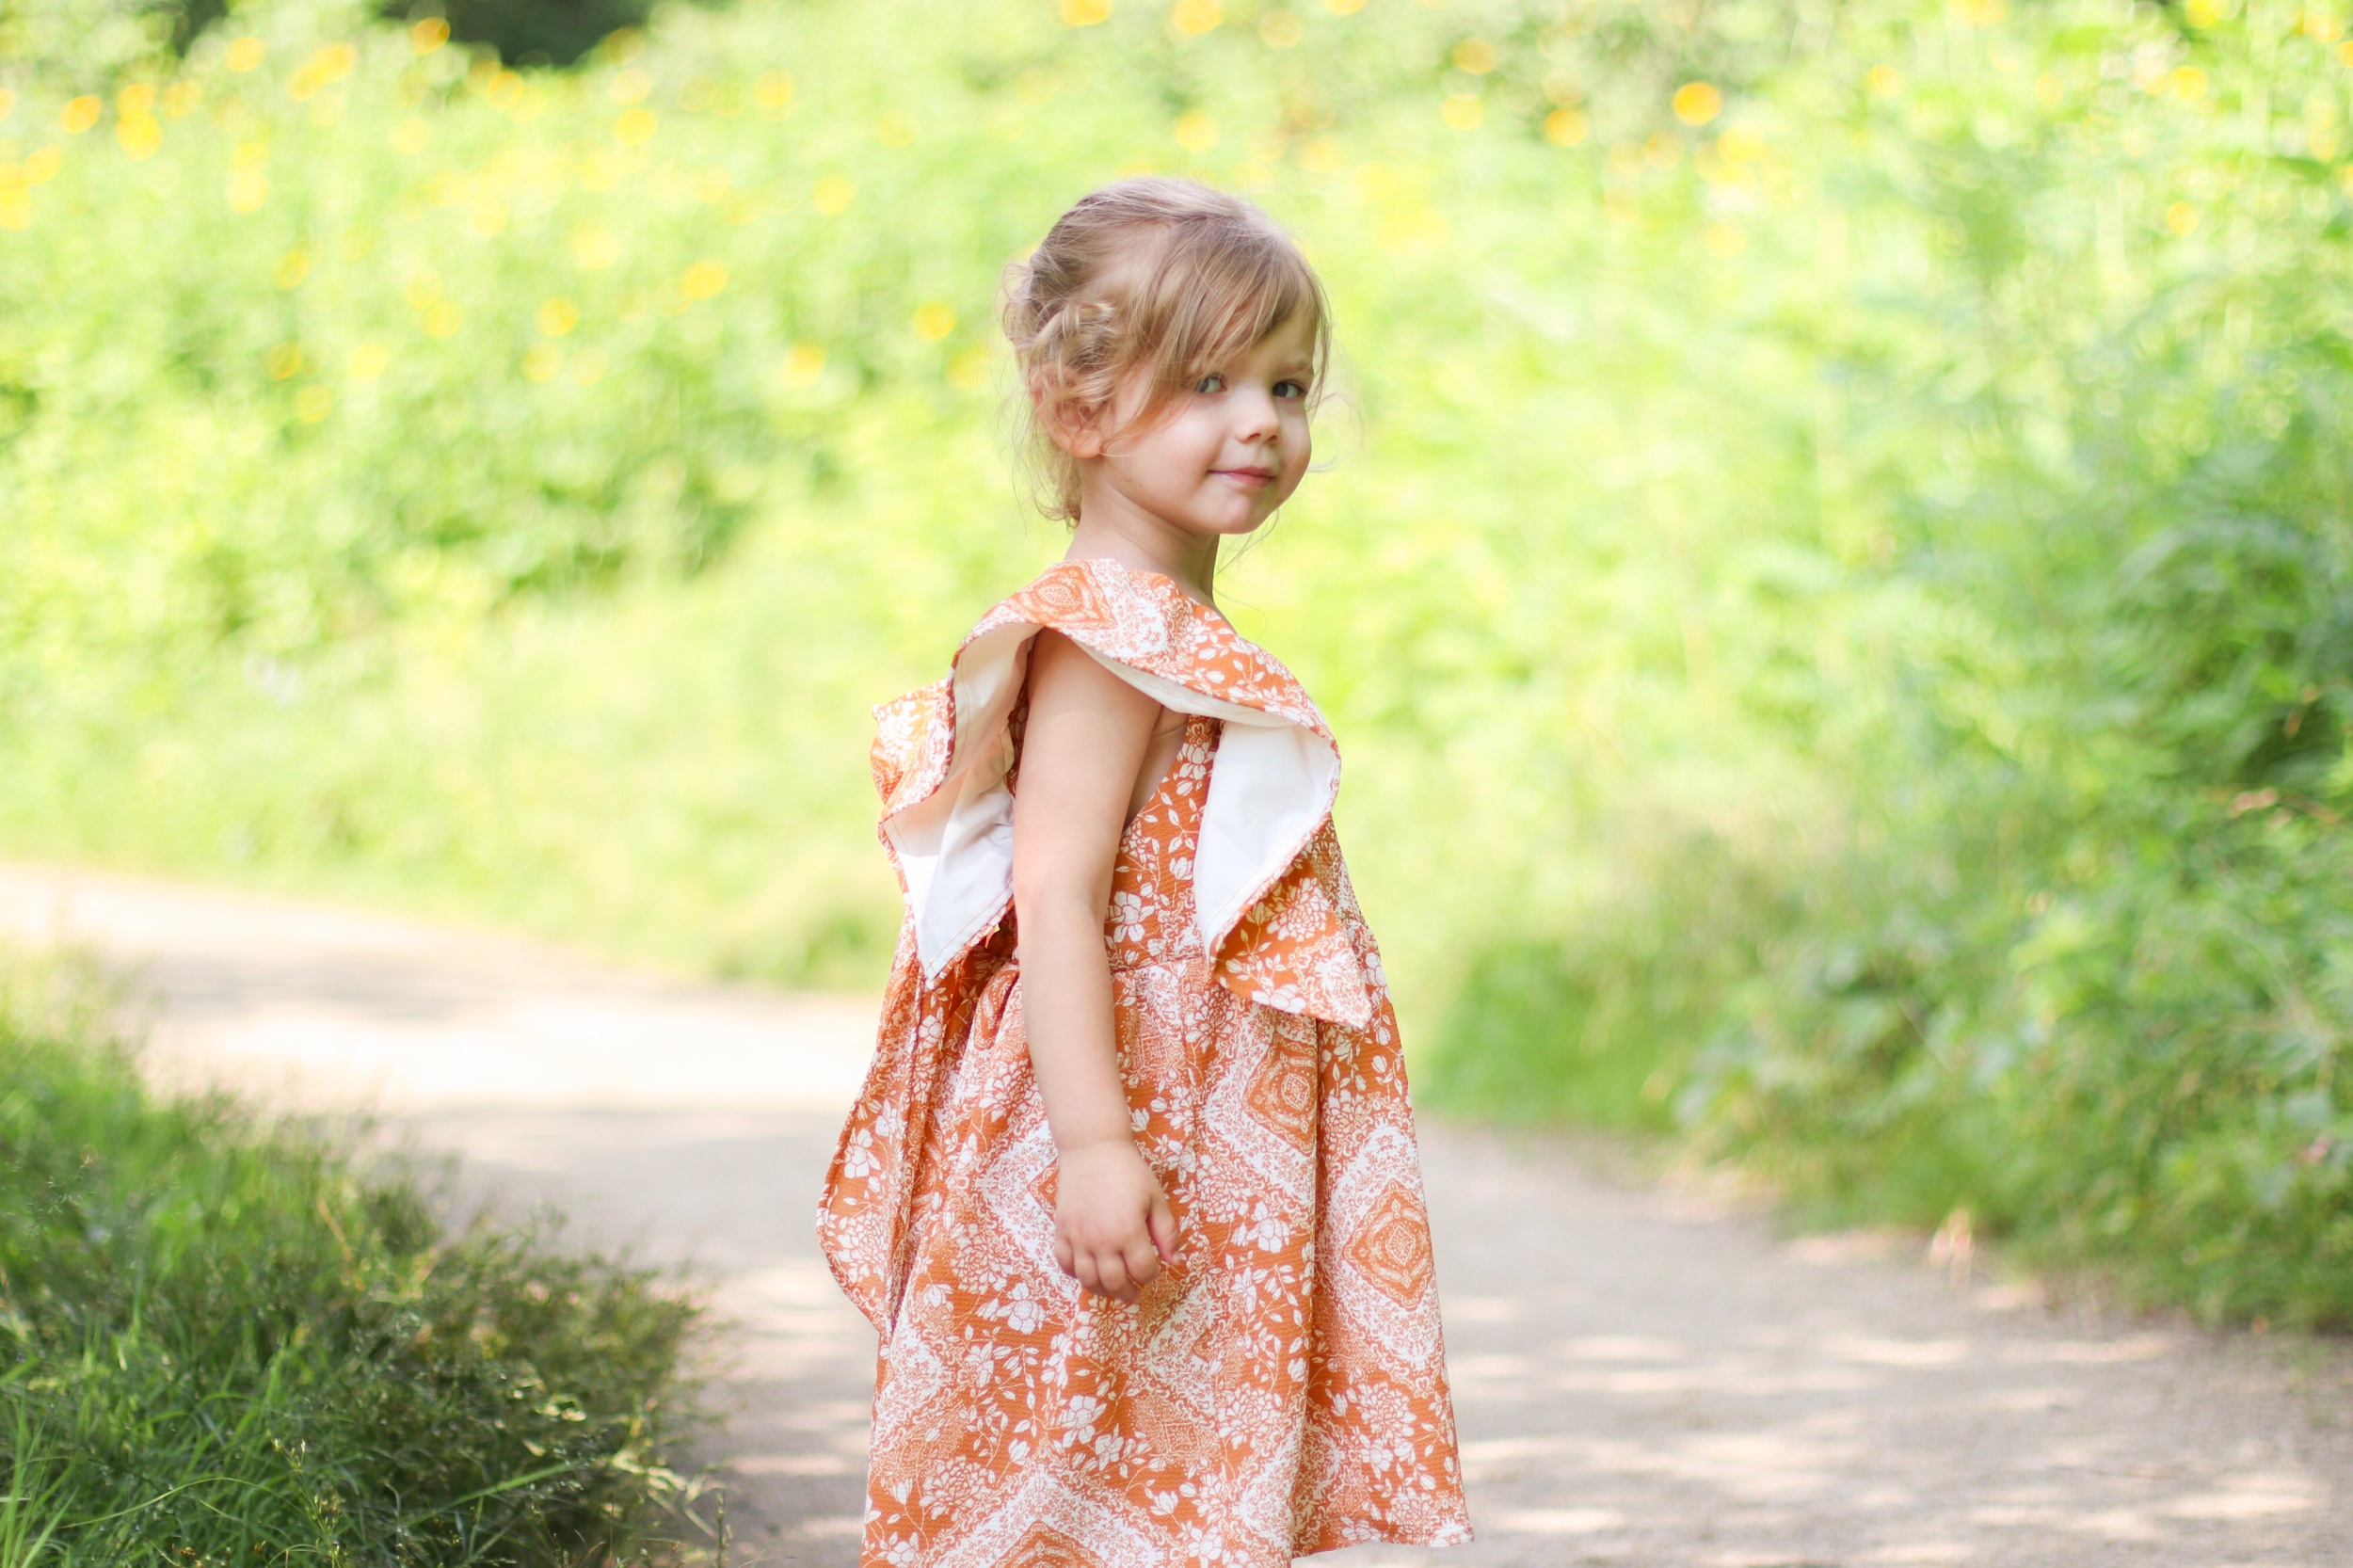
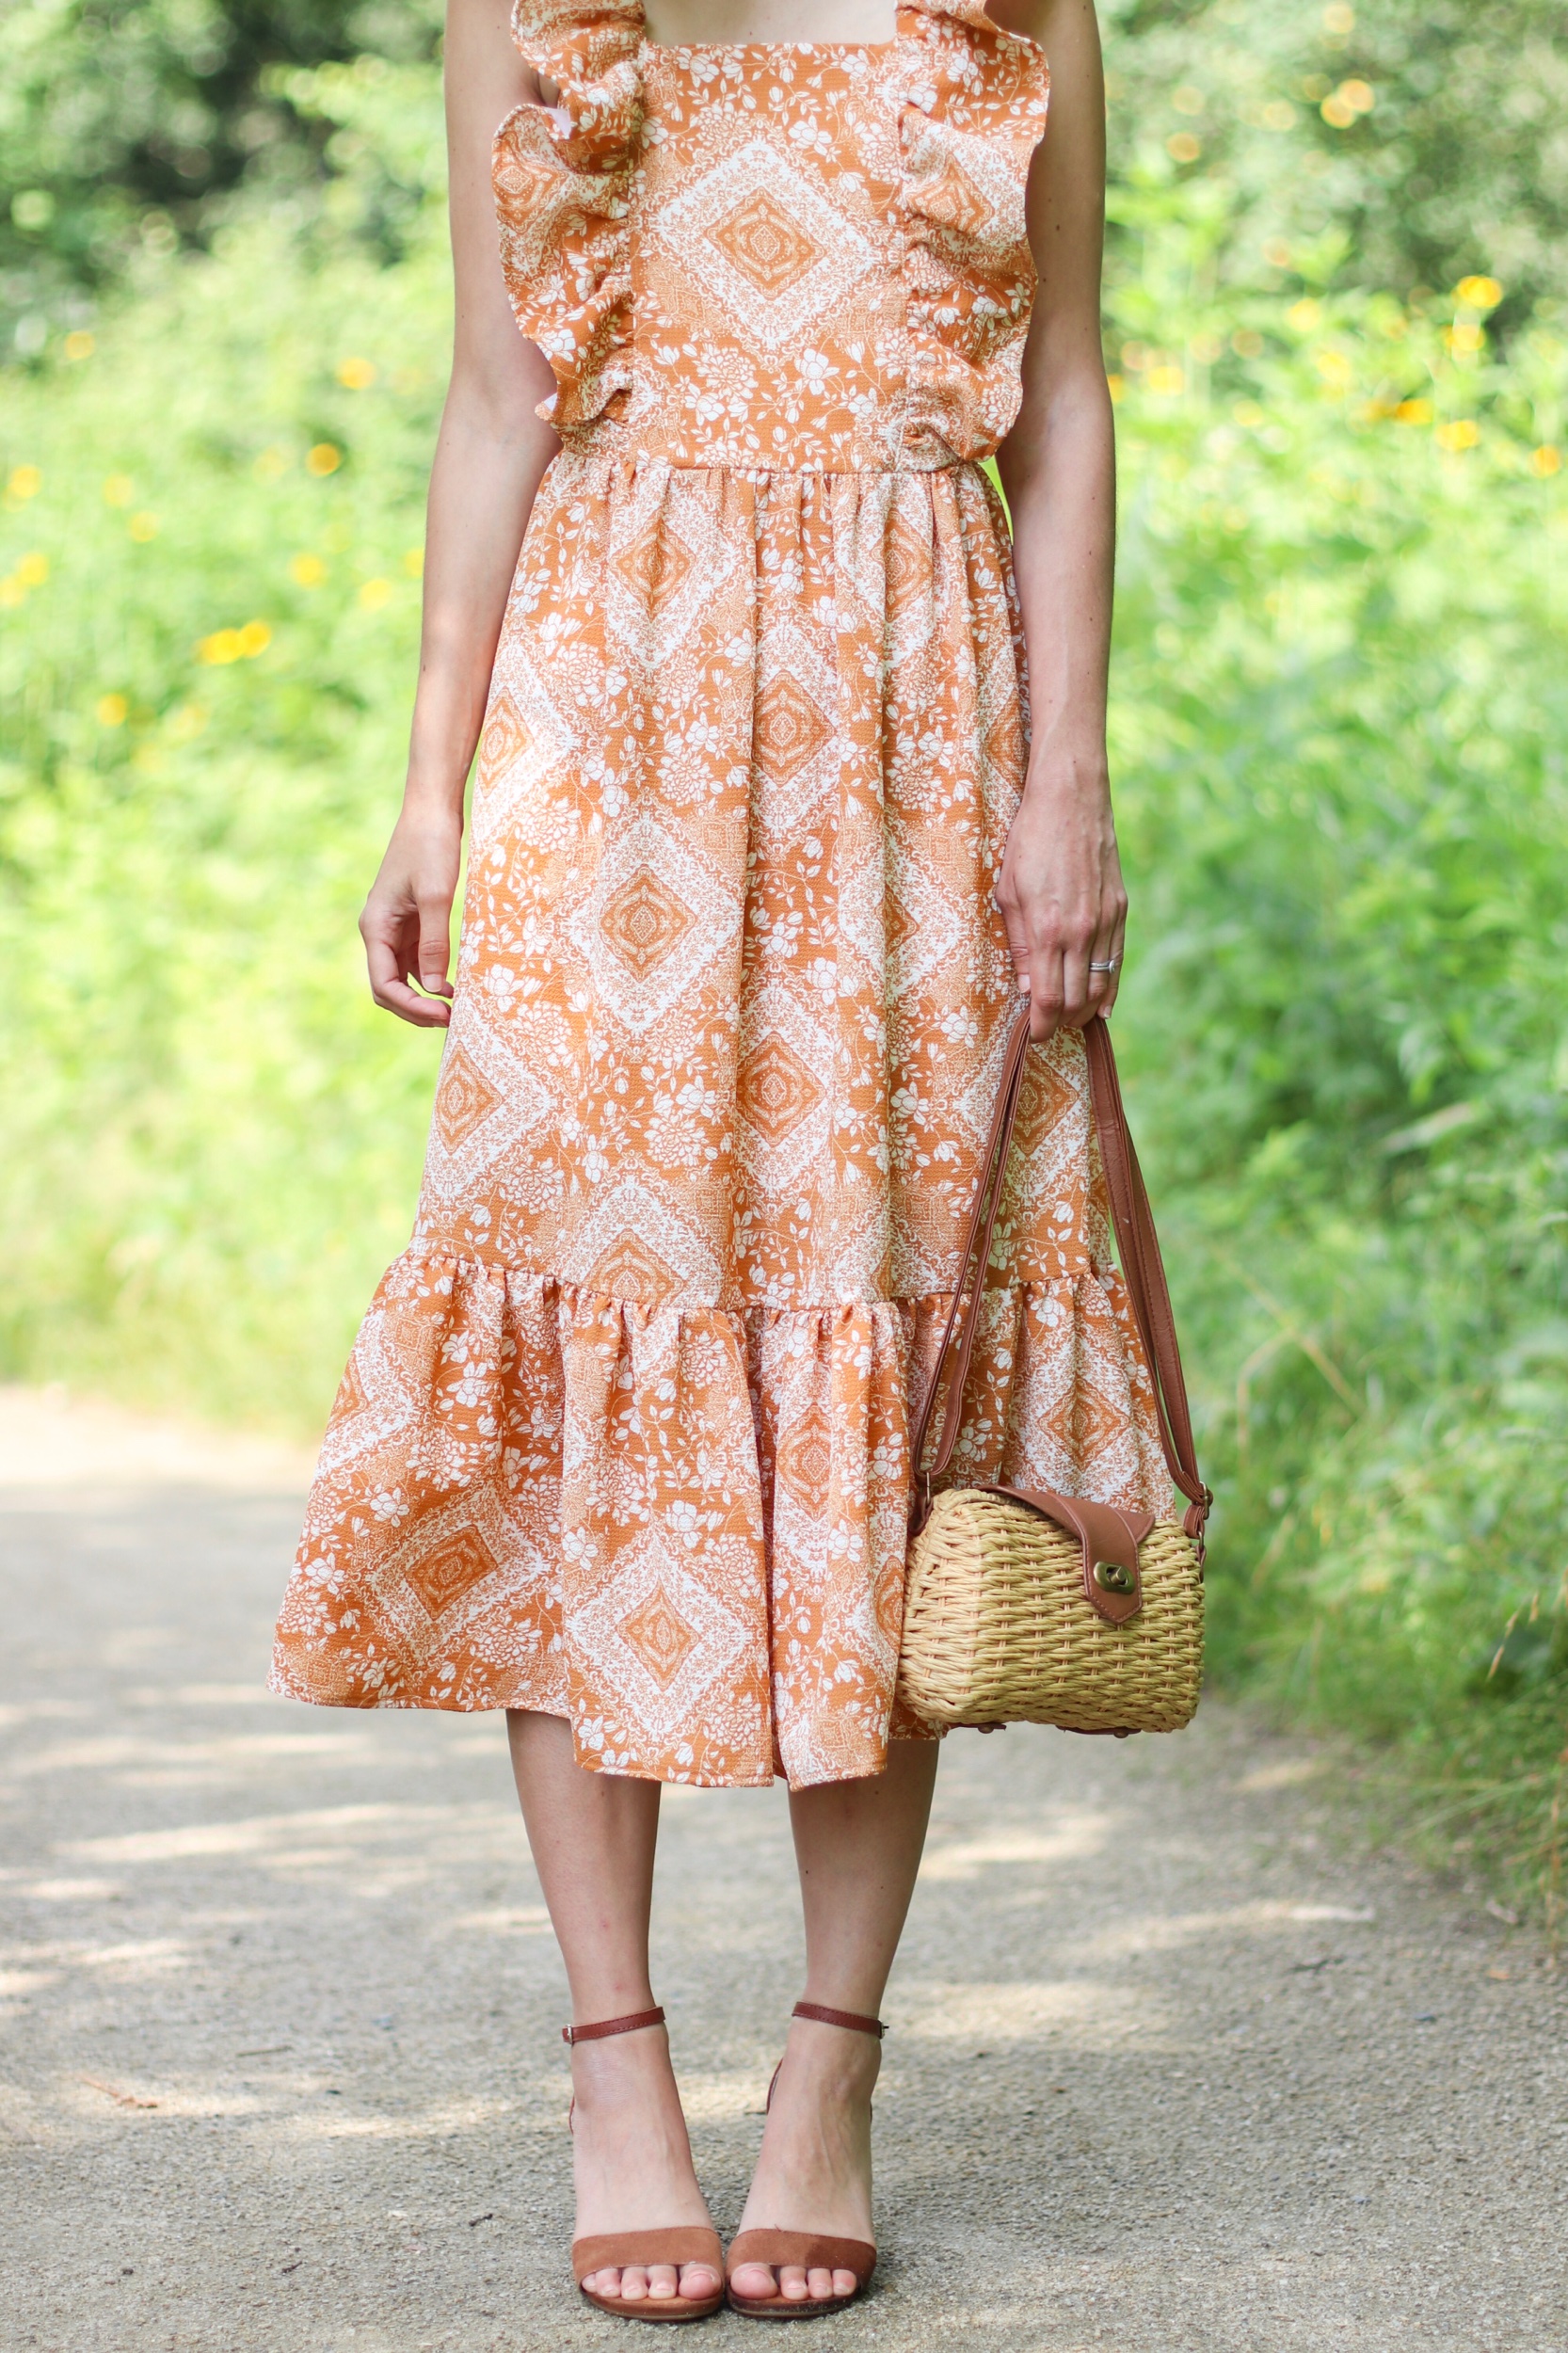
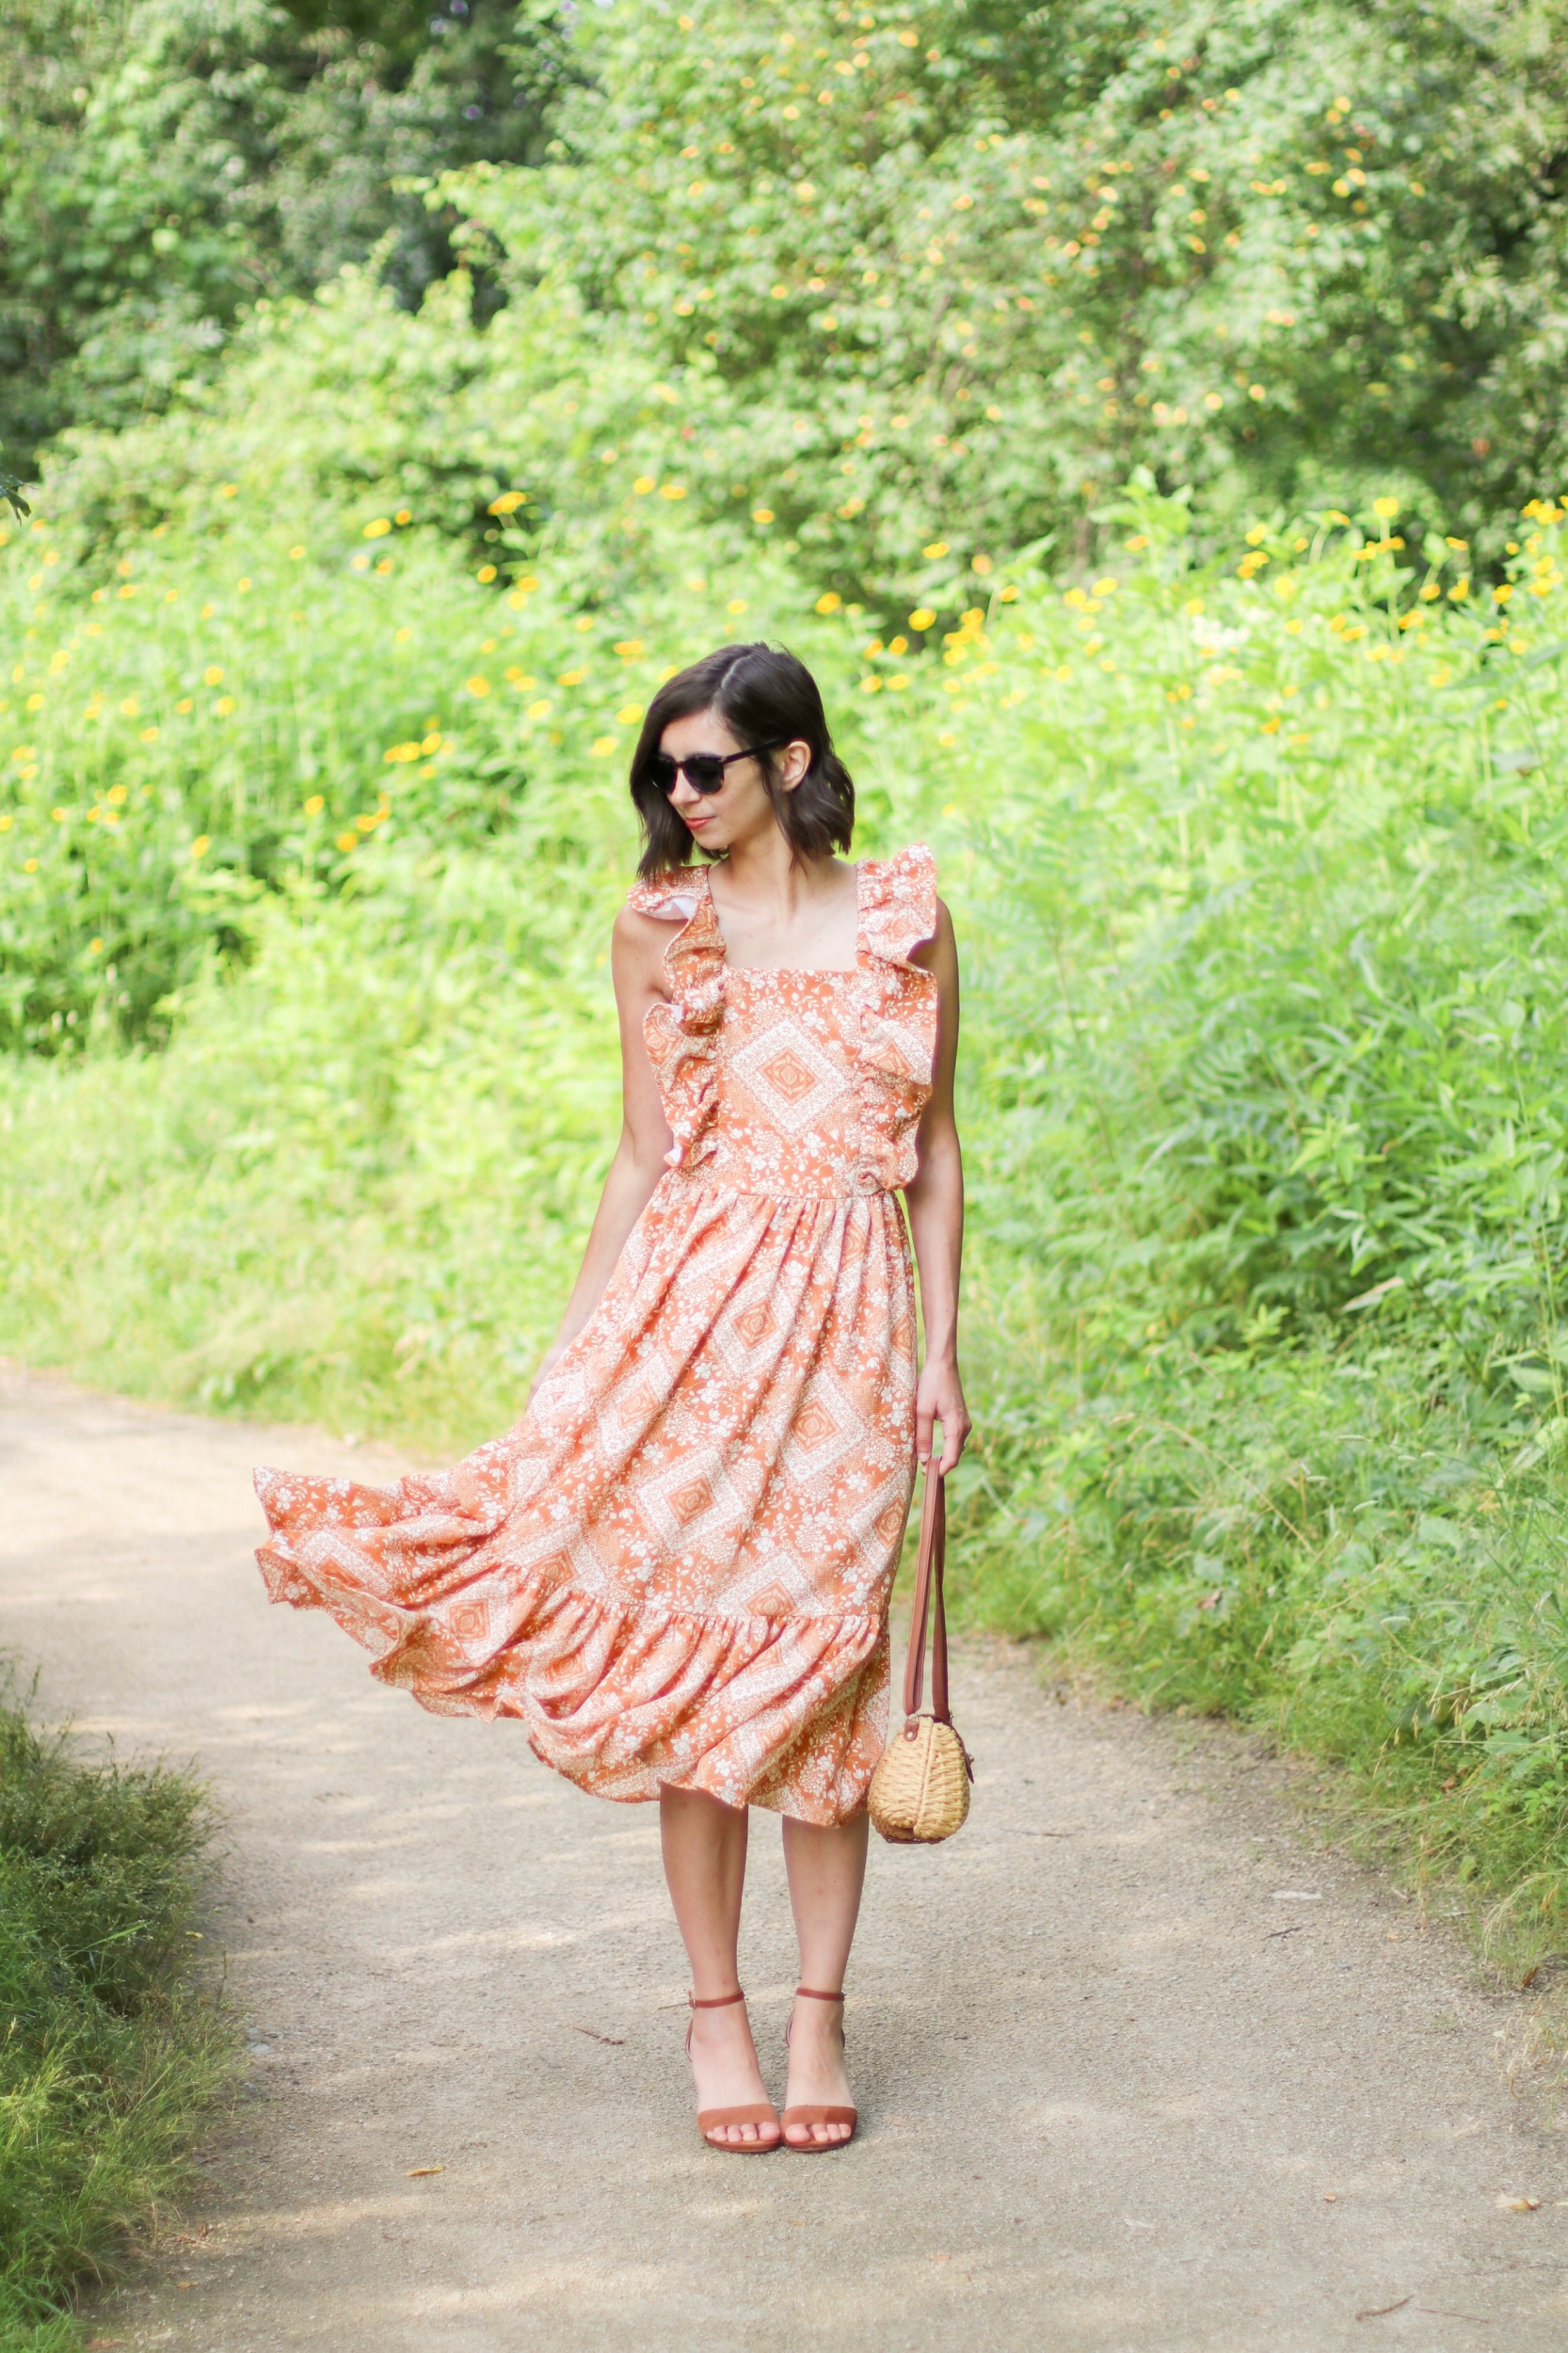
Megan Nielsen Mommy & Me sewing pattern bundles

Have a sewist in your life that also has a little one? Megan is offering mommy & me bundles on some of her sewing patterns that have matching mini versions, at a discounted price! Theres the Cottesloe swimsuits like I have above, the Tania culottes, Eucalypt tank/dress, and Virginia leggings.

Kylie and the Machine sewing labels

Sooooooo I really just want a stocking full of these sewing labels! Check out her website for all the different ones she offers (there are so many good ones!), and you can also find them offered at some of your favorite fabric stores - just search for Kylie and the Machine labels. The perfect stocking stuffer!

‘Maker’ necklace

I love this simple necklace! And not just for sewists - it could be the perfect gift for any kid of maker in your life. Comes in silver, too!
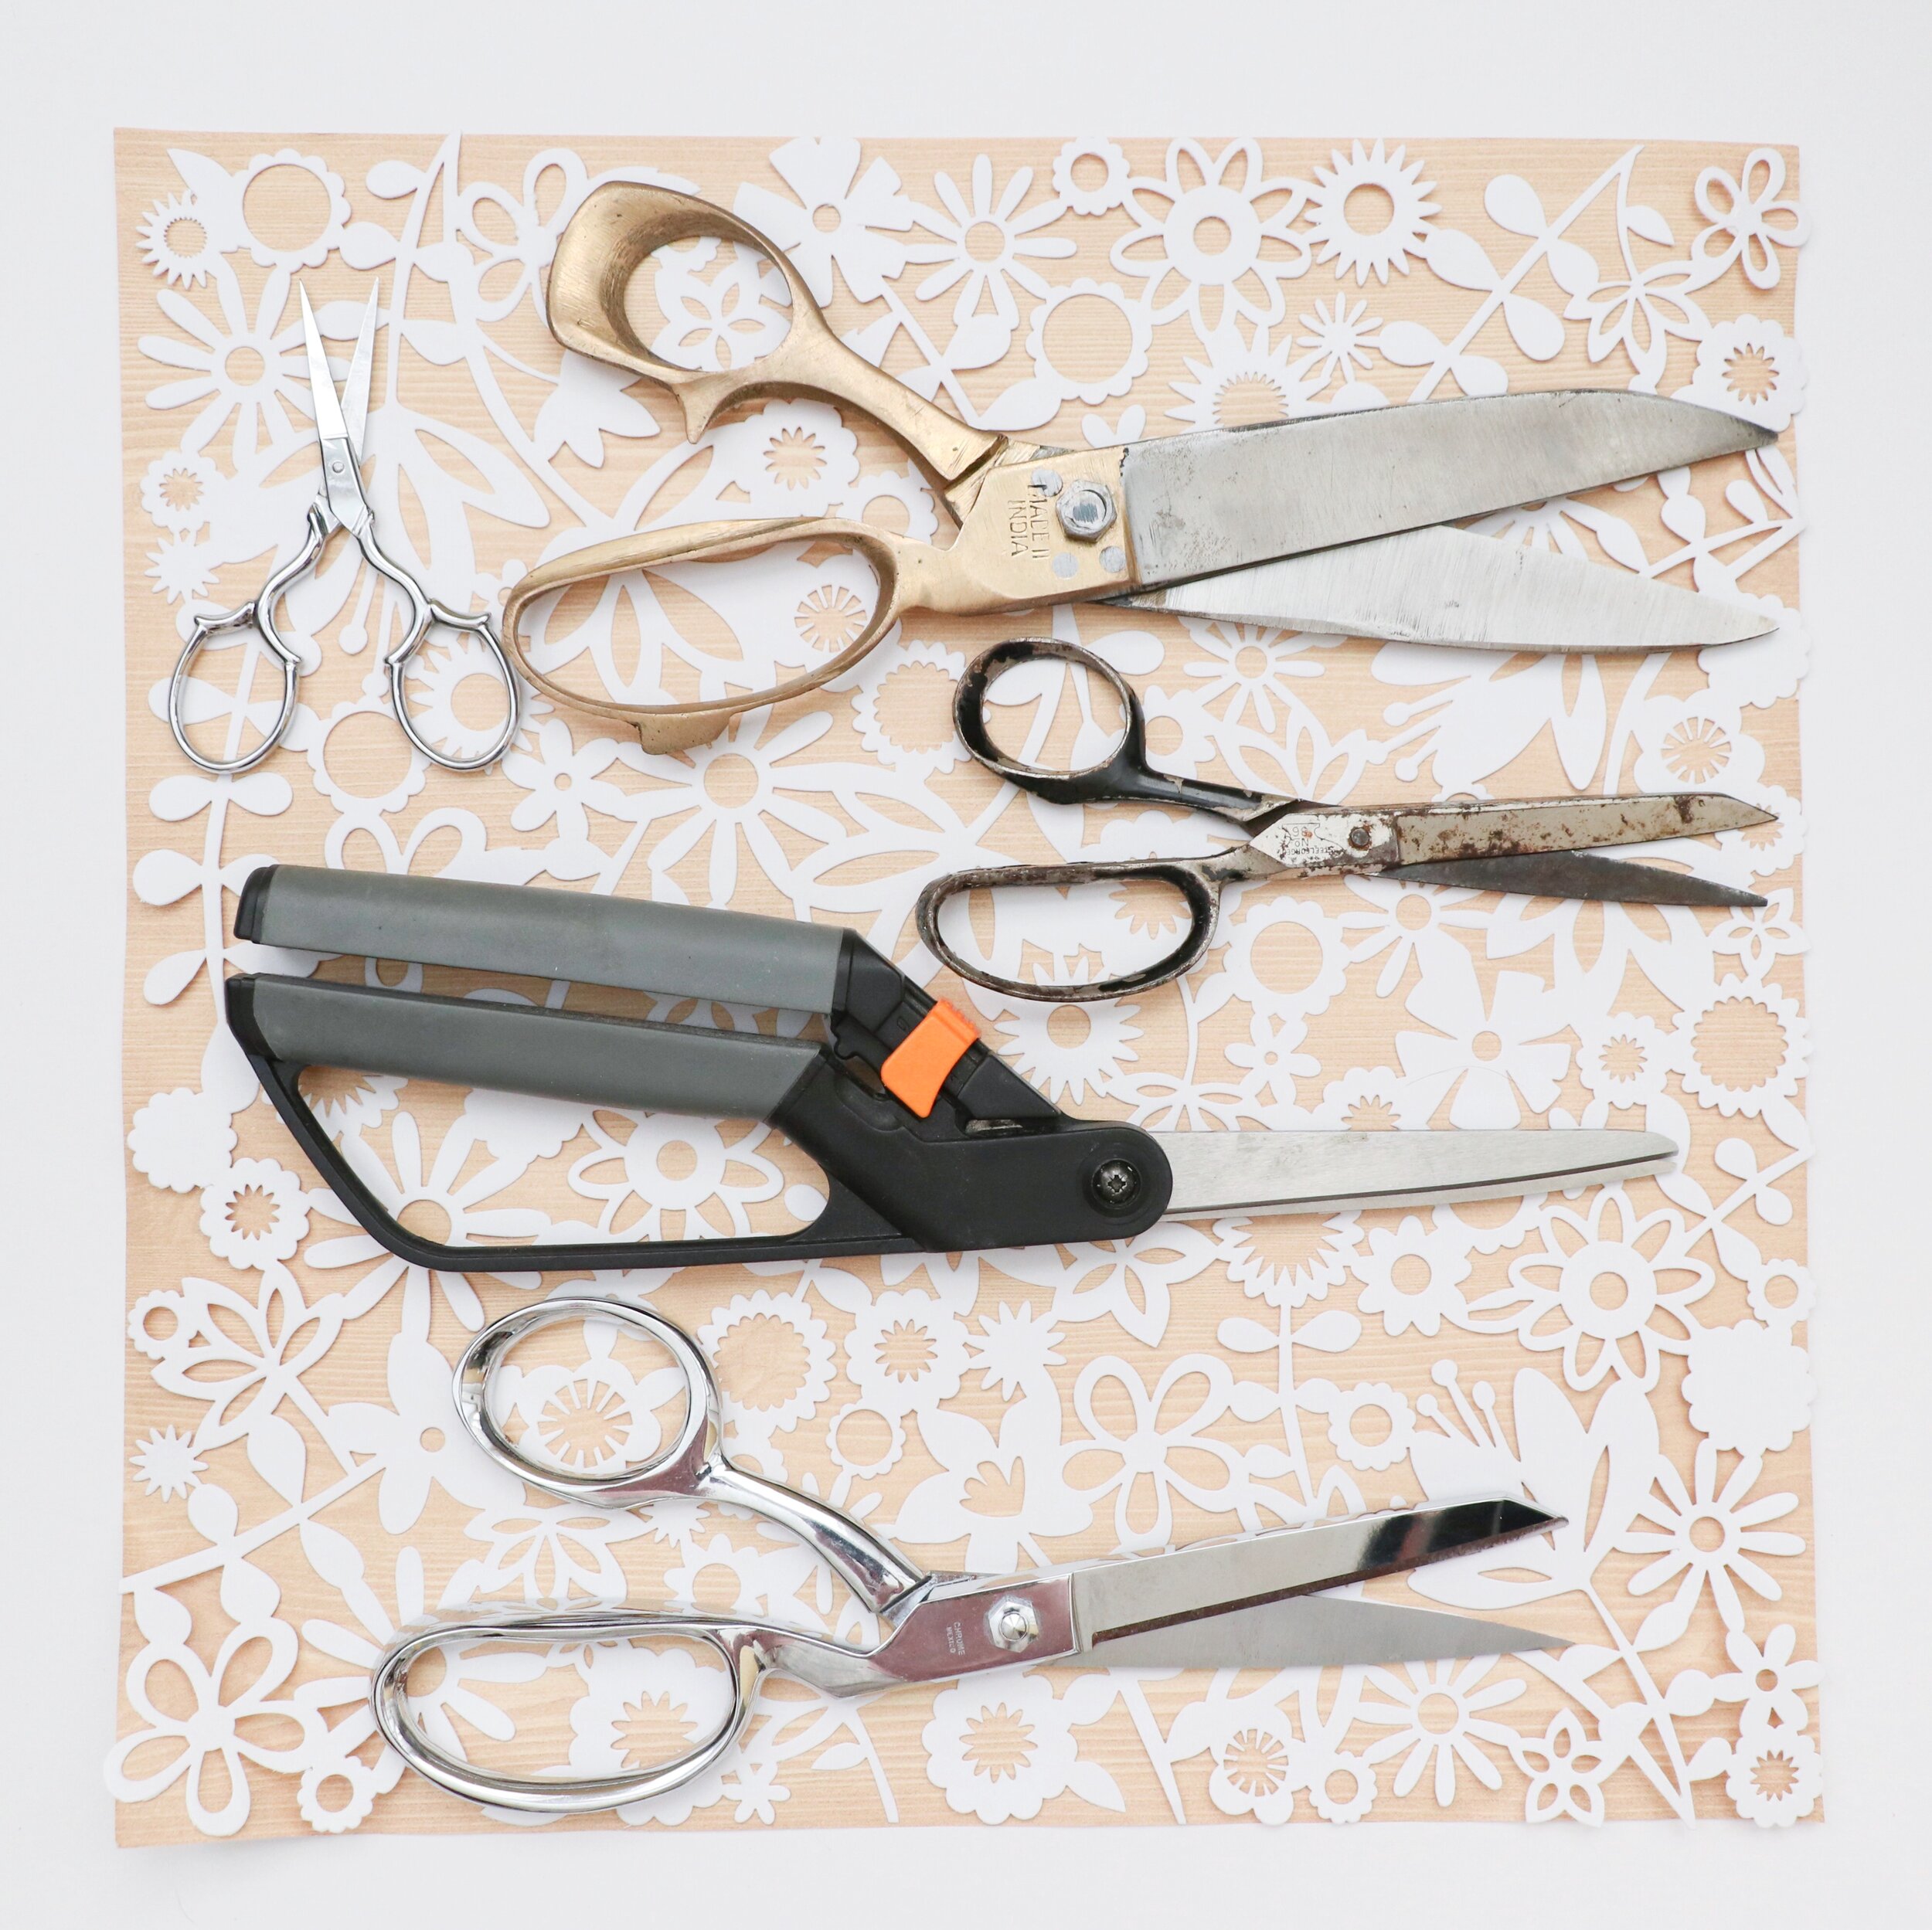
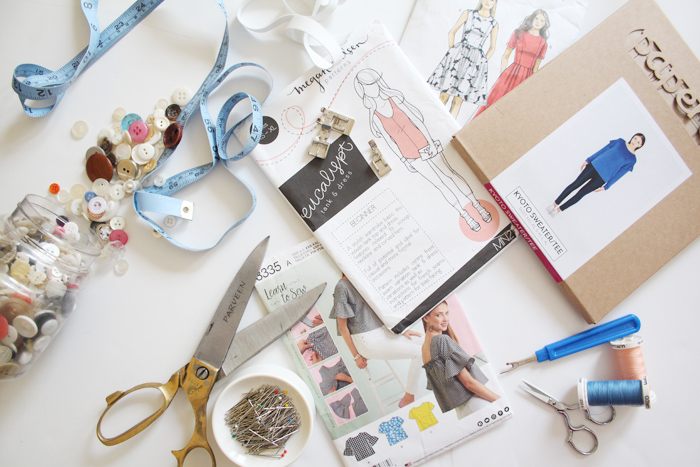
Scissors!!!!!

I don’t know a sewist or maker that doesn’t love collecting scissors. Both useful scissors, and pretty decorative scissors. This photo above is just a small selection of my own. But here are a few of my favorites, and some that I am coveting:

Handmade wardrobe // lena horne

Dress: Tabitha Sewer Lena Horne dress

Penny’s dress: McCall’s 7739

fabric: bubble crepe from Cali Fabrics (interfaced and lined for body and stability)

—————————————————————————————

GUYS, I’m SO excited about how this dress turned out! When Tabitha Sewer first released her Lena Horne pattern, I immediately pictured it in this mustard-y medallion fabric I’ve been hoarding in my stash. Problem was, this fabric is a crepe. A lightweight and drapey crepe. Something suited more for a flowy dress or blouse, and I really wanted the ruffles on my Lean Horne to have body and weight. But I was determined, so I interfaced the ruffles to give them stability so they stood up more and didn’t drape, and I lined the bodice in a cotton for more added stability. and as a quick add-on, I attached a ruffled flounce along the bottom hem. It just made sense to me with the whole vibe of the fabric/dress combo. Kind of like a 70’s boho vibe, I think. Yes?

I did have a few set backs with this make. I had to completely remove the bust darts, but thats my issue, not the pattern’s (no boobs problem. Like literally, no boobs. I can get away with no bust darts at all). I also struggled with the fact that the interfaced underside of the ruffle was visible. I really wanted to double layer/line the ruffles, but didn’t have enough fabric since I was determined to make a dress for Penny too. And speaking of Penny’s, I also kind of struggled with hers, too. The pattern seemed like a perfect match. But because I was working with limited leftover fabric and I was in a rush to finish it, it didn’t turn out quite as much of a match as I was picturing. The dress itself was huge, even though I cut out her size. I ended up having to add a little pleat in the front to help keep it on her shoulders. And the shape of the ruffle is much wider and drapy-er than the Lena Horne ruffle. If I would’ve been paying more attention and slowed down when making it, I would’ve modified her ruffle to be less wide, longer and more gathered. So that it looked similar to mine. But c’est la vie. It’s still a really cute dress once I get past the fact that its not a perfect match for mine. She looked freakin adorable twirling around in it. And since its so big, she’ll be able to wear it for years, ha.

But seriously - my dress? OBSESSED. I need some place to wear this baby more often.

Review // Madam Sew ultimate presser foot kit

Recently, Madam Sew sent me one of their Ultimate Presser foot sets to try out. I was pretty excited because I only have and use two feet - my regular foot and my zipper foot. So this was pretty cool for me!

The presser foot set comes with 32 presser feet, a snap on adapter, an instruction manual, and a DVD with instructional videos. there is also an app you can download to see all the video tutorials and instructions, as well.  Both the written instructions and video tutorials were very helpful, especially with some of the feet/techniques I’ve never used before!

Most of the feet are snap-on, but work with both snap-on and screw-on sewing machines, because it comes with the bonus snap-on adapter for screw-on machines! *One thing to note, though - if you work on a Bernina, you will need an additional adapter (sold separately) because Bernina uses their own presser foot system. But its worth it, and totally simple, because once its on, you can use both screw-on feet and then also uses the snap-on adaper, too!

There are some feet that I’m personally excited to play around with. Including an adjustable bias binding foot, rolled hem/narrow hem foot, invisible zipper foot (no longer need to use my regular zipper foot!), piping foot, and a lot more! I’ve also been using the zig zag foot a lot recently. It has a big, clear open area in the center so you can see where you are stitching better! And if you work with sticky fabrics like leather, suede, plastic, etc - there are also a few different feet (roller foot and non-stick foot) to make sewing those fabrics easier.

In today’s post, I’m going to show a small sampling of 4 of the presser feet I played around with. And you can also head to my Instagram (@hollydollydarling), where I’m sharing videos of all of these samples in my stories! The story videos will be up for 24 hours, but I will save them in my highlights in my profile afterwards.

GATHERING FOOT

This foot is fun! I create gathers a lot for peplums, dresses, ruffles, etc. So this is the first one i jumped to try. Using this foot, it automatically creates gathers as you sew, no need to pull on threads and finger-gather. They are fixed-gathers though, so you can not adjust them after the fact. So you should play around on scraps before a project to find the settings for your perfect gather. By adjusting the stitch length and tension on your machine, you can create loose/farther spaced gathers, really full gather,s or anything in between. The dvd included with the presser foot kit (or the instructions in the app) is very helpful in explaining how to get the gathers you need.

The foot also has a little slot on it which allows you to gather one fabric AND attach it to another fabric at the same time!

see below for my results.

EDGE JOINING/STITCH IN THE DITCH FOOT

The main purpose of this foot is for joining the edges of two pieces of fabric together. I didn’t test that out. I was more excited about using this for stitching in the ditch - something I do a lot! The foot has a thin guide bar right in the center, which is lined up perfectly with the needle. As you sew, the bar glides right along in the ditch/seam, with the needle following behind - keeping your stitch-in-the-ditch stitching perfectly straight with barely any effort.

See below for my results.

STITCH GUIDE FOOT

This is a pretty simple foot, but a very useful one that I know I’ll find myself using quite often. Especially on jeans and pants that have a lot of topstitching! Topstitching is my nemesis. I’m not the most patient person, and my topstitching often ends up uneven and wavy. This foot has a small perpendicular bar that extends out, with markings ever 2mm. You can use these guides to sew parallel topstitching lines and keep them even and straight. And because there are so many lines, you can do it at any width you need, up to an inch.

Look how straight my 4 lines of topstitching lines are below.

OVERCAST FOOT

This foot requires a machine that has an overcast stitch setting (there are different kinds of overcast stitching, so your machine may have a few options). An overcast stitchh is done along the edge of fabric, to finish the raw edge , in a manner that looks similar to a serger/overlock finish. And this foot helps aid your machine when using that stitch! It has a guide bar to help keep the edge of your fabric lined up, as well as a center piece that helps create overlock stitching without rolling.

I’ve actually never used this stitch before, since I have a serger. But I thought it would e fun to show for those of you that don’t!

That’s all I am showing you for now! Don’t forget to check out videos of these samples in action on my Instagram stories and highlights (@hollydollydalring), and check out the full kit at Madam Sew here.

Penny's handmade wardrobe // yo mama made this

I recently set aside some time to do some sewing just for Penny. I mean, I did use fabrics that were left over from my projects (that turban fabric is from my Rowan bodysuit from my last post), so she’ll still match me, but the time and the projects were just for her.

The top and jumper are actually from the same pattern - Simplicity 8706. Which is technically a baby size pattern, the largest being about size 18-24. Penny is between a 2T and 3T. So I just cut all pieces roughly a little larger than the largest size, and it worked perfectly! I’ll even be able to extend those straps a little longer for more length as she grows into it, giving it a longer life.

Turban is my own pattern that I use for Nelly Lou, and boots are from Target.

Handmade Wardrobe // A Beginners Resource

I've been getting a few requests lately to share my favorite patterns and sewing advice for someone who wants to start building a handmade wardrobe, but is a newbie to sewing. So I wanted to build this post as sort of a resource for beginners. I'm going to list my favorite places to find sewing tutorials and information, my favorite online fabric stores, my favorite places to find patterns, and some of my own personal favorite patterns - all suited for someone just starting out. 

These are just some of my personal favorites, so if you have anything you'd like to share, drop a comment below!

Fabric

Getting familiar with fabric is really important before you get into sewing. The right fabric can make a garment, or break it if its the wrong weight and drape. Some of the biggest sewing fails comes from pairing the wrong fabric with a pattern, not necessarily from poor technique or sewing quality. So you should become familiar with the difference between knits and woven (remember, knits are stretchy like t-shirts, woven for the most part are not), as well as some of the different types of each. For example, a lightweight jersey knit is going to drape and sit completely different than a heavier weight ponte knit. So pay attention to what a pattern suggests for fabric.

 If you're able to go to a fabric store in person and touch and feel the different kinds of fabrics, its a quick way to learn. Otherwise, some online fabric shops offer swatches for a few dollars each so you can feel for yourself before committing to a lot of yardage. 

Speaking of online fabric shopping, these are some of my favorites! I know there more out there, so if you have another go-to, don't forget to tell me in a comment below!:

Another note on fabric - when building a handmade wardrobe, you'll want to keep in mind your personal style. You want your handmade pieces to fit flawlessly into your closet/wardrobe. It can be easy, when fabric shopping, to get sucked into really fun and flashy prints or other fabrics. But stop and think if it really fits in with the rest of your wardrobe. Maybe that is your style - colorful and lots of prints! Hey, thats cool! But does your wardrobe contain mostly muted solid colors? Or just subtle florals? Is that bright yellow cat print really going to work with your other garments, or do you only attracted to the fabric because its cute and stands out? Just keep it in mind! I still struggle with this every time I buy fabric. I'm drawn to those quirky fabrics, even though its not actually my personal style anymore. 

Patterns

Same as with fabric, there are soooo many great pattern companies out there, both big name and indie. You seriously could spend forever looking for the perfect patterns (I know because I still do all the time). Here are some brands I love:

So, when ordering most indie patterns online, they will offer you a choice in receiving a paper pattern in the mail, or an instant download PDF pattern (usually for a cheaper price). With PDF patterns, you can either print it yourself on a home machine - printing out on multiple 8x10 pieces of printer paper and then taping them together (I did a how-to post for Megan Nielsen here), OR you can get it all printed at once as a large format A0 or 36x48 print - either at a copy shop like Staples, or through a PDF printing website. I use the site PDF plotting and it's so much easier than taping a million papers together! You just choose how many pages are in your PDF file, how many copies you want, and then upload the file. Its delivered to you in a few days, and then you only have to worry about cutting or tracing just like with any other pattern. 

My Favorites - Very Easy

When looking for beginner patterns, most indie designers will have a difficulty ranking system. Look for something like 1/5, beginner, easy, super easy, etc. Even the big 4 will have text on the front of some of their patterns that say Super Easy! or Learn to Sew! 

This first set is some that I consider super easy. Very beginner. In other words - start here! lol. These are patterns that don't have any frou frou details, no difficult closures, and no need to perfect fit. They're all either loose fitting or stretchy - no darts required. 

My favorite absolute beginner go-to patterns are easy, no-fuss knit pieces. And Megan's Axel skirt fits the bill. Its quick, simple, but stylish. And when you use heavier stable knits like I did in all threes examples above, you don't even need to hem. So super simple!

Another simple design to start out with is a t-shirt dress. Again, its a simple construction. I've kinda perfected my own pattern over time, but this one is pretty close. 

-Don't want to invest in actual patterns yet? Try a DIY! I made this off the shoulder tutorial a few years ago, and its been a hit! No pattern required. 

-The kimono in the second photo is also a no-pattern DIY. Literally just a few rectangles sewn together. I made it using these two tutorials  - one and two

-Another easy Megan Nielsen pattern - the Eucalypt tank/dress. A basic closet staple that you can do so much with - like add patch pockets and a faux collar like above!. I've made quite a few of these. 

- A recent favorite Papercut Patterns Kyoto tee/sweater. Its very on trend right now with the ruffle on the sleeve, but there is no crazy construction required. A gathered ruffle is very basic sewing!

- I also love this Simplicity pattern 8335. Again, trendy with those details, but they're easy details, I promise. 

A few more:

-I made this BurdaStyle 6663 right after I had Penny, I just can't find the photos. No fancy closures or facings, so suuuuper easy. And really cute with the ties at the shoulder. 

- Megan Nielsen Virginia leggings. Basic leggings with elastic waist and a few variations!

- One of the easiest beginner things to make is a basic skirt. Like the knit pull on skirts I talked about earlier, a drawstring (or elastic waist) skirt is so so easy and therefore usually someones first garment (it was mine!) This BurdaStyle 6416 is super cute. 

My Favorites - Level 2 Easy

These next ones I would still classify as easy, but one step up. They include detail such as zippers, plackets, buttons, etc. So they probably wouldn't be your very first sewing project. Bt once you have a couple of super easy ones under your belt, these would be your next step. 

I have made soooooooo many Darling Ranges dresses. So many. And I have another one in my queue. I love it that much. The placket/buttons and pockets in this pattern may be a bit intimidating, and move it up into this next category, but it is so satisfying and rewarding to make. And p.s - I helped create the sewalong for this pattern if you need help with construction!

This one is Vogue 9075. Its a simple staple design, but involves pleats and a zipper, and princess seams, so definitely next level easy. But honestly one of my favorites. There is a dress version and jumpsuit version, and can be made in wovens or knits. 

A few more:

-The True Bias Ogden came and Lodo dress are such classic shapes and closet staples. The only reason I include them in this category instead of the super easy one, is because they have facings/linings. Still not hard at all, though!

-This BurdaStyle 6401 dress is pretty cute. It's loose fitting - so you don't have to worry about darts are seams and getting the right fit, it just has a zipper back closure.

Another option for patterns - vintage! I found both of the above on Etsy. Just pay attention to the measurements on the back pf the patterns, because vintage sizing can be a lot different than modern sizing. 

Sewing Tips and Tutorials

I know sometimes, as a beginner, even an easy pattern can breeze over something that leaves you confused. If you are brand new to sewing, and you need help understanding some techniques and termonology, there are so many resources online to help!

- Search Youtube for video tutorials! 

- Craftsy offers tutorials and online sewing workshops. Check out their blog under the sewing fundamentals or sewing techniques categories for a whole bunch of tips. Or sign up for one of their online classes. 

- Most of the indie pattern companies have blogs where they include specific sewalongs for each of their patterns, as well as tips and tutorial posts. Tilly and Buttons has a great 'learn to sew' section that I love, with posts ranging from marking and cutting fabric, to how to set up your machine, to how to make buttonholes.

- I also love See Kate Sew's post about fabric grain

- Megan Nielsen has a bunch of these types of posts on Design Diary, a lot of which I've written! Some that I think are useful for beginners:


Again, everything here is just some of my personal favorites, and just ones I would consider easy, beginner, or next level beginner. I could do a whole other post on intermediate and advanced patterns and information!

I'm also thinking about doing a separate post talking about sewing for babies/toddler/kids, and how to find free patterns for them. Any interest?