
It finally snowed and I did my nails
.
I was featured on the front page of Chictopia and I played Mancala with Boo
.
I’ve been sick the last few days, and there has been lots of soup and movies in bed involved!

Blog
It finally snowed and I did my nails
.
I was featured on the front page of Chictopia and I played Mancala with Boo
.
I’ve been sick the last few days, and there has been lots of soup and movies in bed involved!

worn on January 19th, 2011
HollyDolly is now accepting sponsors for the month of February! Email me at HLKeenan22 (at) gmail (dot) com for more info.
…………………………………
Don’t forget, if you sign up now, you can use the code bos990 at checkout to receive 50% off your first month of Jewelmint, courtesy of the Boston MBA Team.
…………………………………
Do you follow me on facebook?
How about twitter?
And bloglovin’ ?


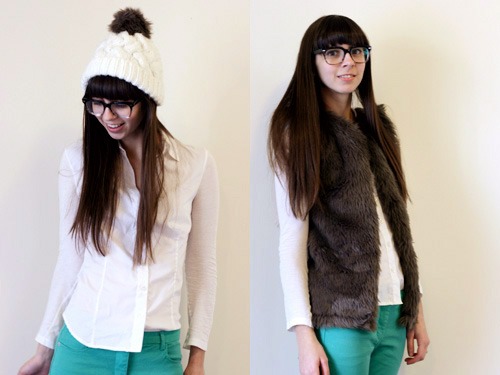
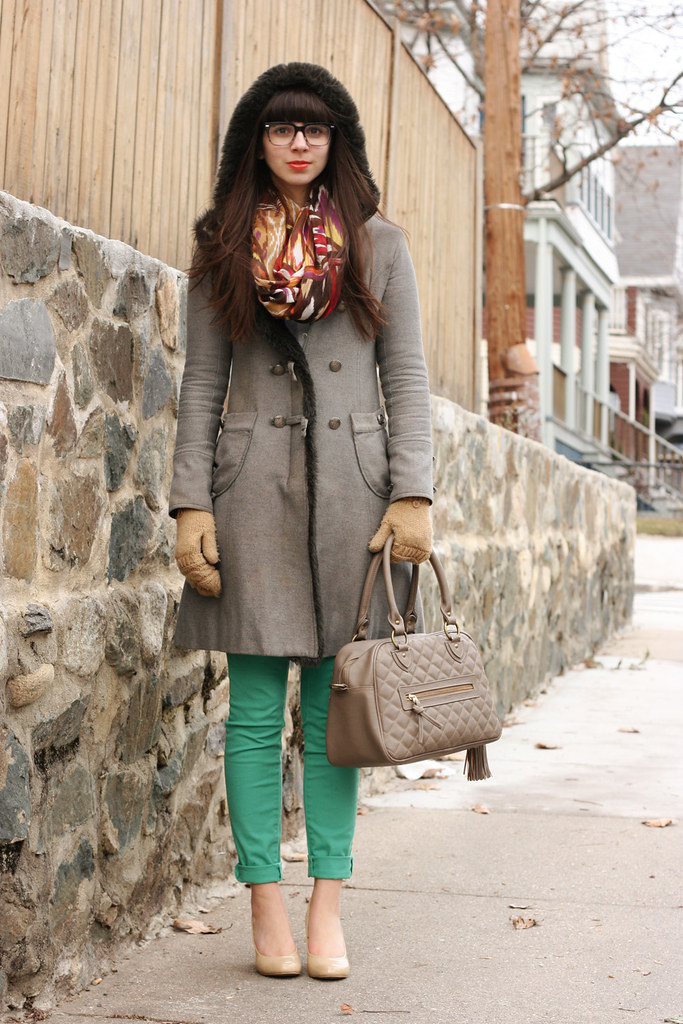
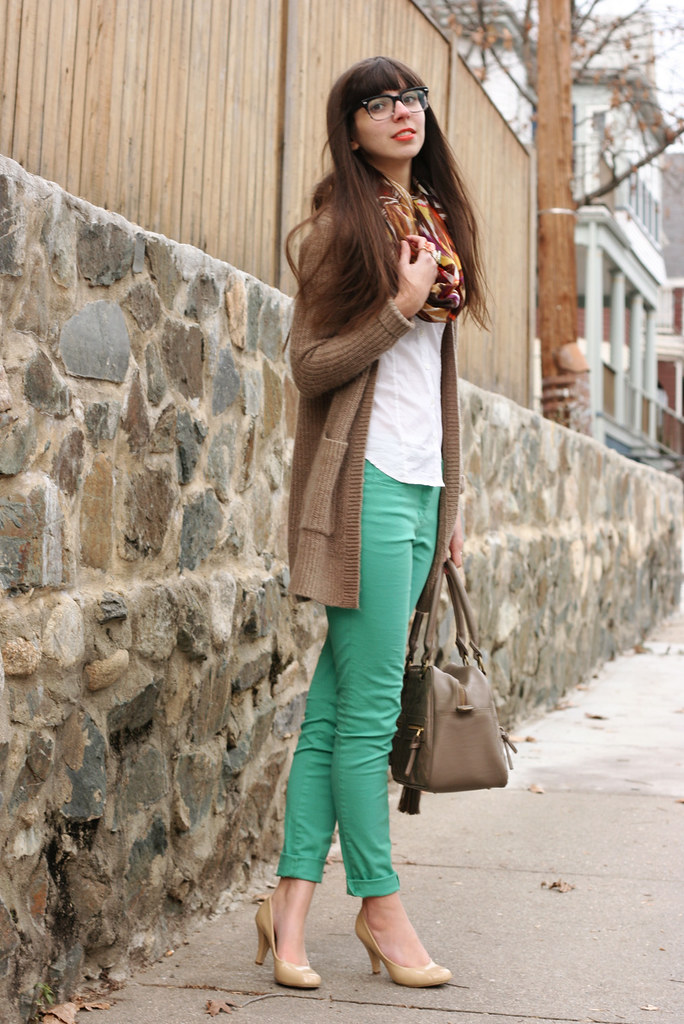
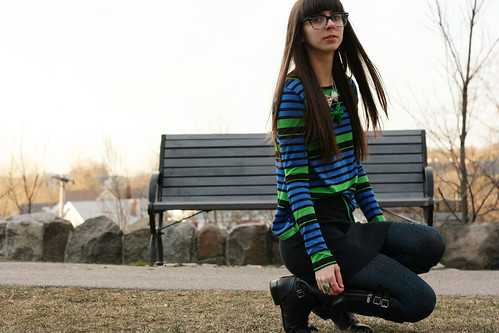
cape: American Apparel; gift
skirt: swapped and DIYed
hat: Urban Outfitters; DIYed
tights: ?
booties: Boutique 9

worn on January 16th, 2011
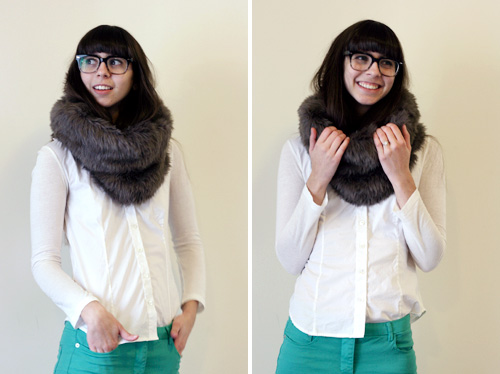
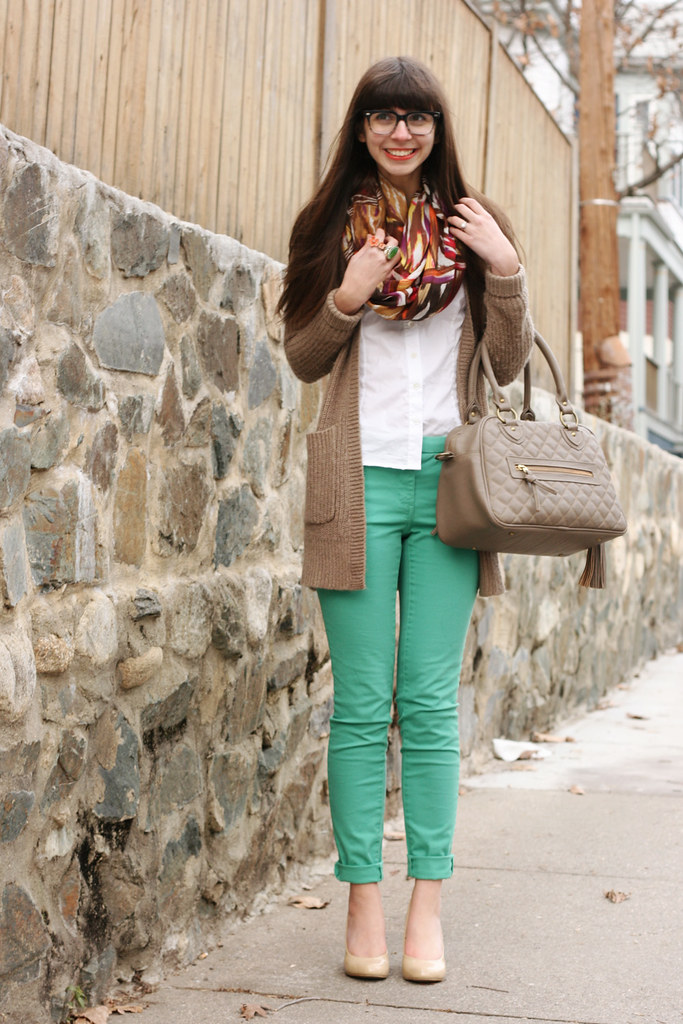
I told you that you would be seeing more of the faux fur items from yesterdays post :) I’m kind of obsessed with the vest, and I have the urge to wear it with everything. No really… everything. Would you mind? Well you may not have much of a choice, because I can pretty much guarantee you right now that you will be seeing a lot more of it.
Now I know why so many of you fashionable ladies are so into this fur trend.


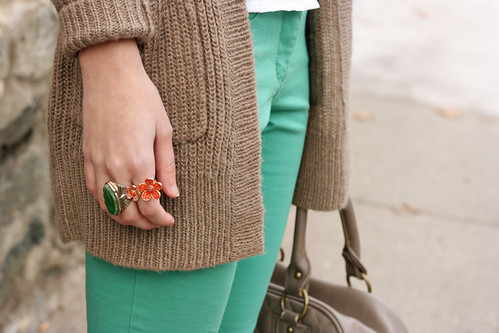
vest: handmade
tee: Urban Outfitters
skirt: Vintage
necklace: Express
belt: Coach
tights: H&M
boots: STEVEN Steve Madden
I’m on a roll with my one project a week goal. So much so that I did three this week instead of one! I was inspired by one of my favorite DIY and lifestyle blogs - Cotton and Curls , who just recently did a faux fur week with 6 different projects!
My first two projects were taken straight from Liz. If you are interested in the instructions, make sure to check out her pom pom and boxy vest tutorials. As well as the rest of her faux fur projects.
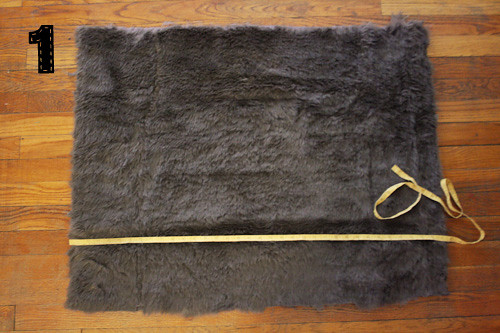
And then I went off on my own for my third item - a faux fur snood!
Heres what you would need:
-faux fur
-measuring tape
-sewing machine
-needle and thread
1. Cut out a piece of fur aprox. 36 x 28”
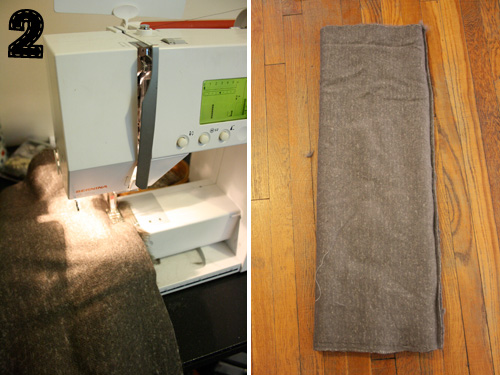
2. With right sides together (fur sides together), fold the fur in half the long way, creating a tube. Sew along the edge.
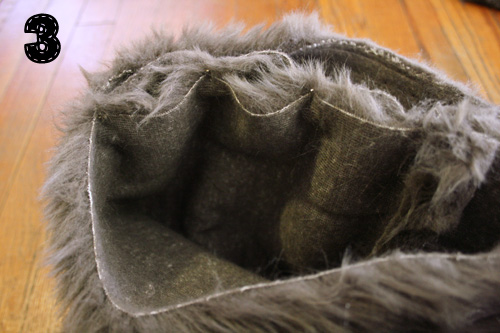
3. Next, turn the tube right side out again, so the fur is on the outside. Being the ends on the tube together, and pin and sew as far around as you can. For me it was a little more than half way.
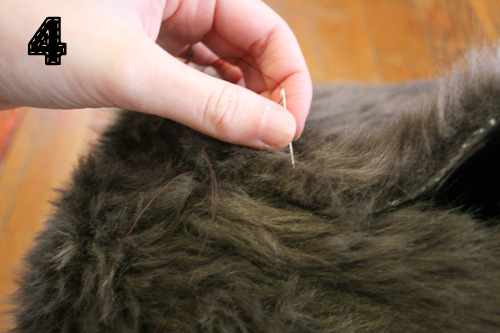
4. finish closing the ends by hand stitching. Don’t worry if your hand sewing isn’t the greatest - the best part about working with the faux fur is that it hides all of the stitching!

And voila, a new cozy snood :)
………………………………………….
Don’t worry, you will see a lot more of these three items in upcoming outfit posts!
worn on January 14th, 2011
Brrrrrr, it was really cold this weekend!
I wore this out on saturday for a little wedding filled morning with my friend Ashlee. We went wedding dress shopping for her (and found the one! Yay Ash!) and then grabbed some lunch where it was non stop wedding talk. I’m getting married in July, and she is getting married in September, so we have double the wedding fun!
sweater, pants, and scarf: H&M
shirt: BCBG
heels: Forever21
bag: THEIT bossi bag
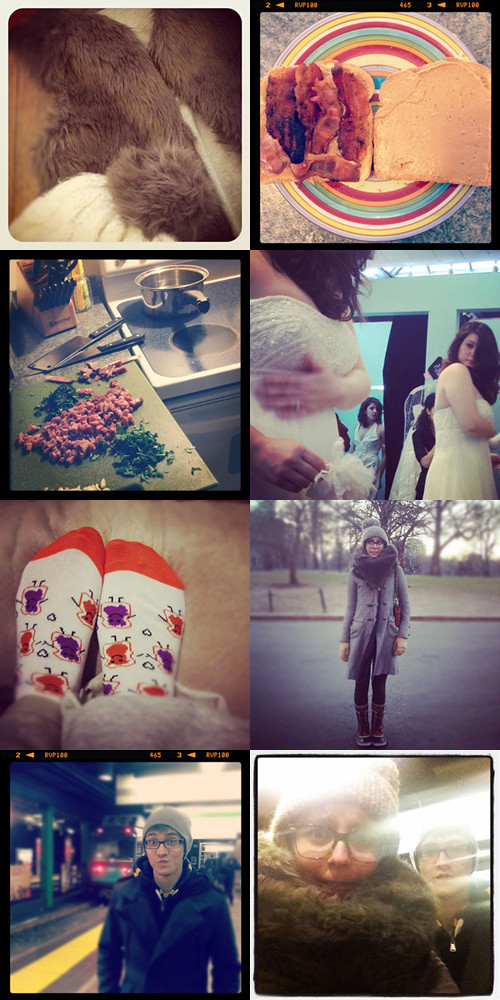
DIY projects coming later this week … Peanut butter and bacon sammie
.
Boo made me dinner! … Helping my Ashleebear shop for her wedding dress
.
Fun new socks from Ash … Bundling up in the cold
.
Out and about with Boo on a freezing cold day!

worn on January 11th, 2011
After almost 6 months, I finally got around to getting my hair trimmed. Yay! It needed it. Badly. When your hair gets this long (and longer), taking off and inch and a half doesn’t really look like it makes much of a difference. But it makes a wooooorld of a difference to me. And my bangs. It feels so good to not have them getting in the way of my glasses. Woohoo happy dance!

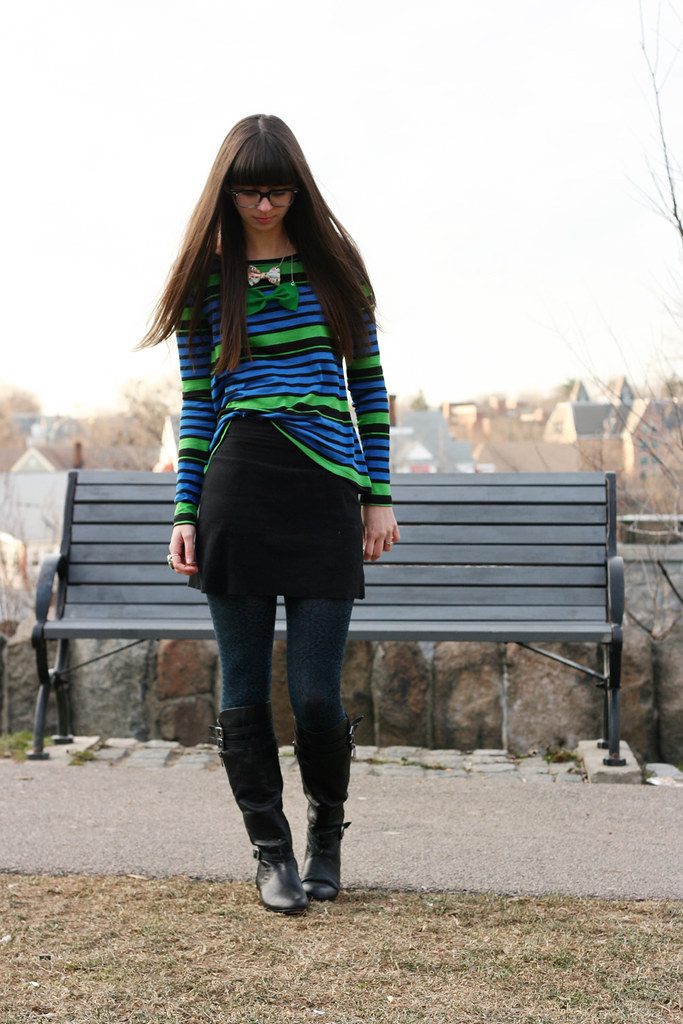
tee: Stylemint
bow necklaces: Hollydolly
skirt: American Apparel
tights: ?
boots: Dolce Vita

worn on January 8th, 2011
Do you like my necklace? It is my first Jewelmint piece!
If you haven’t heard of Jewelmint yet, it is an exclusive jewelry line created by Kate Bosworth and Cher Coulter. When you join, you take a personal style quiz which helps them create your own personal showroom with pieces that best match your style. Every month new pieces will be added to your showroom, and every piece is only $29.99 with free shipping. Pretty sweet, right?
But if you sign up now, you can use the code bos990 at checkout to receive 50% off your first month of Jewelmint, courtesy of the Boston MBA Team.


tee: Gap
cardigan: Victoria’s Secret
hat: stolen from Boo
necklace: Jewelmint, use code bos990 for 50% off your first month, c/o the Boston MBA Team
jeans: BCBGeneration
tights: Urban Outfitters
heels: Forever21
One of my goals for the blog this year is to do a lot more DIYs than I was doing before. My hope is that if I tell myself that every wednesday must be either a DIY or wedding post, it will keep me busy, motivated, and constantly working on new projects. Heres to hoping :)
So I’m starting out slowly with a little t-shirt reconstruction. I picked this up at the last swap I attended. Its a mens XL, and way to big for wither me or Boo. But I’m a sucker for ombre, and its the softest cotton ever, so as soon as I touched it there was no way I was putting it down.
And now I finally got around to sizing it into a shirt I can actually wear :) Heres an easy way to turn an oversized tee into something more fitted.

You’ll Need:
-an oversized tee
-a tee that fits you well
-something for marking (tailors chalk, colored pencil, etc)
-sewing supplies
-rhinestones or other embellishments

1. Carefully cut off the sleeves and set aside.
2. Lay your “good” tee on top, making sure to line up the neck and shoulders. trace the outline of the top shirt with your marking tool. Don’t forget to reshape your armholes too!

3. Make sure you add a little seam allowance to your new lines, and then go ahead and cut.
4. Sew up your new side seams. And then sew your sleeves back in. You may either need to make a slight adjustment to the size of the sleeve or ruche it to give it a little puff effect. (sorry, I forgot to document this separately).

5. And now the fun part! Use your rhinestones and fabric glue (or whatever other embellishments) to bling out whatever area you want. The pocket, collar, sleeves… whatever! I really wanted to do the entire pocket, but I didn’t have nearly enough rhinestones.

And now I have a cute and soft new tee shirt! Now that I’m looking at the photos, the only other thing I might go back and do is shorten the sleeves a little. But I like how it came out, otherwise.


**Keep a lookout from now on every wednesday for either a new project or wedding related post. I’m pretty excited for this!**

I’m over at Virginie’s Cinema today with another hockey fan inspired outfit. Come on over and visit to see more!
